Did you know that the global demand for renewable energy is expected to increase by 50% in the next decade? If you’re interested in harnessing the power of magnetism to generate electricity, this guide is for you, a step-by-step to building your own magnetic field generator. From gathering the necessary tools and materials to fine-tuning the generator, this comprehensive guide will walk you through each stage of the process. But that’s not all – it also offers insights into enhancing power output and achieving energy independence. So, if you’re ready to explore the fascinating world of magnetic field generation, let’s get started on this electrifying journey together.
Ready to Build Your Own Off-Grid Power System?
The number one reason DIY magnetic generators fail isn’t the physics—it is a lack of precision tools. Don’t drill a single hole or twist a single wire until your workspace is set up like a professional energy lab. Grab our free 17-page blueprint covering the exact tools, safety gear, and air-gap instruments you need to succeed on your first try.
Key Takeaways
- Gather essential materials and tools for building a magnetic field generator safely.
- Construct a sturdy base structure and ensure its stability before proceeding.
- Create and test the circuit wiring with different loads to observe induced current.
- Install magnets in a proper orientation and spacing for optimal magnetic field generation and balance.
Gather Necessary Tools and Materials
To begin building your own magnetic field generator, gather the necessary tools and materials for the construction process. You’ll need materials such as coated copper wire, high current wires, batteries, battery charger controller, and magnets. These components are crucial for generating a magnetic field.
Additionally, make sure you have the appropriate tools on hand, including scissors, a ruler, tape, a screwdriver, and a sturdy table to work on. Safety precautions should be taken when handling neodymium magnets due to their strong magnetic properties.
Proper organization of supplies such as paper sheets, cups, string, coins, and a lab notebook will ensure an efficient project setup. Optional equipment like a camera for documentation and a wire spool dispenser for neat and organized coil winding can also be considered.
Build the Base Structure
If you have gathered all the necessary tools and materials, it’s time to construct the base structure for your magnetic field generator. The base structure serves as the foundation for building the generator and ensures stability for the components.
Follow these steps to build the base structure:
- Cut a piece of cardboard to the specific dimensions required for the base.
- Mark and fold the cardboard to create a sturdy frame.
- Slide a metal shaft through the support frame to provide stability.
- Make sure the frame is strong enough to support the weight of the generator components.
- Ensure the base structure is level and secure before proceeding to the next step.
Wire the Circuit
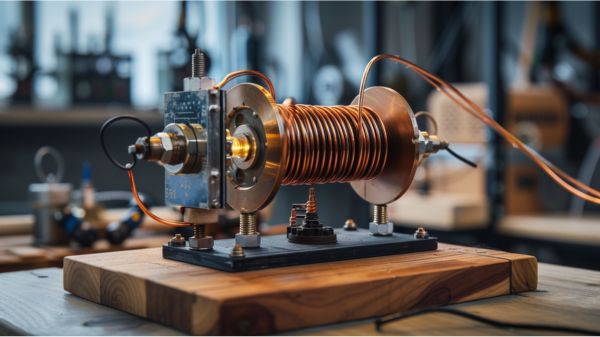
To wire the circuit for your magnetic field generator, wind approximately 200 feet of enamel coated copper wire tightly around a cardboard box. This wire will serve as the primary component for creating the magnetic field.
Strip the insulation from the wire ends to prepare for connections to the load. Once the wire ends are exposed, you can connect them to a light bulb or meter to observe the induced current. This will allow you to understand the power output of the circuit.
Experiment with different loads to gain a comprehensive understanding of the circuit’s capabilities. It’s crucial to ensure that the circuit is properly connected for the magnetic field generator to function effectively.
Install and Position the Magnets
Position the magnets on the shaft, ensuring they’re evenly spaced and securely attached. Proper alignment and attachment are crucial for generating a strong magnetic field.
Here are the steps to install and position the magnets:
- Align the magnets so that their poles alternate (north-south-north-south) to optimize magnetic field generation.
- Make sure the magnets are firmly fixed to prevent any wobbling or displacement during rotation.
- Use a strong adhesive that can withstand the spinning forces to securely attach the magnets to the shaft.
- Confirm that the magnets are oriented correctly to interact effectively with the coil for electricity generation.
- Double-check the spacing between magnets to maintain uniformity and balance in the magnetic field.
Test and Fine-tune the Generator
To test and fine-tune your generator, connect it to a load such as a light bulb to measure its power output accurately. Use a multimeter to measure the voltage output of the generator. This will allow you to determine the effectiveness of your magnetic field generator in generating electric current.
Fine-tuning the generator might involve adjusting the number of wire turns or the positioning of the magnets. Experiment with different loads to see how they affect the performance of the generator. Ensure all connections are secure and the components are functioning correctly during testing.
The following table provides an overview of the steps involved in testing and fine-tuning your generator:
| Step | Description |
|---|---|
| 1 | Connect the generator to a load |
| 2 | Measure the voltage output using a multimeter |
| 3 | Adjust the number of wire turns or magnet positioning if necessary |
| 4 | Experiment with different loads to observe their impact |
| 5 | Ensure all connections are secure and components are functioning correctly |
Conclusion
Congratulations! You have successfully completed the construction of your very own magnetic field generator using our step-by-step guide. By following the detailed instructions and utilizing the necessary tools and materials, you have created a functional generator that can provide energy independence. Now, you can explore ways to enhance its power output and enjoy the benefits of a magnetic generator. Remember, with a little experimentation and fine-tuning, the possibilities are limitless. So, get ready to power up and embrace the future of energy generation!
Ready to Build Your Own Off-Grid Power System?
The number one reason DIY magnetic generators fail isn’t the physics—it is a lack of precision tools. Don’t drill a single hole or twist a single wire until your workspace is set up like a professional energy lab. Grab our free 17-page blueprint covering the exact tools, safety gear, and air-gap instruments you need to succeed on your first try.