
Growing fresh vegetables and raising healthy fish in a single closed-loop ecosystem is one of the most rewarding ways to produce food at home. This guide to aquaponics for beginners walks you through the exact biology, system design choices, material costs, and daily routines needed to build and maintain your first thriving unit. Grounded in established aquaculture standards from the Food and Agriculture Organization of the United Nations (FAO) and university extension programs, every recommendation below focuses on realistic expectations, safe materials, and practical troubleshooting.
Key Takeaways
- Three living components work together: Fish produce ammonia-rich waste, nitrifying bacteria convert that waste into plant-available nitrates, and plants filter the water before it returns to the fish tank.
- Start with a media bed system: Media-filled grow beds act as both a mechanical filter and a biological filter, making them the most forgiving setup for first-time builders.
- Cycle your tank before adding fish: Establishing beneficial bacteria takes 4 to 6 weeks. Fishless cycling using pure ammonia prevents fish stress and mortality.
- Balance your pH at 6.8 to 7.0: Fish, plants, and bacteria each prefer different pH levels; maintaining a slightly neutral range keeps all three thriving simultaneously.
- Size your system properly: A 1:1 volume ratio between your grow bed and fish tank—starting at 50 to 100 gallons (190 to 380 L)—keeps water chemistry stable.
What Is Aquaponics?
Aquaponics is an integrated food production method that combines aquaculture (raising aquatic animals like fish in tanks) with hydroponics (cultivating plants in water without soil). Nutrient-rich water from the fish tank is pumped into a grow bed where beneficial bacteria convert fish waste into organic plant fertilizer, and the plants clean and filter the water before it drains back to the fish.
In a traditional fish farm, waste accumulates quickly, requiring constant water exchanges and complex filtration to prevent the water from becoming toxic. In a conventional hydroponic garden, growers must regularly mix and purchase synthetic liquid fertilizers while flushing out stagnant nutrient solutions. Aquaponics solves both problems by linking the two systems together.
Because the water recirculates in a closed loop, an aquaponics setup uses significantly less water than traditional soil gardening—losing moisture only through plant transpiration and surface evaporation. You also eliminate the need for synthetic chemical fertilizers, herbicides, and soil-Applied pesticides, since any harsh chemical sprayed on your crops drains directly into the fish tank and harms your fish.
How Does the Aquaponics Nitrogen Cycle Work?
The aquaponics nitrogen cycle is a natural biological process where two distinct groups of aerobic nitrifying bacteria convert toxic ammonia from fish waste into harmless, nutrient-rich nitrates. First, Nitrosomonas bacteria oxidize ammonia into nitrite; second, Nitrobacter and Nitrospira bacteria oxidize nitrite into nitrate, which plant roots absorb for vegetative growth.
Understanding this invisible workforce is the single most important part of managing an aquaponic garden. You are not just raising fish and vegetables; you are tending a microbial colony that lives on the wet surfaces of your grow media, tank walls, and plumbing.
- Ammonia Production: Fish excrete liquid ammonia directly through their gills and produce solid waste that breaks down into ammonia. Even at low concentrations above 0.5 parts per million (ppm), un-ionized ammonia burns fish gills and causes tissue damage.
- Conversion to Nitrite: Autotrophic bacteria, primarily from the genus Nitrosomonas, colonize the biofilter (a high-surface-area medium where bacteria live) and consume ammonia, releasing nitrite as a byproduct. Nitrite is still toxic to fish because it binds to red blood cells and prevents them from carrying oxygen—a condition often called “brown blood disease.”
- Conversion to Nitrate: A second group of bacteria (Nitrobacter and Nitrospira) consumes the nitrite and converts it into nitrate. Nitrate is nontoxic to fish unless it reaches extreme concentrations (well over 150 to 200 ppm) and serves as the primary form of nitrogen that plants use to build leaves and stems.
- Water Purification: As plant roots draw nitrates and trace minerals out of the water, they strip the water of excess nutrients. The purified water then flows back into the fish tank, completing the cycle.
Is Aquaponics Right for You? Costs, Time, and Trade-Offs
Before buying tanks and plumbing parts, evaluate whether a recirculating fish-and-plant system fits your schedule, climate, and budget. While aquaponics eliminates weeding, soil tilling, and daily hand-watering, it requires consistent daily observation and reliable electricity.
- Startup Costs: A functional, food-safe backyard or basement starter setup (50 to 100 gallons / 190 to 380 L) typically costs between $250 and $600 when built from scratch using repurposed Intermediate Bulk Container (IBC) totes or stock tanks. Pre-made retail kits of the same size generally cost $800 to $1,500.
- Ongoing Expenses: Expect to spend $15 to $40 per month on continuous electricity (running a water pump and air pump 24/7, plus a water heater or indoor grow lights if needed), high-protein fish feed, water testing reagents, and buffer minerals like calcium carbonate or chelated iron.
- Time Commitment: Once your system is cycled and balanced, daily maintenance takes 5 to 10 minutes (feeding fish and checking water flow), plus 30 to 45 minutes once a week for water chemistry testing and plant care.
- Climate and Location: Outdoor systems thrive in mild climates, but extreme winter cold or scorching summer heat requires greenhouse protection, water chillers, or submersible heaters to keep fish alive.
- Risk Factors: Because fish rely on continuous aeration and water circulation, an extended power outage or pump failure can deplete oxygen in a heavily stocked tank within hours. If you travel frequently without a caretaker or battery backup, traditional soil gardening or passive hydroponics may be a better fit.
What Are the Main Aquaponics System Types?
The three primary aquaponics system types are media bed aquaponics (flood-and-drain beds filled with clay pebbles or gravel), Nutrient Film Technique or NFT aquaponics (shallow horizontal pipes holding plants in net cups), and deep water culture aquaponics or DWC (floating foam rafts suspended over deep water channels). Media beds are the best choice for beginners because the gravel or clay media acts as both a mechanical filter and a biological filter.
| Feature | Media Bed (Flood & Drain) | Nutrient Film Technique (NFT) | Deep Water Culture (DWC / Raft) |
|---|---|---|---|
| Relative Cost | Low to Moderate | Moderate to High | Moderate to High |
| Difficulty Level | Beginner | Intermediate to Advanced | Intermediate |
| Filtration Built-In? | Yes (Media handles solids & bio) | No (Requires external filters) | No (Requires external filters) |
| Best Crop Types | Leafy greens, herbs, tomatoes, peppers, root crops | Shallow-rooted leafy greens, herbs, strawberries | Lettuce, basil, pak choi, fast-growing greens |
| Key Pros | Supports big root systems; simple plumbing; very forgiving | Lightweight; ergonomic working height; uses less water volume | High water volume buffers temperature and pH; easy harvesting |
| Key Cons | Heavy when filled with rock; media needs occasional cleaning | Clogs easily if solids pass filter; sensitive to temperature swings | Requires heavy mechanical filtration and dedicated aeration |
Media Bed Aquaponics
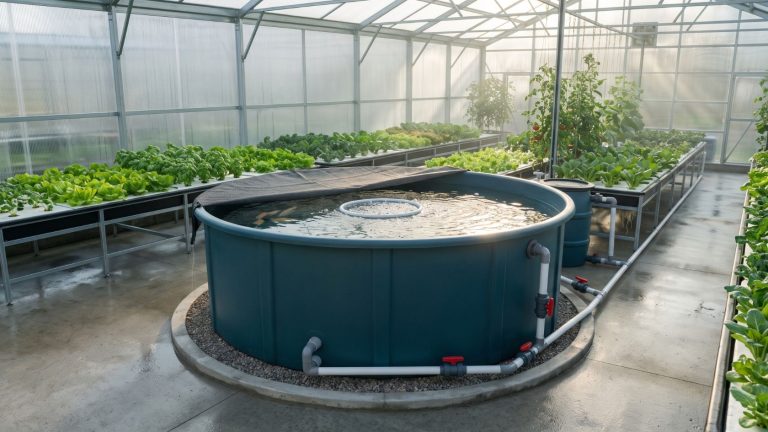
In a media bed aquaponics setup, plants grow inside a sturdy tray filled with inert gravel or expanded clay pebbles. Water from the fish tank floods the bed to bring nutrients to the roots and then drains completely back into the tank (or an intermediate sump tank, which is a low reservoir that collects draining water to keep the fish tank level constant), pulling fresh oxygen down into the root zone. Because the porous stones trap solid waste and provide massive surface area for nitrifying bacteria, you do not need separate mechanical or biological filtration tanks for small-scale systems.
NFT Aquaponics
In NFT aquaponics, water flows in a thin, continuous trickle down the bottom of horizontal PVC pipes or square hydroponic channels. Plants sit in small plastic net cups suspended in holes along the top of the pipes, with their roots dangling into the moist air and touching the nutrient film at the bottom. Because the channels are narrow, solid fish waste will quickly clog the pipes and coat plant roots unless you install a mechanical solids separator and a separate biofilter tank before the water reaches the pipes.
Deep Water Culture Aquaponics
In deep water culture aquaponics, plants are placed in net cups set into holes cut through floating food-grade polystyrene rafts. These rafts float directly on top of water troughs that are 8 to 12 inches (20 to 30 cm) deep, with the roots hanging continuously in the water below. Like NFT, DWC requires external mechanical and biological filtration, plus dedicated air stones inside the plant troughs so the submerged roots do not suffocate. DWC is the standard design for commercial greenhouses because the large water volume resists sudden temperature or chemical shifts.
How to Build an Aquaponics System (Step-by-Step Media Bed Guide)
Learning how to build an aquaponics system is easiest when you start with a single-bed flood-and-drain (ebb-and-flow) design. This DIY aquaponics system places a 50-gallon (190 L) grow bed directly above or slightly offset from a 70-to-100-gallon (265 to 380 L) fish tank, eliminating the need for a second sump tank while maintaining safe water levels for your fish.
Sizing Guidance
- Tank Volume: Aim for a minimum fish tank size of 50 to 100 gallons (190 to 380 L). Aquariums smaller than 50 gallons experience rapid fluctuations in temperature, ammonia, and pH that can wipe out fish overnight.
- Grow Bed-to-Fish Tank Ratio: Match your grow bed volume to your fish tank volume at a 1:1 ratio to start (for example, a 50-gallon / 190 L grow bed paired with a 70-gallon / 265 L fish tank filled to 50 gallons of active water, or a 100-gallon / 380 L tank with two 50-gallon beds).
- Grow Bed Depth: Make your grow bed exactly 12 inches (30 cm) deep. Shallow beds under 8 inches (20 cm) do not provide enough dry surface area, filtration volume, or root space for larger crops, while beds deeper than 14 inches (35 cm) can develop stagnant, low-oxygen pockets at the bottom.
Materials, Tools, and Cost Range ($280–$520)
Materials List:
- Fish Tank ($70–$140): One 70-to-100-gallon (265 to 380 L) heavy-duty HDPE (high-density polyethylene) agricultural stock tank, or the bottom half of a food-grade IBC tote.
- Grow Bed ($40–$80): One 50-gallon (190 L) rigid HDPE hydroponic flood table, Tuff Stuff oval stock tank, or top section of a food-grade IBC tote (12 inches / 30 cm deep).
- Support Frame ($40–$80): Concrete cinder blocks with 2×6-inch (5×15 cm) pressure-treated lumber crossbeams (keep treated wood from touching system water), or heavy-duty galvanized steel shelving rated for at least 600 lbs (270 kg).
- Submersible Water Pump ($30–$55): Rated for 300 to 500 gallons per hour (GPH) / 1,100 to 1,900 liters per hour (LPH) at a 4-foot (1.2 m) head height.
- Air Pump and Air Stones ($25–$45): Dual-outlet commercial diaphragm air pump, flexible airline tubing, check valves, and two 4-inch (10 cm) ceramic air stones.
- Grow Media ($45–$100): Approximately 6 to 7 cubic feet (170 to 200 L) of pH-neutral expanded clay pebbles (LECA / Hydroton) or washed 3/4-inch (19 mm) river pea gravel (never use limestone or marble gravel, which drives pH dangerously high).
- Plumbing and Bell Siphon Parts ($25–$45): Schedule 40 PVC pipes (3/4-inch / 19 mm for supply lines, 1-inch / 25 mm for drain standpipe, 2-inch / 50 mm for bell housing, and 4-inch / 100 mm for media guard), one 3/4-inch PVC ball valve, bulkhead fittings (uniseals), and NSF-61 potable-water-safe PVC primer and cement.
- Freshwater Master Test Kit ($30–$40): Liquid drop test kit covering pH, High Range pH, Ammonia, Nitrite, and Nitrate (liquid reagents are far more accurate than paper test strips).
Tools Needed:
- Power drill with hole saw bits (sized to match your bulkhead fittings)
- PVC pipe cutter or hacksaw
- Carpenter’s spirit level and tape measure
- Adjustable wrench and sandpaper (for deburring cut plastic edges)
Safety & Material Notes
- Food-Safe Plastics Only: Only use tanks and totes stamped with recycling codes #2 (HDPE), #4 (LDPE), or #5 (PP), as well as potable-water-safe Schedule 40 PVC. If repurposing an IBC tote, verify its previous contents; never use a container that held pesticides, industrial solvents, dyes, or petroleum products.
- Electrical Safety: Plug all pumps, heaters, and lights into a GFCI (Ground Fault Circuit Interrupter) outlet. Arrange power cords so they hang in a “drip loop” below the level of the electrical socket, preventing water from running down a wet cord into the outlet.
Plumbing Flow Overview
Your plumbing follows a simple loop:
- The submersible pump sits at the bottom of the fish tank and pushes water upward through a 3/4-inch (19 mm) PVC pipe.
- A tee-fitting and ball valve on the upward pipe divert a small stream of water straight back into the fish tank—this lets you throttle the water speed going into the grow bed without putting back-pressure on the pump motor, while adding extra surface agitation for the fish.
- The main water line enters the top of the grow bed.
- As the grow bed fills to 10 inches (25 cm) deep, a bell siphon (an automatic mechanical drain operated by atmospheric pressure and gravity, requiring no electricity or moving parts) triggers, rapidly draining the water back into the fish tank until the bed is empty and the siphon breaks.
Step-by-Step Assembly Instructions
1. Position and Level the Fish Tank
Place your fish tank in its final location on a flat concrete pad, reinforced deck, or basement floor. Remember that water weighs 8.34 lbs per gallon (1 kg per liter); a 100-gallon setup with wet gravel easily exceeds 1,000 lbs (450 kg).
2. Build the Grow Bed Support Stand:
Stack cinder blocks on either side of the fish tank and lay sturdy 2×6 lumber planks across them so the grow bed sits directly above the back half of the fish tank. Use your spirit level to confirm the support frame is completely level side-to-side and front-to-back; an unlevel bed prevents the bell siphon from starting or stopping properly.
3. Drill the Drain Hole and Install the Bulkhead
Drill a hole in the bottom of the grow bed at the end overhanging the fish tank. Sand any rough plastic burrs and install a 1-inch (25 mm) threaded bulkhead fitting with its rubber gasket placed on the inside (wet side) of the grow bed.
4. Assemble the Bell Siphon:
- Standpipe: Cut a 1-inch (25 mm) PVC pipe to 9 inches (23 cm) long and press it into the inside of the bulkhead fitting (do not glue it, so you can pull it out to drain the bed completely if needed). This sets your maximum water height at 9 inches, leaving the top 2 to 3 inches (5 to 7.5 cm) of your 11-to-12-inch media layer completely dry to prevent collar rot on plant stems and stop algae from growing.
- Bell Housing: Take a 10-inch (25 cm) piece of 2-inch (50 mm) PVC pipe and glue a flat 2-inch PVC end cap onto the top. At the bottom open end, cut four 1/2-inch-high (12 mm) notches around the rim to let water enter, and drill one 1/4-inch (6 mm) hole about 1.5 inches (3.8 cm) from the bottom edge to help air break the siphon cleanly when the bed empties. Slip this bell over the standpipe.
- Media Guard: Cut a 13-inch (33 cm) piece of 4-inch (100 mm) PVC pipe and drill dozens of 1/4-inch (6 mm) holes all along its sides. Place it over the bell siphon so gravel or clay pebbles cannot jam the siphon, while still allowing water to flow freely.
5. Plumb the Water Pump and Supply Line
Connect 3/4-inch (19 mm) PVC pipe or black kink-free vinyl tubing (avoid clear tubing, which grows algae inside and blocks flow) from your submersible pump up to the opposite end of the grow bed from the drain. Install your tee-fitting and ball valve above the fish tank water line to control flow speed.
6. Wash and Load the Grow Media
Thoroughly rinse your expanded clay pebbles or pea gravel in wheelbarrows or perforated buckets using a garden hose until the runoff water runs clear. Skipping this step dumps thick orange clay dust or rock silt directly into your fish tank and clogs pump impellers. Pour the washed media into the grow bed around the media guard to a total depth of 11 to 12 inches (28 to 30 cm).
7. Set Up Aeration
Place two ceramic air stones at the bottom of the fish tank and connect them via airline tubing to your air pump. Mount the air pump above the tank’s water level (or use inline check valves) so water cannot siphon backward into the pump if the power goes out.
Startup Checklist
- Fill the fish tank with clean tap water and add a vitamin-C or sodium thiosulfate dechlorinator (or let tap water aerate in the sun for 48 hours to off-gas chlorine; note that chloramines do not evaporate and require a neutralizing conditioner safe for food fish).
- Plug in the air pump and confirm vigorous bubbling from both air stones.
- Plug in the water pump and adjust the bypass ball valve until the grow bed takes about 15 minutes to fill and 5 to 10 minutes to drain completely via the bell siphon (2 to 3 full flood-and-drain cycles per hour).
- Check every bulkhead, pipe joint, and drain return for slow drips over a 24-hour test run before starting the biological cycle.
How to Cycle Your New Aquaponics Setup
System cycling is the process of establishing a living colony of nitrifying bacteria in your grow bed before stocking your tank to full capacity. A brand-new system contains zero bacteria; if you dump a full load of fish in on day one, ammonia levels will spike rapidly and kill them—a mistake widely known as “new tank syndrome.”
1. Fishless Cycling (Recommended: 4 to 6 Weeks)
Fishless cycling is the safest, most humane, and fastest way to start an aquaponics setup because you can dose higher levels of ammonia without harming live animals.
2. Choose an Ammonia Source
Purchase 100% pure household janitorial ammonia (check the ingredient label to ensure it contains only water and ammonium hydroxide—no surfactants, perfumes, or dyes; shake the bottle and if it foams like soap, do not use it). Alternatively, use ammonium chloride powder sold for aquarium cycling, or tie a small mesh bag of fish food pellets inside the grow bed to decay.
3. Add a Bacterial Starter (Optional)
Nitrifying bacteria exist naturally in the air and will colonize your tank on their own, but you can speed up the process by adding a liquid nitrifying bacteria culture from an aquaculture supplier or a handful of wet media from a healthy, disease-free aquaponics system.
4. Dose Ammonia to 2–4 ppm
Turn on your water pump and air pump, and plant a few hardy leafy greens right away. Add tiny drops of pure ammonia to the fish tank until your test kit reads between 2.0 and 4.0 ppm.
5. Track Nitrite Appearance (Days 7–14)
Test the water every two days. If ammonia drops below 1.0 ppm, add a small dose to bring it back to 2.0 ppm. Within one to two weeks, Nitrosomonas bacteria will establish and you will see nitrite levels turn purple on your test chart.Once nitrite appears, cut your ammonia dosing in half so nitrite does not climb above 5.0 ppm and stall the cycle.
5. Confirm Nitrate Production and Completion (Days 21–42)
Within three to six weeks, Nitrobacter colonies catch up. Your nitrate test will turn orange/red, and both ammonia and nitrite will plummet. Your system is fully cycled when you can dose ammonia to 2.0 ppm and both ammonia and nitrite read 0 ppm exactly 24 hours later. You can now safely introduce your fish.
Fish-In Cycling (Alternative: 6 to 8 Weeks)
If you choose to cycle with live fish, start with only 10% to 20% of your final fish stocking number using tough starter species like feeder goldfish or bluegill. Feed them very lightly once a day. You must test ammonia and nitrite daily; whenever either reading hits 0.5 to 1.0 ppm, perform a 25% to 50% partial water change with dechlorinated, temperature-matched water to keep the fish from suffocating while the bacteria slowly multiply.
What Are the Ideal Aquaponics Water Parameters?
Maintaining stable aquaponics water parameters requires balancing the needs of three completely different organisms. While plants prefer slightly acidic water (pH 5.5 to 6.5) to absorb micronutrients like iron, nitrifying bacteria and fish perform best in slightly alkaline water (pH 7.0 to 8.0). The universal compromise target for a healthy aquaponics system is a pH between 6.8 and 7.0.
| Parameter | Target Range | Acceptable Range | Testing Frequency | Why It Matters |
|---|---|---|---|---|
| pH | 6.8–7.0 | 6.0–7.4 | 2–3 times per week | Controls nutrient uptake in plants and prevents ammonia toxicity in fish. |
| Ammonia | 0 ppm | Under 0.5 ppm | Weekly (Daily when cycling) | Excreted by fish; toxic to gills even at low levels, especially if pH is above 7.5. |
| Nitrite | 0 ppm | Under 0.5 ppm | Weekly (Daily when cycling) | Intermediate waste product; blocks oxygen transport in fish blood. |
| Nitrate | 5–150 ppm | 5–200 ppm | Weekly | Primary plant food; safe for fish unless levels exceed 200+ ppm over long periods. |
| Dissolved Oxygen (DO) | Above 5 mg/L | 5–8+ mg/L | Observe daily | Essential for fish respiration, root health, and aerobic bacteria survival. |
| Carbonate Hardness (KH) | 60–140 ppm | 50–180 ppm | Every 2 weeks | Acts as a buffer against sudden, deadly pH crashes caused by nitrification. |
| Water Temperature | Species-dependent | 65–82°F (18–28°C) for warm; 55–68°F (13–20°C) for cold | Daily | Nitrifying bacteria work best at 65–85°F (18–29°C); must match fish tolerance. |
Managing pH and Carbonate Hardness (KH)
As nitrifying bacteria convert ammonia into nitrate every day, they naturally release hydrogen ions and nitric acid into the water. Over time, this steady acid production eats away at your water’s carbonate hardness (KH)—its alkalinity buffer—and causes your pH to drop.
- How to Safely Raise pH: When your pH drops toward 6.4, never use sodium bicarbonate (baking soda), as sodium builds up in the water and stunts plant growth. Instead, alternate between calcium hydroxide (hydrated agricultural lime) and potassium carbonate (or potassium bicarbonate). This raises your pH back to 6.8–7.0 while simultaneously supplementing essential calcium and potassium that fish feed lacks. Alternatively, place a small mesh bag of crushed oyster shells in the sump or grow bed to dissolve slowly whenever pH dips below 7.0.
- How to Safely Lower pH: During the first few weeks of cycling, tap water often sits too high (7.6 to 8.2). If you need to lower pH before nitrification takes over, use small doses of food-grade phosphoric acid or hydroponic pH-down buffers in a separate bucket before pouring slowly into the tank. Never adjust pH by more than 0.2 units per day, or you will shock your fish.
What Are the Best Fish for Aquaponics?
Choosing the best fish for aquaponics depends on your local climate, tank size, whether you plan to eat the fish or keep them as ornamentals, and your state or regional wildlife regulations. Always select one primary fish species matched to your ambient water temperature rather than heating or cooling large volumes of water year-round.
1. Tilapia (Nile or Blue Tilapia)
- Best For: Warm climates or heated indoor setups; edible harvests.
- Temperature Range: 70–85°F (21–29°C); growth slows below 68°F (20°C) and death occurs below 52°F (11°C).
- Pros & Caveats: Tilapia are tough, tolerate fluctuating water quality and high stocking densities, grow from fingerling to plate-size (1 to 1.5 lbs / 450 to 680 g) in 6 to 9 months, and thrive on omnivorous pellet feed. Legal Caveat: Because tilapia are invasive in warm waterways, many states and countries strictly regulate, require permits for, or ban possession of live tilapia. Check your state Department of Agriculture or Fish and Wildlife agency before ordering.
2. Channel Catfish
- Best For: Temperate and warm outdoor systems; delicious edible fillets.
- Temperature Range: 65–85°F (18–29°C), though they survive winter temperatures down to 40°F (4°C) by going dormant.
- Pros & Caveats: Catfish convert feed efficiently and grow quickly during warm months. Because they do not have scales, they are sensitive to high ammonia, low dissolved oxygen, and parasites if stressed. They are bottom-dwellers and prefer shaded tanks.
3. Rainbow Trout
- Best For: Cool climates, unheated winter greenhouses, or subterranean tanks.
- Temperature Range: 50–65°F (10–18°C); temperatures above 70°F (21°C) quickly become fatal.
- Pros & Caveats: Trout grow well in chilly water where warm-water fish cannot survive, pairing well with cold-hardy crops like kale, spinach, and swiss chard. However, trout require pristine water quality, high-protein carnivorous feed, fast water current, and dissolved oxygen levels consistently above 6 to 7 mg/L.
4. Bluegill, Crappie, and Perch (Sunfish Family)
- Best For: Four-season backyard systems in North America.
- Temperature Range: 40–80°F (4–27°C), with optimal growth between 68–78°F (20–25°C).
- Pros & Caveats: Native panfish handle freezing winter water and hot summers without needing expensive tank heaters or chillers. They take longer to reach harvest size (12 to 18 months) and are smaller on the plate than tilapia, but they are exceptionally hardy for beginners.
5. Goldfish (Comet or Common) and Koi
- Best For: Beginners focused strictly on growing vegetables, indoor classrooms, or small tanks under 100 gallons (380 L).
- Temperature Range: 40–80°F (4–27°C); optimal at 65–75°F (18–24°C).
- Pros & Caveats: If you do not want to harvest and process fish for food, Comet goldfish and Koi are nearly indestructible starter fish. They survive wide temperature swings, tolerate beginner mistakes during system setup, produce plenty of waste for plants, and can be bought at any local pet store without special aquaculture permits. Note: Never use municipal herbicides, copper-based medications, or malachite green treatments meant for ornamental fish if you plan to eat the vegetables growing in your bed.
What Are the Best Plants for Aquaponics?
The best plants for aquaponics fall into two nutritional categories: low-to-medium-nutrient leafy greens and herbs (which thrive in newly cycled systems with modest fish loads) and high-nutrient fruiting crops (which require mature, heavily stocked systems running for at least 3 to 6 months).
Best Starter Plants for New Systems (Months 1–4)
Start your garden with fast-growing leafy crops that primarily need nitrogen and modest trace minerals:
- Lettuce (Romaine, Butterhead, Loose-leaf): Grows rapidly with zero fuss; harvest outer leaves continuously in 25 to 35 days.
- Culinary Herbs: Basil (loves warm aquaponic water), mint (grow in net pots or watch carefully, as its runners will take over an entire media bed in weeks), cilantro, parsley, chives, and watercress.
- Asian Greens and Brassicas: Pak choi (bok choy), tatsoi, mustard greens, kale, and Swiss chard adapt effortlessly to flood-and-drain beds.
Crops for Mature, Heavily Stocked Systems (Month 4+)
Once your fish grow larger, eat more feed daily, and build up baseline nitrates (40 to 100+ ppm) along with supplemental potassium, calcium, and iron, you can grow heavy feeders:
- Fruiting Vegetables: Cherry and determinate tomatoes, bell and chili peppers, cucumbers, zucchini, bush beans, and peas. Provide trellises or overhead twine supports so heavy vines do not pull roots out of the loose clay media.
- Fruits: Strawberries thrive along the sunny edges of media beds or in NFT channels.
Plants to Avoid or Handle with Care
- Acid-Loving Crops: Blueberries require a very low pH (4.5 to 5.5) that will harm your fish and stall your nitrifying bacteria.
- Large Root Crops in Shallow Rock: Potatoes, sweet potatoes, and long carrots struggle or deform in coarse gravel and can clog bell siphons; however, shallow globe radishes and beets can grow well in smooth expanded clay pebbles.
Stocking Density, Feeding, and the Plant-to-Fish Ratio
Sizing your fish population to match your grow bed area prevents toxic waste build-up while ensuring your crops receive enough fertilizer. Rather than guessing by counting individual fish (since a 2-inch fingerling produces a tiny fraction of the waste of a 1-pound adult fish), aquaculture researchers use weight-based stocking densities and the feed rate ratio.
Beginner Stocking Density Rule
For a low-maintenance home system without pressurized oxygen tanks or external drum filters, keep your maximum stocking density (at mature harvest weight) at or below:
- 1 pound of mature fish per 5 to 8 gallons of tank water (roughly 1 kg of fish per 40 to 65 liters of water).
- Example: In a 100-gallon (380 L) fish tank, plan for a maximum adult harvest weight of 12 to 20 lbs (5.5 to 9 kg) of fish—which equals about 12 to 20 adult tilapia or catfish, or 15 to 25 medium panfish/goldfish.
The Feed Rate Ratio (Matching Food to Plant Space)
According to research compiled by the Food and Agriculture Organization of the United Nations (FAO), the most reliable way to balance plants and fish is measuring how many grams of fish feed enter the system each day per square meter (or square foot) of plant growing space:
- Leafy Greens & Herbs: Require 40 to 50 grams (1.4 to 1.8 oz) of fish feed per day for every 1 square meter (10.7 sq ft) of grow bed surface area.
- Fruiting Vegetables (Tomatoes, Peppers, Cucumbers): Require 50 to 80 grams (1.8 to 2.8 oz) of fish feed per day for every 1 square meter (10.7 sq ft) of grow bed surface area.
Practical Feeding Guidelines
- Use High-Quality Floating Pellets: Choose an aquaculture pellet containing 32% to 40% crude protein (higher for trout, moderate for tilapia/catfish). Floating pellets allow you to watch your fish eat at the surface—if they suddenly refuse food, it is your earliest warning sign of low oxygen, an ammonia spike, or disease.
- The 5-Minute Rule: Feed your fish once or twice a day, offering only as much food as they will eagerly consume within 5 minutes. Scoop out any uneaten pellets with a hand net immediately; rotting fish food in the tank causes rapid ammonia spikes and cloudy water.
- Temperature Adjustments: Fish are cold-blooded (ectothermic); their metabolism is governed by water temperature. If water drops below their optimal range, cut feeding amounts by 50% or stop feeding entirely if they become sluggish at the bottom.
Routine Maintenance Schedule
A thriving aquaponics garden relies on small, consistent habits rather than heavy weekend labor. Follow this checklist to prevent equipment failures and water chemistry surprises.
Daily Tasks (5–10 Minutes)
- Feed the fish and observe their behavior for 2 minutes (healthy fish swim actively and strike at pellets immediately).
- Check water flow and aeration: Verify that the bell siphon is flooding and draining on schedule and that air stones are bubbling vigorously.
- Check water temperature and top off evaporated water if the tank level drops more than 2 inches (5 cm), always using dechlorinated water.
Weekly Tasks (30–45 Minutes)
- Test water chemistry: Measure and log pH, ammonia, nitrite, and nitrate using your liquid test kit.
- Buffer pH and supplement iron: Add small doses of calcium hydroxide or potassium carbonate if pH has drifted below 6.8. Dose chelated iron (Fe-DTPA) at 2 mg/L every 2 to 3 weeks if new plant leaves show pale yellow coloration between green veins.
- Inspect plants: Prune yellowing lower leaves, tie up tall tomato or cucumber vines, harvest mature greens, and check the undersides of leaves for aphids or caterpillars.
- Clean the pump intake pre-filter: Rinse the foam sponge or strainer screen covering your submersible water pump so fish waste does not slow down your GPH flow rate.
Monthly Tasks (1 Hour)
- Inspect the bell siphon and standpipe: Lift the media guard shroud and pull out any vigorous plant roots (especially from tomatoes, mint, or cucumbers) that are creeping toward the drain slots.
- Test Carbonate Hardness (KH): Ensure your alkalinity buffer sits above 60 ppm.
- Check plumbing lines: Clear out any bacterial biofilm buildup inside your supply pipe or bypass valve by opening the valve fully for 30 seconds to flush it out.
- Stir or siphon excess sludge (Every 6–12 Months): If dark organic sludge builds up heavily in one corner of your media bed, either introduce red wiggler composting worms (Eisenia fetida—they live happily inside flood-and-drain media beds and break down solid fish waste into rich vermicompost) or wash one small section of media at a time using tank water (never chlorinated tap water, which kills your beneficial bacteria).
Troubleshooting Common Aquaponics Problems
Even well-built systems occasionally run into biological or mechanical hiccups. Use this diagnostic guide to fix issues before they harm your fish or harvest.
1. Cloudy Water
- White or Gray Milky Haze: Usually happens in new systems or after overfeeding. It is a harmless heterotrophic bacterial bloom feeding on dissolved organic waste. Fix: Stop feeding the fish for 24 to 48 hours, remove any uneaten food or dead roots, ensure strong aeration (heterotrophic bacteria consume lots of oxygen), and wait 3 to 5 days for the water to clear naturally.
- Green Pea-Soup Water: Caused by single-celled phytoplankton algae blooming when direct sunlight hits nutrient-rich fish tank water. Algae causes dangerous day-to-night pH and oxygen swings. Fix: Wrap or cover your fish tank with opaque insulation, shade cloth, or painted boards so 90%+ of the tank surface is in darkness.
2. Rapid pH Swings or Crashes
- Cause: Your water’s Carbonate Hardness (KH) has dropped to 0–20 ppm, leaving zero buffer against the nitric acid produced daily by nitrifying bacteria.
- Fix: Dissolve 1 tablespoon of potassium carbonate or hydrated agricultural lime per 100 gallons (380 L) in a bucket of water and pour slowly into the sump or grow bed drain return. Check pH after 4 hours, and place a mesh bag of crushed oyster shell or agricultural limestone in the water flow until KH stabilizes above 60 ppm.
3. Fish Gasping at the Surface (“Piping”)
- Cause: Either dissolved oxygen (DO) has dropped below 3 to 4 mg/L (often during hot summer nights or after an air pump fails), or nitrite/ammonia poisoning has damaged the fish’s gills.
- Fix: Immediately drop a spare air stone into the tank or aim a garden hose with dechlorinated water from a height above the tank to splash oxygen into the water. Stop feeding immediately, and test ammonia and nitrite. If nitrite is above 1.0 ppm, add 1 gram of pure non-iodized solar salt (NaCl) per liter of tank water (0.1% salinity, or roughly 1.3 oz per 10 gallons)—the chloride ions block nitrite from entering the fish’s bloodstream while you fix the biofilter.
4. Yellowing Plant Leaves (Nutrient Deficiencies)
Fish feed contains plenty of nitrogen and phosphorus, but lacks sufficient iron, potassium, and calcium for heavy plant production.
- Young top leaves turn yellow with bright green veins (Interveinal Chlorosis): Iron deficiency (or pH is above 7.4, locking out iron). Fix: Lower pH below 7.0 and add chelated iron (Fe-DTPA for pH up to 7.5; Fe-EDDHA if pH is higher) at 2 mg/L of system water.
- Older bottom leaves turn uniformly yellow and drop off: Nitrogen deficiency in a lightly stocked system. Fix: Slightly increase fish feed (if fish eat it all) or add a few more fish once ammonia/nitrite are zero.
- Brown scorched leaf edges, poor flowering, or pinpoint brown spots on older leaves: Potassium deficiency. Fix: Buffer your water with potassium carbonate or spray plant leaves lightly with a foliar kelp/potassium sulfate mist.
- Hooked, crinkled new leaves or black sunken bottoms on tomatoes/peppers (Blossom End Rot): Calcium deficiency or inconsistent watering cycles. Fix: Buffer with calcium hydroxide or apply a foliar calcium spray directly to the leaves.
5. Garden Pests (Aphids, Whiteflies, Spider Mites, Caterpillars)
- Crucial Rule: Never spray synthetic chemical insecticides, systemic pesticides, or copper fungicides on aquaponic plants; runoff will wash into the tank and kill your fish. Even organic rotenone, pyrethrin, and concentrated neem oil are toxic to fish if they enter the water.
- Fish-Safe Fixes: Blast soft-bodied aphids off leaves with a sharp spray of water, pick caterpillars off by hand, install yellow sticky traps around the grow bed perimeter, release beneficial predatory insects (ladybugs or lacewings), or use biological Bt (Bacillus thuringiensis) sprays carefully on leaves to control caterpillars (Bt is harmless to fish and mammals).
6. Water Pump Failure or Bell Siphon Stalling
- Pump Stops Flowing: Unplug the pump, pull it out of the tank, remove the front plastic impeller cover, and clean out any hair algae, snail shells, or sludge wrapping around the magnetic impeller blade. Always keep a spare $30 backup pump in your shed.
- Bell Siphon Won’t Start or Won’t Stop: If the siphon trickles continuously without flushing, your pump inflow is too slow—open the ball valve slightly so more water enters the bed. If the siphon flushes and never stops sucking air, your inflow is too fast—close the ball valve slightly, or clean debris blocking the breather hole at the bottom of the bell housing.
7 Common Beginner Mistakes to Avoid
- Adding Too Many Fish Too Soon: Stocking a full load of fish before the 4-to-6-week bacterial cycle finishes causes deadly ammonia spikes. Cycle fishless first, or start with a tiny fraction of your target fish count.
- Overfeeding the Fish: Uneaten pellets rot in the grow bed, depleting dissolved oxygen, clouding the water, and spiking ammonia. Only feed what fish finish in under 5 minutes.
- Leaving the Fish Tank Exposed to Direct Sunlight: Unshaded tanks grow thick green algae that competes with your plants for nutrients and causes overnight oxygen drops. Shade the fish tank while giving the grow bed full sun.
- Using Limestone Gravel as Grow Media: Limestone, marble chips, and builder’s gravel containing calcium carbonate continuously leach minerals that lock your water pH above 8.0—starving your plants of iron and making ammonia far more toxic to fish. Stick to inert expanded clay pebbles or washed river silica gravel.
- Planting Heavy Feeders in Month One: Putting tomatoes, peppers, or cucumbers into a brand-new setup results in yellow, stunted vines because the young system lacks potassium, calcium, and mature biofiltration. Start with leafy greens and herbs for the first 90 days.
- Ignoring Produce Hygiene and Food Safety: Fish tank water contains active microbes and fish feces. When harvesting lettuce or herbs, never submerge the edible leaves in the aquaponic water, wash your hands thoroughly after handling tank equipment, and always rinse harvested produce under clean potable running tap water before eating.
- Skipping Backup Aeration: A single tripped circuit breaker can suffocate a warm, heavily stocked tilapia tank in 3 to 4 hours. Use an AC/DC battery-backup air pump that automatically switches to battery power if household electricity cuts out.
Frequently Asked Questions (FAQ)
How much does it cost to build a beginner aquaponics system?
A complete, beginner-friendly 50-to-100-gallon (190 to 380 L) DIY media bed aquaponics system costs between $280 and $520 to build from scratch. This budget covers a food-safe stock tank or repurposed IBC tote, grow bed, inert clay pebbles or washed river gravel, a submersible water pump, an air pump with air stones, PVC plumbing, and a freshwater master test kit. Pre-built retail kits of the same size typically cost $800 to $1,500.
How often do you need to change the water in an aquaponics system?
In a healthy, fully cycled aquaponics system, you never perform full water changes because replacing the water strips away the nitrates and micronutrients your plants need to grow. Instead, you simply top off the 1% to 3% of water lost weekly to plant transpiration and evaporation using dechlorinated tap water or clean rainwater. You only perform partial water changes (20% to 30%) during an emergency ammonia spike, nitrite spike, or extreme nitrate buildup above 150 to 200 ppm.
What is the easiest fish to keep for aquaponics beginners?
Tilapia and channel catfish are the easiest species if you want an edible fish in a warm climate or heated indoor space, because they tolerate fluctuating water conditions and eat inexpensive pellet feed. If you want an outdoor four-season fish that handles cold winters, bluegill are exceptionally tough. If you only care about growing vegetables and do not plan to eat the fish, Comet goldfish or koi are the easiest and hardiest starter fish available.
Do indoor aquaponics systems need grow lights?
Yes. Unless your indoor aquaponics system sits inside a bright, south-facing sunroom or greenhouse receiving at least 6 hours of direct sunlight daily, you must install full-spectrum LED grow lights. Leafy greens and culinary herbs require 12 to 14 hours of light per day (delivering a Daily Light Integral of 12 to 17 mol/m²/day), while fruiting crops like tomatoes and peppers require stronger fixtures running 14 to 16 hours daily.
Why are my aquaponic plant leaves turning yellow?
Yellow leaves in aquaponics usually point to one of three nutrient gaps: iron, nitrogen, or potassium. If young upper leaves turn yellow while their veins stay dark green, your plants have an iron deficiency—check that your pH is between 6.8 and 7.0 and add chelated iron (Fe-DTPA). If older lower leaves turn pale yellow across the whole leaf, your system lacks nitrogen, meaning you need slightly more fish or fish feed.
Can I use tap water in my aquaponics system?
Yes, you can use municipal tap water as long as you remove chlorine and chloramines before adding the water to your system. Chlorine and chloramines are added by water utilities to kill bacteria—which means untreated tap water will burn your fish’s gills and wipe out the beneficial nitrifying bacteria living in your grow bed. Let tap water aerate in an open bucket for 48 hours to evaporate chlorine, or treat it with a food-fish-safe sodium thiosulfate or vitamin-C dechlorinator.
How many fish do I need for a 50-gallon or 100-gallon aquaponics tank?
Follow the conservative beginner stocking rule of 1 pound (0.45 kg) of mature fish weight per 5 to 8 gallons (19 to 30 L) of water. For a 50-gallon (190 L) tank, plan for 6 to 10 lbs (2.7 to 4.5 kg) of adult fish—roughly 6 to 10 harvest-sized tilapia or 10 to 15 medium goldfish. For a 100-gallon (380 L) tank, stock 12 to 20 lbs (5.5 to 9 kg) of adult fish. Always start with half that amount during your first season.
Conclusion and Next Steps
Mastering aquaponics for beginners comes down to patience during the initial 4-to-6-week bacterial cycling phase and consistent, five-minute daily check-ins once your ecosystem is running. By starting with a forgiving 50-to-100-gallon media bed setup, testing your water parameters weekly, and pairing hardy fish with leafy greens and culinary herbs, you can harvest fresh, pesticide-free produce right at home while conserving water.
Your Next Step: Before buying fish or seeds, measure your available space, verify your state’s regulations on backyard aquaculture species, and pick up your tank, grow bed, and freshwater liquid test kit so you can start your fishless biological cycle this week.