Imagine harnessing the invisible force of magnets to power your own DIY generator. With a few simple materials and some basic knowledge, you can tap into the energy of magnets and generate electricity right at home.
But how exactly does it work? And what are the steps involved in this DIY generator magnets project? In this discussion, we will explore the fascinating world of magnet power and delve into the process of creating your very own generator. Get ready to unlock the secrets of magnetism and discover how you can harness its power for your own benefit.

Key Takeaways
- Magnet power is a renewable energy source that utilizes magnets to generate electricity.
- Understanding magnet-coil interaction is crucial for building an efficient generator.
- Choosing the right materials ensures optimal performance and efficiency in magnet power projects.
- Proper assembly and testing of components are essential for harnessing power with magnets.
Introduction to Magnet Power
Magnet power is a renewable energy source that utilizes the natural properties of magnets to generate electricity. It’s the first step towards building your own energy generator. By harnessing the power of magnets, you can create a sustainable and efficient source of electricity.
Permanent magnets, like those found in everyday objects, create a magnetic field that induces current in nearby conductive materials, such as copper wire. As the magnets move relative to a coil of wire, electromagnetic induction occurs, resulting in the generation of electrical energy.
Understanding how magnets interact with coils and conductors is crucial for building a magnet-powered device that can produce enough power to meet your needs. So, let’s dive into the world of magnet power and explore the possibilities it offers for generating clean and renewable electricity.
Gathering the Materials
To gather the materials for your DIY generator magnets project, you will need to gather items such as cardboard, wood, a flick switch, neodymium magnets, and a DC motor. These materials are essential for constructing a functional generator that harnesses power with magnets. To help you visualize the required materials, refer to the table below:
| Materials | Quantity | Purpose |
|---|---|---|
| Cardboard | 1 | Provides a sturdy base for mounting the components |
| Wood | 1 | Used as support for the generator assembly |
| Flick switch | 1 | Controls the flow of electricity within the generator |
| Neodymium magnets | Varies | Generate a magnetic field necessary for power generation |
| DC motor | 1 | Converts mechanical energy into electrical energy |
Once you have gathered these materials, you can proceed to the next step of building the dynamo coil.
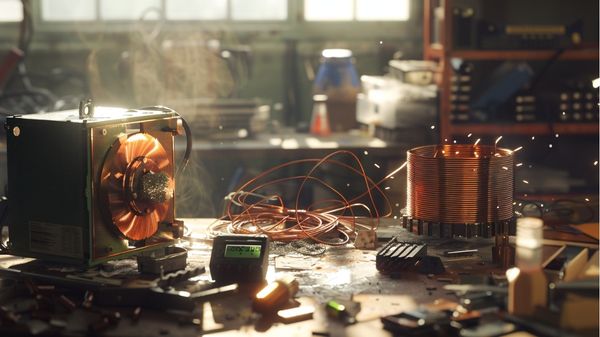
Building the Dynamo Coil
Now it’s time to focus on building the dynamo coil. To construct the coil, you’ll need to employ specific techniques such as winding the copper wire tightly around the donut magnet and aligning the magnetic field properly. It’s crucial to choose the right materials for the coil to ensure optimal performance and efficiency.
Coil Construction Techniques
When constructing the dynamo coil for your DIY generator magnets project, ensure precise winding and attention to detail. The coil construction techniques play a crucial role in the efficiency and stability assurance of your generator.
To achieve precision winding, follow a step-by-step video tutorial that provides guidance on the process. Connect the coil wires to the terminals of a light fitting, securing them tightly for a stable connection. This ensures that the generated power can be harnessed effectively. To help you visualize the construction process, refer to the table below:
| Coil Construction Techniques |
|---|
| Precision Winding |
| Wire Connection |
| Stability Assurance |
Magnetic Field Alignment
Start by wrapping the coil copper wire around the donut magnet to begin building the dynamo coil for your DIY generator project. Proper alignment of the coil wires is crucial to optimize the magnetic field and maximize efficiency.
The magnetic field created by the coil is essential for generating electricity when in motion. By aligning the coil properly, you ensure that the magnetic field induces an electric current in the coil, resulting in efficient energy generation.
The dynamo coil serves as a converter, transforming mechanical energy from motion into electrical energy through magnetic field alignment. It’s important to focus on coil alignment to enhance performance and achieve the desired level of energy production.
Paying attention to magnet orientation and magnetic field optimization will greatly impact the overall efficiency of your DIY generator project.
Choosing the Right Materials
To build the dynamo coil for your DIY generator project, select the appropriate materials for optimal performance and energy generation. The size of the coil is an important factor to consider. Use copper wire to coil around a donut magnet, ensuring that the wire is tightly wound and evenly distributed.
Neodymium magnets are ideal for generating a strong magnetic field within the coil, maximizing power output. Additionally, choose a flick switch that is compatible with the coil and the light fitting to ensure smooth operation.
For converting the mechanical energy from the magnets into electrical energy, a DC motor is necessary. Lastly, make sure to secure the coil wires to the light fitting terminals to ensure proper electrical connectivity. The table below summarizes the key materials for building the dynamo coil.
| Material | Function |
|---|---|
| Copper wire | Coiled around magnet for conductivity |
| Neodymium magnets | Generate strong magnetic field |
| Flick switch | Compatible with coil and light fitting |
| DC motor | Converts mechanical energy to electrical energy |
| Light fitting terminals | Secure coil wires for proper connectivity |
Assembling the Light Fitting
To assemble the light fitting: Start by wiring the components. Connect the dynamo coil wires to the terminals of the light fitting, ensuring a secure connection by tightening them. Once the wiring is complete, mount the lightbulb onto the fitting.
Wiring the Components
For efficient power transmission, connect the dynamo coil wires securely to the designated terminals of the light fitting, ensuring a stable and effective connection.
To achieve this, use proper terminal techniques when attaching the coil wires to the light fitting. Tighten the wires onto the terminals to secure them in place. It’s crucial to establish reliable electrical connections between the coil wires and the light fitting terminals to ensure efficient power flow.
Troubleshooting tips include checking for loose connections and ensuring all wires are properly tightened. By using efficient power transmission methods, you can maximize the electricity generated by the dynamo coil and effectively light up the bulb.
Remember to incorporate a flick switch to control the flow of electricity from the dynamo coil to the light fitting, allowing you to easily control the power output.
Mounting the Lightbulb
Now, let’s move on to the next step in assembling the light fitting: mounting the lightbulb securely onto the designated side of the base. This step involves securing connections and ensuring stability to guarantee the proper functioning of the generator.
To achieve this, attach the light fitting terminals to the coil wires securely, establishing a strong and reliable connection. Make sure to properly tighten the coil wires to prevent any loose connections that may hinder the transmission of power.
To affix the light fitting to the base, utilize a hot glue gun, applying it carefully and evenly to ensure a secure attachment. Position the light fitting securely on one side of the base, readying it for the electrical connection.
Constructing the Base
The construction of the base involves securely affixing the light fitting and dynamo coil to a cardboard or wood sheet for stable support during operation. To ensure base stability, carefully cut the sheet to fit the components securely.
Use a hot glue gun to attach the light fitting to one side of the base and the dynamo coil vertically to the other side. It’s crucial to align the components properly and securely attach them to prevent movement during operation.
Additionally, consider base customization by creating a hole for wiring integration, allowing effective connection between the components. The base serves as the foundation for the generator project, providing a stable platform for efficient power generation.
Material selection, component alignment, secure attachment, and base customization are key factors in constructing a sturdy and reliable base for your DIY generator project.
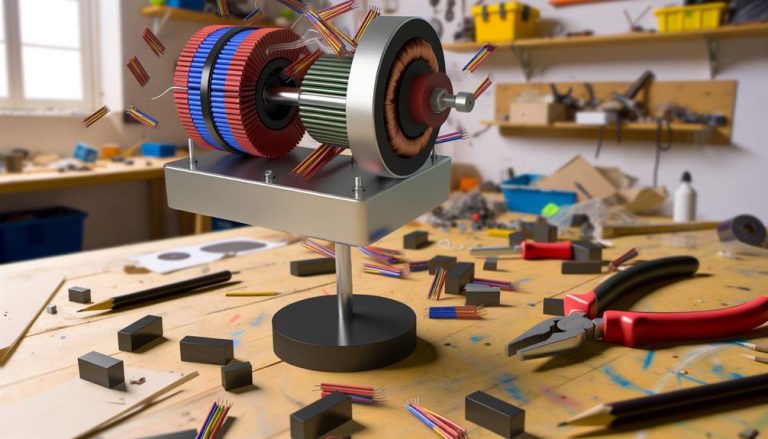
Completing the Generator Device
To complete the generator device, attach a plastic pulley wheel to the motor’s rotor for efficient transfer of rotational energy. This will enable power transmission from the motor to the generator. Ensure the pulley wheel is securely fastened to the rotor to prevent any slippage during operation.
Additionally, solder wires from the battery connector to the motor terminals to establish a reliable electrical connection. This will allow for the efficient transfer of energy from the battery to the motor.
Once the device is assembled, it’s important to perform performance testing. Connect the battery and add a bulb to confirm proper functionality. Make sure the magnets are positioned close but not touching to allow the motor to spin freely and generate power.
Troubleshoot any issues with the device’s performance by testing each component individually for optimal results. This will ensure energy efficiency and overall performance of the generator device.
Discover the Future of Energy – Reliable, Portable, and Affordable!
Frequently Asked Questions
Can a Generator Be Powered by Magnets?
Yes, a generator can be powered by magnets. It has advantages such as being sustainable and renewable, but also limitations in terms of efficiency. Innovations and future prospects are being explored to improve magnet driven generators.
How Do You Make an Electric Generator With Magnets?
To make an electric generator with magnets, you’ll need to design a DIY generator that harnesses the power of magnetic fields. By utilizing magnetism and energy conversion, you can create a device that converts mechanical energy into electrical energy.
How Much Electricity Can Magnets Generate?
Magnets can generate electricity through electromagnetic induction. The amount of electricity depends on magnet strength and movement speed. It has applications in powering small devices, but limitations exist in terms of efficiency.
Why Do We Not Use Magnets to Generate Electricity?
You do not use magnets alone to generate electricity because they require movement relative to a conductor for electromagnetic induction. Magnets have advantages in power generation, but limitations exist. Future prospects include improving efficiency and exploring new applications.
Conclusion
This DIY generator magnets project proves that it’s possible to generate electricity using magnets and simple materials. By constructing a dynamo coil, assembling the necessary components, and testing the device, one can successfully harness power through the power of magnets.
This project offers an accessible and practical way for individuals to explore and understand the principles of electricity generation. Watch the following video to learn more about DIY free energy generator.