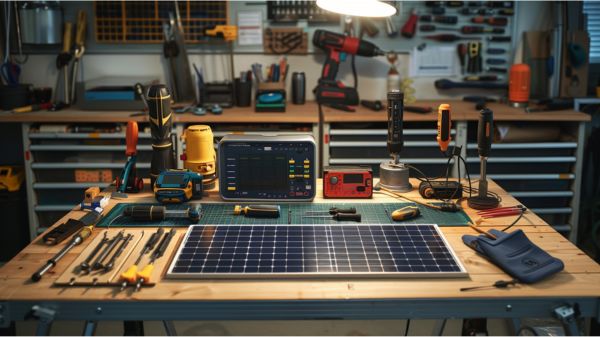
Embarking on a DIY solar panel installation is like embarking on a journey to harness the power of the sun. And just like any journey, having the right tools is crucial for success. But with so many options out there, how do you know which tools are essential for the task at hand? In this discussion, we will explore the top tools for a successful DIY solar panel installation.
So, strap in and get ready to discover the key tools that will make your solar dreams a reality.
Key Takeaways
- Digital multimeter ensures precise measurements of power output, voltage, and current for efficient solar cell performance.
- Battery operated drill provides power and efficiency for secure mounting of solar panels during rooftop installations.
- Hack saw allows accurate cutting of solar panels for customized dimensions, ensuring a secure and precise fit on rooftop rails.
- Caulk gun and quality sealant ensure a watertight seal, protecting the roof and enhancing the longevity and durability of the installation.
Digital Multimeter
To begin your DIY solar panel installation, you’ll need a digital multimeter to accurately measure the power output and ensure the efficiency of your solar cells. A digital multimeter is an essential tool for solar panel installations as it combines the functions of an ohmmeter, ammeter, and voltmeter in one convenient device.
With this tool, you can perform precise measurements of power output, voltage, and current, allowing you to assess the performance and efficiency of your solar panels. It’s also useful for maintenance tasks, enabling you to identify any potential issues or faults in the system.
Battery Operated Drill
When it comes to solar panel installation, having a battery-operated drill is crucial. Its power and efficiency allow you to drive screws, drill pilot holes, and secure mounts and rails with ease.
What makes it even better is its compatibility and versatility, making it one of the essential tools for a successful DIY solar panel installation.
Drill Power and Efficiency
A battery-operated drill is one of vital tools for a successful DIY solar panel installation, providing the necessary power and efficiency to securely mount panels on your roof.
When working on the rooftop, portability and convenience are crucial. The battery-operated drill allows you to move freely without the constraints of cords or limited power sources. It reduces the risk of falling while handling drilling tasks on the roof, ensuring your safety during the installation process.
Professional installers commonly rely on powerful battery-operated drills for efficient and precise installations. The drill’s power and efficiency enable quick and accurate work, making it an essential tool for DIY solar panel installation.
With a battery-operated drill, you can securely mount the panels, ensuring they’re firmly attached to the roof for maximum stability and performance.
Compatibility and Versatility
Battery-operated drills offer a wide range of compatibility and versatility for various mounting tasks during DIY solar panel installation. Here are four reasons why these drills are an essential tool for your project:
- Versatile: Battery-operated drills are compatible with various types of screws, making them suitable for different mounting tasks during solar panel installation.
- Lightweight and Portable: These drills are lightweight and easy to maneuver on rooftops, ensuring convenience and efficiency in drilling pilot holes for mounting hardware. Their portability allows for easy transportation to different areas of the installation site, enhancing flexibility during the project.
- Adjustable Torque: With adjustable torque settings, battery-operated drills help prevent overtightening of screws. This feature reduces the risk of damaging solar panels or mounting hardware, ensuring a secure and safe installation.
- Efficiency and Quick Operation: Battery-operated drills offer quick and efficient operation, saving time and effort during the installation process. This is especially beneficial in remote locations where power outlets may not be readily available, allowing you to work efficiently and effectively.
Battery-operated drills provide the versatility, lightweight design, adjustable torque, and quick operation needed for successful DIY solar panel installation.
Hack Saw
Using a hack saw is an essential step in the DIY solar panel installation process, allowing you to accurately cut the panels to the correct dimensions for secure and customized mounting on your rooftop rails. This versatile tool provides precision cutting, ensuring a successful installation.
With a hack saw, you can easily customize the size of your solar panels to fit specific mounting locations, maximizing their efficiency. It is cost-effective and convenient, helping you prepare the panels before and after installation.
By cutting the solar panels with a hack saw, you ensure a secure and precise fit on your rooftop rails, minimizing the risk of damage or instability. This tool is a must-have for any DIY solar project, empowering you to take control of your energy production.
| Hack Saw | Benefits |
|---|---|
| Precision cutting | Accurately cut solar panels to size |
| Customization | Customize panel dimensions for mounting |
| Secure mounting | Ensures a secure fit on rooftop rails |
| Versatile | Suitable for various DIY installations |
Flat Pry Bar
To ensure a secure and damage-free installation process, the flat pry bar is an essential tool for mounting solar panels directly on the roof by lifting and securing shingles safely. Here are four reasons why the flat pry bar is one of indispensable tools for a successful DIY solar panel installation:
- Sliding flashing under shingles: The flat pry bar aids in sliding flashing under the shingles, ensuring a watertight seal and protecting the roof from water damage.
- Mounting directly on the roof: By lifting and securing shingles, the flat pry bar allows for the proper installation of solar mounts and rails, ensuring a sturdy and secure attachment to the roof.
- Damage prevention: This tool helps prevent damage to the roof by providing a safe and controlled way to lift and secure shingles, minimizing the risk of tearing or breaking them.
- Versatility: The flat pry bar isn’t limited to a specific type of roofing surface, making it suitable for various roof materials, such as asphalt shingles, metal roofs, or clay tiles.
Caulk Gun
When it comes to solar panel installation, a caulk gun is an essential tool that you can’t afford to overlook. Its primary function is to ensure a watertight seal during the installation process.
Essential Tool for Sealing
Invest in a high-quality caulk gun, an essential tool for DIY solar panel installation, to ensure a professional and durable finish that meets industry standards for waterproofing. Here are four reasons why a caulk gun is crucial for sealing during solar panel installation:
- Roof Protection: The caulk gun allows you to effectively seal drilled holes, protecting the roof and ceiling from water damage. This ensures the longevity of your solar panel system.
- Leak Prevention: Properly sealing the mounting screws using a caulk gun reduces the risk of water leakage, preventing potential damage to your roof and the underlying structure.
- Structural Integrity: By sealing all the necessary areas with a high-quality caulk gun, you maintain the structural integrity of the roof, ensuring a secure and stable installation.
- Weatherproofing: Applying sealant using a caulk gun helps weatherproof the installation, keeping the solar panels secure and protected from environmental elements.
Investing in a reliable caulk gun is essential for a successful DIY solar panel installation that guarantees waterproofing and long-term performance.
Ensures Watertight Installation
Ensure a watertight installation for your DIY solar panel project by utilizing a high-quality caulk gun to seal mounting screws and holes, effectively protecting your roof and interior from potential water damage.
A caulk gun is an essential tool that helps prevent leaks and water damage by applying sealant to key areas of your solar panel system. By sealing out moisture, the caulk gun helps maintain the integrity of the roof and ensures the long-term durability of your installation.
Investing in a high-quality caulk gun is crucial for achieving a watertight seal that can extend the lifespan of your solar panel system. Don’t underestimate the importance of a caulk gun in safeguarding your investment and keeping your solar panels functioning optimally.
Simplifies Panel Mounting
To simplify the mounting process of your solar panels, a high-quality caulk gun is an indispensable tool for ensuring a secure and watertight installation.
Here are four reasons why a caulk gun is essential:
- Applying Sealant: The caulk gun allows you to apply sealant easily and evenly, ensuring that all mounting points are properly sealed. This prevents leaks and protects your roof and ceiling from potential water damage.
- Secure Installation: By creating a watertight seal around the mounting points, the caulk gun helps maintain the integrity of the installation. This ensures that the solar panels stay in place, even during extreme weather conditions.
- Longevity and Durability: Properly applying sealant with a caulk gun enhances the longevity and durability of your solar panel system. The sealant acts as a protective barrier, preventing moisture and other elements from compromising the system’s performance.
- Aesthetics: Using a caulk gun allows you to achieve a clean and professional-looking installation. The sealant fills in any gaps or spaces, giving your solar panels a seamless appearance.
Investing in a high-quality caulk gun not only simplifies the panel mounting process but also provides a secure and watertight installation, ensuring the longevity, durability, and aesthetics of your solar panel system.
Conduit Bender
When installing solar panels, a conduit bender is an indispensable tool for bending conduits to accommodate wiring in various angles and ensuring a neat and organized wiring system. This tool is crucial for providing wiring protection in the solar system setup.
With a conduit bender, you can easily create bends in conduits, allowing you to navigate around odd angles and corners when running electrical conduits. By using this tool, you can maintain a tidy and organized wiring installation, preventing any potential hazards or issues in the future.
Whether you’re a DIY solar enthusiast or a professional installer, a conduit bender is one of must-have tools for a successful DIY solar panel installation.
Screwdrivers
Screwdrivers play a vital role in securely mounting solar panels on roofs and preventing any movement during installation. Here are four key points to consider when using screwdrivers for solar panel installation:
- Types of screwdrivers: Different mounting systems may require different types of screwdrivers. Phillips screwdrivers are commonly used, but flat-head screwdrivers may also be needed depending on the panel’s design.
- Proper tightening: It’s crucial to properly tighten the screws using the screwdriver. This ensures the stability and safety of the solar panel system, preventing any potential damage due to loose screws.
- Size matters: Using the correct size of screwdriver is essential to avoid damaging the panels or the mounting hardware. Using a screwdriver that’s too small or too large can result in stripped screws or imprecise installation.
- Safety first: When using screwdrivers, always prioritize safety. Ensure that you’re using the appropriate personal protective equipment, such as gloves and safety glasses, to protect yourself during the installation process.
Frequently Asked Questions
What Do I Need to Install Solar Panels Myself?
To install solar panels yourself, you’ll need essential tools like a digital multimeter to test power, a hacksaw for cutting panels, conduit benders for wiring, screwdrivers for mounting, and a battery-operated drill for convenience and safety.
What Equipment Is Used to Install Solar Panels?
To install solar panels yourself, you’ll need tools for solar panel positioning, mounting hardware, wiring connections, inverter installation, system monitoring, safety precautions, tools for roof penetration, grounding equipment, panel cleaning and maintenance, and battery storage options.
What Tools Do Solar Technicians Use?
To successfully install solar panels, you need essential tools like a digital multimeter, hacksaw, conduit bender, screwdriver, and a battery-operated drill. These common tools will help you ensure proper fitting and secure mounting for efficient solar panel installation.
Are DIY Solar Kits Worth It?
DIY solar kits can be worth it for cost savings, but there are pros and cons. Avoid common mistakes by following a step-by-step guide. Choose the right kit, take safety precautions, and maximize energy production. Maintenance is key.
Conclusion
With the right tools by your side, your DIY solar panel installation project will soar to new heights!
The digital multimeter will ensure your power is top-notch, while the battery-operated drill and hack saw will make mounting a breeze. Don’t forget the flat pry bar, caulk gun, and conduit bender for a seamless assembly. And of course, safety comes first with a safety harness and ladder safety practices.
Get ready to tackle this rewarding and cost-effective endeavor like a pro! Take your time to watch the following video and learn more about DIY Home Energy by Jeff Davis.