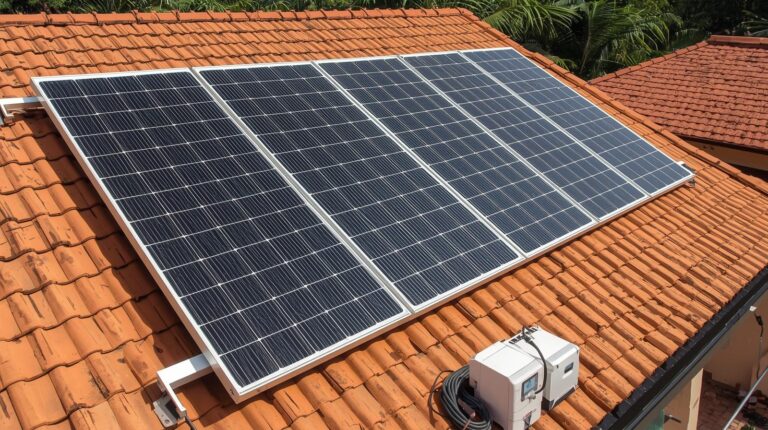
Are you ready to shine a light on renewable energy? In this step-by-step guide, we’ll show you how to make a solar panel with cd. Transform those old CDs gathering dust into a homemade solar panel.
With just a few simple materials and some creative ingenuity, you’ll be harnessing the power of the sun in no time. So grab your scissors, paintbrush, and get ready to embark on a DIY adventure that will not only save you money but also contribute to a greener, more sustainable future. Let’s get started!
Key Takeaways
- Solar power can be harnessed by repurposing old CDs, making it a sustainable and cost-effective option.
- Making a solar panel with CDs can improve understanding of utilizing the sun for heat energy and educate individuals of all ages.
- Blu-ray discs have patterns that make them more efficient for solar panels, and repurposing CDs, DVDs, or Blu-ray discs can create DIY solar thermal panels.
- The process of making a solar panel with CDs is less complex than a grid-connected system, and it does not require battery or inverter integration.
Gather Materials and Tools
To make a solar panel with CDs, you will need to gather materials such as cardboard, a utility knife, paint, aluminum foil, and of course, CDs. These materials will help you create a DIY solar panel that harnesses the power of the sun.
Start by cutting rectangles from cardboard to the required measurements. Then, paint the cardboard pieces and attach aluminum foil to them.
Next, arrange the CDs on the cardboard and secure them with adhesive.
This step-by-step process will guide you how to make a solar panel with CD. By following these instructions and gathering the necessary materials and tools, you will be able to create a functional solar panel that utilizes the power of the sun to generate clean electricity.
⚡ Stay Powered When the Grid Goes Down
What if you could keep lights, devices, and even critical systems running during any blackout? That’s exactly what Dark Reset shows you how to do—using simple, proven methods. Discover lots of ways to prepare for energy independence.
Cut and Paint the Cardboard
Cutting the cardboard into rectangles and painting them according to the required measurements is an essential step in preparing the base for your DIY solar panel with a CD. By cutting the cardboard into the desired size and shape, you create a sturdy foundation for the rest of the assembly process.
Painting the cardboard not only adds a touch of aesthetic appeal but also helps protect it from moisture and other environmental factors. Remember to follow the required measurements to ensure a proper fit for the CDs and other components. This attention to detail will contribute to the overall effectiveness and functionality of your homemade solar panel.
Here are the steps to follow:
- Measure and mark the dimensions on the cardboard.
- Use a utility knife to cut the cardboard into rectangles.
- Sand the edges of the cardboard to smooth any rough edges.
- Apply a coat of primer to the cardboard for better paint adhesion.
- Use acrylic paint in your desired color to paint the cardboard, allowing it to dry completely before proceeding to the next step.
Attach Aluminum Foil
Attach the aluminum foil to the painted cardboard pieces by carefully securing it with adhesive. This step is crucial in the process of making a solar panel with CDs.
The aluminum foil serves as a reflective surface that will help harness the sun’s energy. Start by cutting the aluminum foil into rectangles that match the size of the painted cardboard pieces. Make sure to handle the foil carefully to avoid tearing or wrinkling it.
Then, apply adhesive to one side of the cardboard and carefully place the corresponding piece of foil onto it, ensuring that it is smooth and free of any wrinkles or bubbles. Press down firmly to ensure a secure attachment. Repeat this process for all the painted cardboard pieces.
Arrange and Secure CDs
Arrange the CDs on the cardboard, making sure they are evenly spaced and facing the same direction, and secure them in place with adhesive. This step is crucial in creating a functional solar panel with CDs.
By arranging the CDs in an organized manner, you ensure maximum exposure to sunlight and optimize the panel’s efficiency. Here are five key points to consider:
- Ensure even spacing: By evenly spacing the CDs, you allow for equal distribution of sunlight across the panel, maximizing its energy-generating potential.
- Face the same direction: Facing the CDs in the same direction ensures that they all receive sunlight at the same angle, optimizing their ability to convert light into electricity.
- Secure with adhesive: Using a strong adhesive, such as glue or tape, ensures that the CDs stay firmly in place on the cardboard, preventing any movement or displacement.
- Maintain alignment: It is important to maintain a straight alignment of the CDs on the cardboard to create a neat and organized solar panel.
- Check for gaps: Make sure there are no gaps or overlaps between the CDs, as this can disrupt the flow of sunlight and reduce the panel’s efficiency.
Wear Protective Equipment
To ensure your safety while working on the solar panel project, make sure to wear personal protective equipment such as safety glasses and gloves. This will protect your eyes from any potential debris or chemicals and prevent any cuts or injuries to your hands. Safety should always be a top priority when working with tools and materials.
In addition to safety glasses and gloves, you may also consider wearing a dust mask to prevent inhalation of any particles or fumes. A sturdy pair of work boots can provide protection for your feet, especially if you are working in a potentially hazardous environment.
Here is a table that outlines the recommended personal protective equipment for working on a solar panel project:
| Personal Protective Equipment | Purpose |
|---|---|
| Safety glasses | Protects eyes from debris or chemicals |
| Gloves | Prevents cuts or injuries to hands |
| Dust mask | Guards against inhalation of particles or fumes |
| Work boots | Provides protection for feet |
Handle CDs Carefully
When handling CDs for your solar panel project, be careful to avoid any damage or scratches. CDs are delicate and can easily break or become unusable if mishandled.
Here are some important precautions to take:
- Hold the CD by its edges to avoid touching the shiny surface.
- Place the CD on a clean and flat surface to prevent it from slipping or getting scratched.
- Use a soft cloth or microfiber cloth to gently clean the CD if it gets dirty or dusty.
- Store the CDs in a protective case or sleeve when not in use to prevent any accidental damage.
- Avoid exposing the CDs to extreme temperatures or direct sunlight, as this can warp or damage them.
Work in a Well-Ventilated Area
Ensure that you work in a well-ventilated area while assembling your solar panel with CDs to prevent inhaling any fumes. Proper ventilation is crucial for your safety as you repurpose old CDs to harness the potential energy of the sun.
When working with adhesive, paint, or any other materials that emit fumes, it is important to have fresh air circulating around you. This will help minimize the risk of respiratory issues and ensure a healthy working environment.
Follow Electrical Safety Guidelines
Now that you’ve taken the necessary precautions to work in a well-ventilated area, it’s important to follow electrical safety guidelines when working on your DIY solar panel with CDs. By adhering to these guidelines, you can ensure your safety and prevent any accidents.
Here are five important electrical safety guidelines to keep in mind:
- Always wear personal protective equipment such as safety glasses and gloves to protect yourself from any potential electrical hazards.
- Handle the CDs and any electrical components with care to avoid damage and prevent electric shocks.
- Work in a well-ventilated area to prevent the accumulation of fumes that may be emitted during the process.
- Keep flammable materials away from your work area to reduce the risk of fire or explosions.
- Familiarize yourself with and follow all electrical safety guidelines and procedures to minimize the risk of electrical accidents.
Following these electrical safety guidelines will help ensure a safe and successful DIY solar panel project with CDs.
Assemble the Solar Panel
To assemble your DIY solar panel with CDs, start by gathering all the necessary materials and positioning the CDs on the painted cardboard. Here’s a step-by-step guide to help you through the process:
Materials Needed:
- Cardboard
- Utility knife
- Paint
- Aluminum foil
- Adhesive
- and CDs.
Step-by-Step Guide:
| Step | Description |
|---|---|
| 1 | Cut rectangles from cardboard to the required measurements. |
| 2 | Paint the cardboard pieces to ensure durability. |
| 3 | Attach aluminum foil to the painted cardboard pieces to enhance reflectivity. |
| 4 | Arrange the CDs on the cardboard, ensuring they are evenly spaced. |
| 5 | Secure the CDs onto the cardboard using adhesive. |
Apply Finishing Touches
Once you have secured the CDs onto the cardboard, it’s time to add the finishing touches to your DIY solar panel. Here are the steps to apply the finishing touches:
- Seal the edges of the cardboard with silicone sealant to protect it from moisture.
- Use double-sided adhesive tape to secure the aluminum foil in place on the painted cardboard pieces.
- Ensure that the CDs are firmly attached to the cardboard by applying adhesive to the back of each CD and pressing them down.
- Use a soldering iron to connect the copper wires from each CD to create a series circuit.
- Apply a transparent top layer, such as plexiglass or acrylic, to protect the CDs and provide insulation.
Conclusion
Congratulation! You have successfully learned how to make a solar panel with CD. By following the step-by-step process, gathering the necessary materials and tools, cutting and painting the cardboard, attaching aluminum foil, and arranging and securing the CDs, you have taken a significant step towards harnessing renewable energy.
Remember to always wear protective equipment, work in a well-ventilated area, and follow electrical safety guidelines. With your newly assembled solar panel, you can now contribute to a cleaner and more sustainable future.
Keep in mind the limitations and alternatives of homemade panels and seek expert advice for any further projects. Happy solar panel making! Watch the following video below for more detailed step-by-step guide on how to make a solar panel with cd.
⚡ Stay Powered When the Grid Goes Down
What if you could keep lights, devices, and even critical systems running during any blackout? That’s exactly what Dark Reset shows you how to do—using simple, proven methods. Discover lots of ways to prepare for energy independence.