As an automotive engineer, I’m often asked how to turn a car alternator into a generator. It’s actually not as complicated as it may sound. In fact, with the right tools and materials, you can easily convert your car alternator into a reliable power source in no time!
Gather The Necessary Parts And Tools
When it comes to turning a car alternator into a generator, there are several parts and tools that must be gathered. Researching the necessary components is crucial in order to make sure you have everything needed for this conversion project. It’s also important to practice safety procedures when working with electrical items such as an alternator.
Required Parts:
- Alternator
- Voltage Regulator
- Rectifier
- Brush Holder Assembly
- Bearings
- Capacitor
- Diode
Required Tools:
- Screwdriver
- Socket Wrench
- Wire Cutters
- Voltmeter
- Multi-Meter
- Soldering Iron
- Heat Gun
- Crimping Tool
The skill level required for this job may vary depending on the complexity of the particular model; however, basic knowledge of mechanics and electricity should suffice. Understanding how each part works within an alternator is essential before attempting any modifications or conversions. Knowing which wires need to be connected and what type of voltage output is desired will help ensure success in successfully creating a functioning generator from a car alternator.
Additionally, understanding the differences between AC and DC current can be beneficial when wiring up the unit correctly. With all these details considered, it’s time to move onto the next step in transforming your car alternator into a generator.
Ready to Build Your Own Off-Grid Power System?
The number one reason DIY magnetic generators fail isn’t the physics—it is a lack of precision tools. Don’t drill a single hole or twist a single wire until your workspace is set up like a professional energy lab. Grab our free 17-page blueprint covering the exact tools, safety gear, and air-gap instruments you need to succeed on your first try.
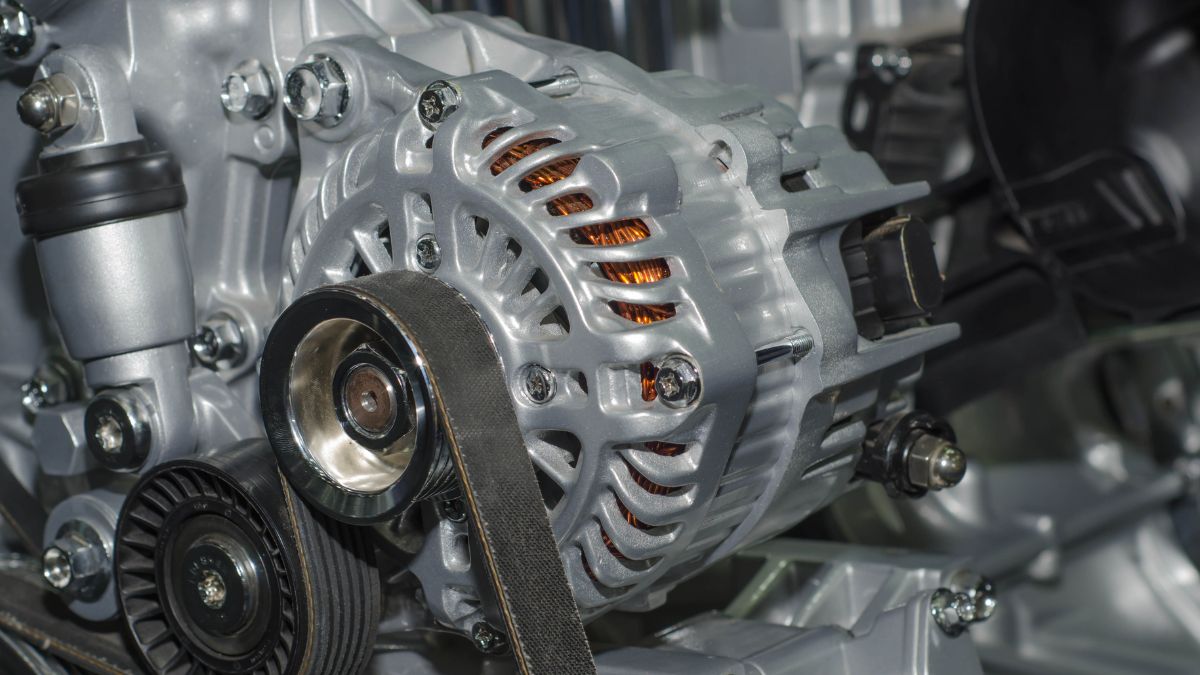
Understanding The Components Of An Alternator
The alternator is an essential component of the modern vehicle, providing power to keep the electrical system running. It symbolizes a lifeline that can make or break a journey – it’s often said, if your battery dies, you’re stranded!
Alternators use rotating magnetic fields to convert mechanical energy into electricity and regulate voltage control in order for all components of the car to receive sufficient power. Within the intricate structure of its inner workings lies a complex web of copper-wound coils and electromagnets that generate alternating current when connected with a spinning shaft.
The alternator also houses two diodes within its unit which are responsible for providing rectified DC output while preventing reverse current flow from entering other parts of the electrical system. Understanding the exact specifications and features of an alternator is paramount before attempting any kind of repairs or modifications.
With this knowledge, we can disassemble our model safely and confidently assess what needs replacing or upgrading so that we can continue on our journey without interruption.
Disassembling The Alternator
Before attempting to turn an alternator into a generator, it’s essential to first disassemble the alternator.
First, identify and inspect all components of the alternator before removal. Check for any signs of damage or wear and tear on wires, cables, brushes, bearings, pulleys, slip rings or cores. Replace any parts that are damaged or worn out with new ones as necessary. Once everything is identified and inspected, use appropriate tools such as wrenches and screwdrivers to carefully remove each component from the alternator case.
After all components have been removed from the alternator case, clean them thoroughly using suitable cleaning agents and rags in order to ensure that they can be safely reused once assembled again. With all these steps completed successfully, we’re now ready to prepare the alternator for wiring.
Preparing The Alternator For Wiring
Identifying the components of an alternator is a crucial step in turning it into a generator. Understanding how each part functions and interacts with other components enables safe, efficient operation.
To begin, inspect the alternator to ensure all parts are present and in good condition. Researching wiring diagrams can help identify which wires need to be connected where on the alternator for it to function as intended.
The next step is to prepare the alternator for wiring by ensuring that any existing wiring has been removed or disconnected from the unit before beginning installation. All insulation must be checked for signs of damage and replaced if necessary, making sure not to pinch any of the wires during installation.
Securely attach mounting hardware such as brackets and clamps according to manufacturer specifications so that no vibration will occur while running at high RPMs.
Having ensured that all necessary adjustments have been made, we can move onto connecting the wires to the alternator. With proper care taken throughout this process, our efforts will result in a functional generator capable of powering multiple applications safely and effectively.
Connecting The Wires To The Alternator
Before attempting to turn an alternator into a generator, it’s important to identify the components and inspect the wiring.
To begin, locate the positive and negative terminals on the alternator. Then check for any loose connections or broken wires. If everything looks secure, it’s time to connect them to your battery or other power source.
Next, find a suitable mounting bracket and attach it to the side of your engine block. Once that’s done, you’ll need to run two wires from your power source through this mount before connecting them directly to the alternator terminals. Make sure both are firmly secured with nuts and bolts so they don’t rattle or come loose while driving.
Lastly, once all connections are made, use a multimeter to test each one is properly working by checking voltage output at various RPM levels.
Now that all necessary steps have been taken care of in order for successful installation, we can move onto installing the voltage regulator – which will help ensure consistent power delivery from your newly converted alternator-generator combo unit.
Installing The Voltage Regulator
Identifying the components of an alternator and understanding their wiring diagrams is essential before attempting to install the voltage regulator. To start, locate the three stator windings that are connected in series with each other. These will be labeled as ‘A’, ‘B’ & ‘C’. Once identified, connect a multimeter to each terminal and measure its resistance by setting it on the ohm scale. Then, look for two diodes connected between these terminals; they should also have corresponding resistances when measured individually.
Next, identify any additional diode rectifiers or transistors which may come attached to your particular alternator model and measure them accordingly. This can vary from model-to-model so knowing how your specific system works is important. Make sure you understand how all of these pieces work together before proceeding onward to installing the voltage regulator.
Installing the voltage regulator requires attention to detail and patience because incorrect wiring could potentially cause damage or injury if not done properly. Referring back to the wiring diagram will help ensure accuracy while hooking up all of the wires correctly according to their labels and designations outlined in said schematic.
With everything now wired correctly, power up the unit using either a battery charger or connecting it directly to a 12V battery source. Connecting this battery will begin producing electrical current in your alternator/generator setup, thus allowing it operate normally moving forward.
Moving on we need to connect this new device’s output into our configuration…
Connecting The Battery
In order to complete the transformation of an automobile alternator into a generator, one must first establish the connection between the battery and other components. The alignment of the battery should be carefully considered in relation to its cable connections and regulator selection. Precision is essential as any misalignment can lead to potential issues down the road.
When it comes to connecting cables, pay attention that positive terminals are securely connected together while negative terminals remain separate. This will create a stable feedback loop so that power generated by your new generator can be properly routed without interruption or interference from outside sources such as external electrical fields or neighboring appliances.
Furthermore, ensure that all wires have appropriate insulation for maximum protection against accidental shorts or sparks.
Regulator selection plays a crucial role in preventing overvoltage or under-voltage situations which could potentially cause damage if left unchecked. It is important to select an appropriately rated voltage regulator based on the specific needs of each application; this will help prevent circuit imbalances and possible failure due to excessive current draw.
The next step involves installing a pulley and fan onto the alternator shaft, allowing it to spin freely while generating electricity more efficiently than before.
Installing The Pulley And Fan
Now that the alternator is detached from the car, it needs to be modified for use as a generator. This involves installing a pulley and fan in order to make it work correctly.
When selecting a pulley, you must ensure it will fit securely on the shaft of the alternator so that power can transfer properly. The size should match both the diameter of the alternator shaft and also be compatible with any other components being used. It’s important not to get too large or too small of a pulley because this could affect how much torque is needed to rotate it.
Once you have selected your pulley, you need to mount the fan onto it which allows air flow over the alternator’s windings while operating.
After making sure everything is lined up correctly, secure them together using screws or bolts and then select an appropriate belt length that fits between both components tightly but still allows enough slack for easy adjustment if needed.
To finish off this step, check all fasteners are tightened adequately and inspect for any potential issues such as improper alignment before moving on to testing the generator.
Testing The Generator
The process of turning a car alternator into a generator is complete. Now it’s time to test the generator and ensure that its performance meets all necessary requirements, as well as any safety protocols.
To optimize performance, maintenance must be completed regularly; this includes cleaning and inspecting for damage or wear-and-tear. It’s also important to check all electrical connections on the device, ensuring they are secure and up-to-date with current codes and regulations.
When testing the generator, start by running it at lower power levels such as half load or even quarter load if possible. This allows you to assess how efficiently the machine runs without overloading it with too much electricity. Make sure to observe these tests closely and record any readings from voltage meters or other gauges in order to monitor progress throughout the entire process.
If everything looks good while running at lower power, gradually increase output until desired target is reached. Once maximum capacity has been tested successfully, then all safety protocols should have been met and it will be ready for use.
Now comes the time to troubleshoot any issues that may arise during operation of the new generator. Troubleshooting tips include checking for signs of corrosion on wiring, ensuring that no loose parts exist around the unit, confirming proper oil level in engine components (if applicable), evaluating air filter condition regularly, etcetera…
All of these elements are essential when maintaining optimal performance from your newly converted generator system.
Troubleshooting Tips
Before attempting to turn a car alternator into a generator, it is important for automotive engineers to understand the basics of how an alternator works. The rotational motion from the engine turns two pulleys connected by belts – one on the crankshaft and the other on the rotor shaft. This rotation causes magnetic field in which electricity is generated and stored in a device called a rectifier bridge.
To ensure that your alternator-turned-generator functions correctly, proper preventative maintenance must be conducted as well as voltage testing and temperature monitoring. Regularly checking wires and connections to make sure they are tight will help with power output issues caused by poor contact or wiring problems. Additionally, you should check all mechanical components such as bearings and fans to see if any need replacing due to wear or tear over time.
Voltage testing can also be done using an ammeter or multimeter set at high ranges of 20 volts DC (direct current) or more. If there is too little voltage being produced, it could indicate that either the brushes may need replacing or something else needs attention within the charging system circuit.
Lastly, when running at full capacity, temperature monitoring plays an essential role for preventing overheating related damage, so always keep an eye out for any excessive heat build up coming from various parts of your converted generator setup during operation. Overall, understanding these key aspects before starting this project helps guarantee success in turning an automobile’s alternator into a functioning generator unit down the line.
Ready to Build Your Own Off-Grid Power System?
The number one reason DIY magnetic generators fail isn’t the physics—it is a lack of precision tools. Don’t drill a single hole or twist a single wire until your workspace is set up like a professional energy lab. Grab our free 17-page blueprint covering the exact tools, safety gear, and air-gap instruments you need to succeed on your first try.
Frequently Asked Questions
How Do I Determine The Wattage Of The Generator?
Determining the wattage of your generator is a key step in ensuring that its efficiency and voltage requirements are met. As an automotive engineer, I can assure you that this process involves careful wiring consideration to ensure maximum output potential. When working with car alternators, it’s important to be aware of the power rating (in watts) so that any necessary adjustments may be made before use. Understanding how much energy the generator is capable of producing will help provide insight into what tasks you’re able to accomplish with it.
What Safety Precautions Should I Take When Working With An Alternator?
When working with an alternator, safety should always be the top priority. It is important to take all necessary precautions when dealing with electrical wiring and ensure that you are in a safe environment. Persons involved in the project should also wear personal protection equipment such as gloves, goggles and sturdy footwear. Additionally, any tools used should be properly grounded and if possible use insulated tools while conducting work on the alternator or other components of the power system. Ensuring these measures are taken will help keep everyone safe throughout the process.
Are There Any Additional Components Or Accessories I Should Buy?
When it comes to turning an alternator into a generator, you need the right tools and parts to get the job done. To ensure success in this endeavor, calculating costs and installing additional components or accessories is essential. You don’t want to be caught off guard with unexpected expenses or complications due to inadequate supplies. It’s like playing Russian roulette – one wrong move could cost you dearly!
So before starting your project, make sure that you have everything from wiring diagrams to extra hardware on hand; otherwise, what seemed like a simple task can quickly turn into a nightmare.
What Type Of Fuel Should I Use To Power The Generator?
When it comes to powering a generator, the type of fuel used is an important factor in maximizing its efficiency and voltage output. Cost comparison should also be taken into account when deciding which fuel source to use. Diesel or gasoline are generally accepted as the most cost-effective fuels for generators due to their high energy density and low emissions, but other types such as propane or natural gas can also be used depending on your specific needs. Ultimately, whichever option you choose will depend on how much power you need from your generator and what kind of budget you have available.
How Often Should The Alternator Be Serviced?
When it comes to servicing an alternator, maintenance intervals should be consistent and regular. Voltage regulation needs to be monitored for optimal power output, and it’s recommended that the alternator is checked at least every 12 months or so. This ensures any potential problems are detected early on in order to prevent large-scale damage down the line. As a automotive engineer, I highly recommend you adhere to these guidelines when turning your car alternator into a generator.
Conclusion
The conversion of a car alternator into a generator is not an easy task. It requires attention to detail and precision in order to get the job done right. I can assure you that with careful preparation, proper safety precautions, and quality parts, your new generator will be running like a dream in no time – it’ll be so powerful it’ll feel like lightning!
I strongly recommend having the alternator serviced regularly for optimal performance. This will ensure that all components are working properly, avoiding any potential malfunctions or electrical fires down the line. With the correct fuel source, this generator should provide more than enough energy for whatever purpose you have in mind.
Before you leave, don’t forget to check out the revolutionary Infinite Energy System, the ultimate solution for green, cheap electricity. With 95% less space and 98% cheaper than traditional solar panels, it slashes power bills by 80%. Don’t miss out on this game-changing innovation.