Many homeowners are now considering solar panel installation as a way to reduce their carbon footprint and save on energy costs. While hiring a professional solar installer may seem like the easiest option, a DIY solar installation can also be a cost-effective and rewarding alternative. However, it requires the right tools and knowledge to get the job done right.
This article aims to provide homeowners with the essential tools needed for a successful DIY solar installation. From a digital multimeter to a solar panel hanger, we will cover everything you need to know to ensure that your solar panel installation is completed efficiently and effectively.
Additionally, we will explore the benefits of solar energy, including the potential to save money on energy bills and reduce carbon emissions. With the right tools and information, homeowners can take a step towards a more sustainable future and join the growing community of solar energy users.
Key Takeaways
- Installing solar panels yourself can save you money on the overall installation process.
- Proper planning and system design are crucial for a successful solar installation.
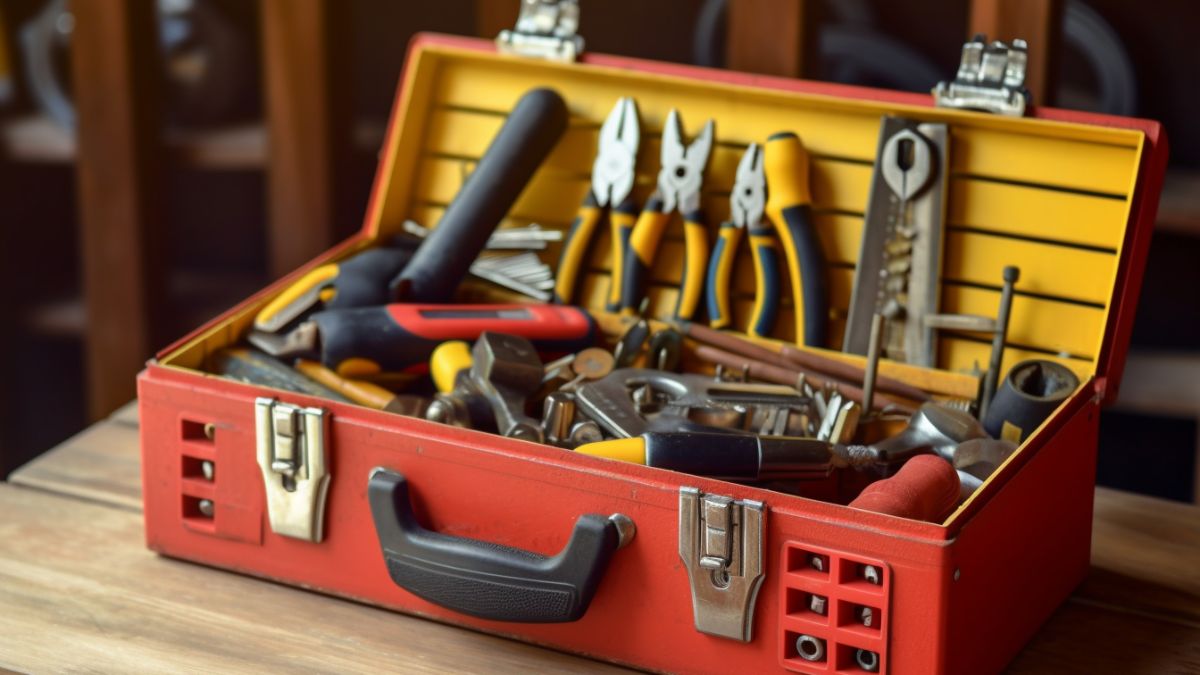
- There are essential tools needed for solar panel installation, including a digital multimeter, battery-operated drill, hack saw, flat pry bar, and more.
- Solar panel financing and incentives are available for homeowners who cannot afford the initial investment.
Solar Energy Benefits
Solar energy offers a multitude of benefits, including affordability, environmental protection, reduced reliance on non-renewable energy sources, increased home value, and long-term cost savings.
By harnessing the power of the sun, solar energy provides a sustainable and renewable energy source that has a significantly lower environmental impact than traditional fossil fuels. This is because solar energy does not produce harmful emissions that contribute to air and water pollution, greenhouse gas emissions, or climate change.
In addition to its environmental benefits, solar energy also offers significant cost savings over the long term. While the initial investment in solar panels may be high, the long-term savings in electricity bills can be substantial. Homeowners who install solar panels can also increase the value of their properties while reducing their dependence on the grid and achieving energy independence. This makes solar energy an attractive option for those who want to reduce their environmental impact while also saving money.
Overall, solar energy provides a sustainable and renewable energy source that has numerous benefits over traditional fossil fuels. By reducing reliance on non-renewable energy sources, solar energy promotes sustainability and energy independence while also providing long-term cost savings and environmental protection.
These benefits make solar energy an attractive option for homeowners looking to reduce their environmental impact and achieve energy independence. Moving forward, the focus shifts to the tools necessary for a successful solar panel installation.
Digital Multimeter
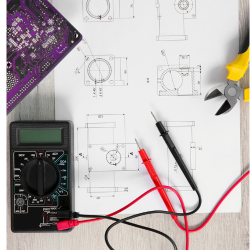
One of the most important tools for ensuring a successful solar panel installation is the digital multimeter. This tool is essential for testing the quality of power emitted from each cell and troubleshooting any electrical issues that may arise during installation.
Using a digital multimeter for solar panel installation is crucial for ensuring that the panels are functioning optimally and efficiently. When using a digital multimeter for solar panel installation, it is crucial to understand the importance of accurate power readings. This tool measures the voltage, amperage, and resistance of each solar cell, enabling you to detect any defects or inefficiencies.
Troubleshooting common issues with digital multimeters, such as incorrect readings or a faulty battery, can help you avoid installation errors and ensure that your solar panels are producing maximum power. Choosing the best multimeter for your DIY solar project is vital. Look for a multimeter with a high level of accuracy, a sturdy build, and a wide range of measurement capabilities.
Additionally, it is essential to maintain your digital multimeter correctly, ensuring that it is calibrated and stored appropriately. With the proper use and maintenance, a digital multimeter can be a valuable tool for any DIY solar installation project. When it comes to installing solar panels, a battery-operated drill is also an essential tool. It is portable, efficient, and powerful enough to handle all the drilling tasks on the roof.
To ensure a successful installation, using both a digital multimeter and a battery-operated drill is crucial.
Battery-Operated Drill
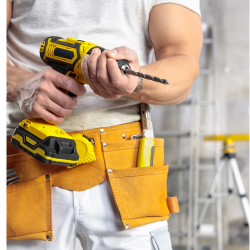
A high-quality battery-operated drill is a crucial component of any successful solar panel installation, allowing for efficient and precise drilling tasks that are necessary for the completion of the project. When choosing a drill, it is important to consider its efficiency, cordless options, and power output.
A drill with sufficient power output will be able to handle the thickness of the roof and the mounting hardware, while cordless options provide greater flexibility and maneuverability on the roof. Another important aspect to consider when selecting a drill is its battery life, charging time, and portability.
A drill with a long battery life will allow for uninterrupted work, while quick charging times will minimize downtime. Portability is also a key factor, as it allows for easy transportation of the drill to the installation site. It is important to ensure that the drill is adequately charged prior to use, as this will maximize its efficiency and effectiveness.
When using a drill, it is important to observe safety tips, such as wearing protective equipment and handling the tool with care. Additionally, proper maintenance of the drill is crucial to ensure its longevity and functionality. Accessories such as drill bits and attachments can also enhance the drill’s versatility and usability. However, manual options and specialized tools may also be considered as alternatives to drilling, depending on the specific needs of the installation.
Moving on to the next tool, a hack saw is an affordable and easy-to-use alternative to specialized cutting tools.
Hack Saw
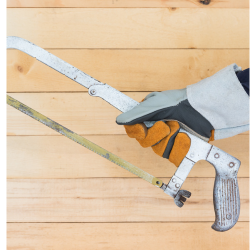
Hack saws are a cost-effective and user-friendly cutting tool that can be utilized in solar panel installation as an alternative to specialized cutting tools. When choosing the right hack saw for your solar panel installation project, consider the blade material, length, and teeth per inch. A high-quality hack saw with a fine blade will give you more control and precision when cutting solar panel frames, rails, and other components.
To achieve clean and accurate cuts during solar panel installation, it is essential to use the right cutting techniques. Start by marking the material to be cut and clamping it securely to a workbench. Use long, smooth strokes to cut through the material, and avoid applying too much pressure, which can cause the blade to bend or snap. Always wear safety goggles and gloves to protect your eyes and hands from flying debris and sharp edges.
Maintaining your hack saw is crucial to ensure its longevity and performance. After each use, wipe down the blade with a clean cloth to remove any debris or rust. Apply a thin coat of oil or lubricant to the blade to prevent corrosion. Store your hack saw in a dry area away from moisture and extreme temperatures. Regularly inspect the blade for signs of wear and tear, and replace it as needed to ensure optimal cutting results.
When you have finished cutting solar panel components with your hack saw, the next step is to use a flat pry bar to slide the flashing under the shingles and install mounts directly on the roof or beneath the shingles.
Flat Pry Bar
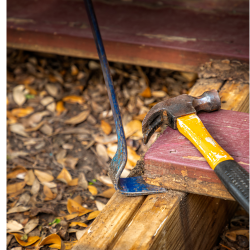
Using a flat pry bar during solar panel installation is like using a key to unlock a door, as it helps to slide the flashing under the shingles and install mounts securely on the roof or beneath the shingles. The flat pry bar is an affordable and versatile tool that can be used in many DIY projects, making it an excellent addition to any homeowner’s toolkit.
Uses of a Flat Pry Bar in Solar Panel Installation
Here are some of the uses for a flat pry bar during solar panel installation:
- Sliding the flashing under the shingles: The flat pry bar is useful for sliding the flashing under the shingles, which helps to prevent water from seeping into the roof. This step is crucial during solar panel installation since it ensures that the roof remains intact.
- Installing mounts: The flat pry bar can also be used to install mounts directly on the roof or beneath the shingles. This technique ensures that the mounts are securely in place and can handle the weight of the solar panels.
- Removing old shingles: In some cases, homeowners may need to remove old shingles before installing the solar panels. The flat pry bar can be used to remove the old shingles safely and efficiently.
Choosing the right flat pry bar is essential for a successful solar panel installation. Look for a pry bar with a comfortable grip and a sturdy construction. It’s also important to choose the right size based on the size of the solar panels and the roof.
Before using a flat pry bar, it’s crucial to understand the proper techniques to ensure safety and prevent damage to the roof and solar panels. Always wear gloves and eye protection when using a flat pry bar. Additionally, regularly maintaining the flat pry bar can help extend its lifespan and ensure that it works correctly.
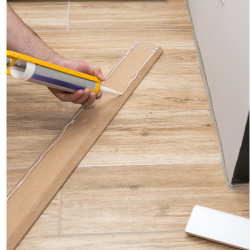
Using a flat pry bar is just one of the many tools required for a successful solar panel installation. The next step in the process is to use a caulk gun to apply sealant safely and accurately.
Caulk Gun
A conduit bender is like a sculptor’s chisel, used to shape conduit precisely for solar panel installations. It is essential for creating odd angles and fitting the conduit to the desired shape. There are manual and hydraulic benders available, each with their own advantages and disadvantages.
Bending techniques vary depending on the conduit material, such as using a heat gun for PVC conduit. PVC, metal, and flexible conduits have different pros and cons. Common mistakes include incorrect angles and too much pressure, leading to cracking or breaking.
Safety precautions, like wearing goggles and gloves, clamping the conduit securely, and following the manufacturer’s instructions, are crucial. Once the conduit is bent, screws are used to secure the solar panel on the roof.
Conduit Bender
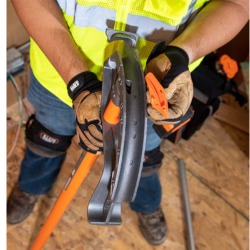
A conduit bender is akin to a sculptor’s chisel, allowing the installer to shape the conduit with precision and finesse to match the layout of the solar panel system. This tool is essential for making odd angles when installing solar panels, as it can bend the conduit material to fit the desired shape.
There are different types of conduit benders available on the market, including manual benders and hydraulic benders, each with their own set of advantages and disadvantages. Bending techniques can vary depending on the type of conduit material used. For example, some installers may choose to use a heat gun to soften the PVC conduit before bending it.
It’s important to note that there are different types of conduit available, including PVC, metal, and flexible conduit, each with their own set of advantages and disadvantages. Common mistakes made when using a conduit bender include not bending the conduit at the correct angle or placing too much pressure on the conduit, which can cause it to crack or break.
Safety precautions should always be taken when using a conduit bender, as it can be a dangerous tool if not used properly. It’s important to wear safety glasses and gloves when working with conduit, as well as to make sure the conduit is securely clamped in place before bending. Additionally, it’s important to follow the manufacturer’s instructions and guidelines when using a conduit bender to ensure proper use and prevent accidents.
With the conduit bent to the desired angle, the next step is to use screwdrivers to hold the entire solar panel in place on the roof by screws.
Screwdrivers
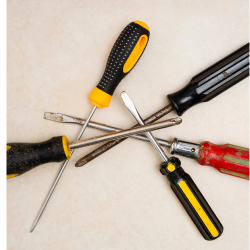
Screwdrivers are an important tool for securely fastening solar panels to the roof during installation. There are various types of screwdrivers, such as Phillips head and flathead screwdrivers, that are useful for different types of screws. It’s essential to use the correct type of screwdriver to avoid damaging the screws or the panels. Additionally, screwdriver safety should be taken into consideration during the installation process. It’s crucial to use a screwdriver with a comfortable grip to prevent any hand injuries and to avoid over-tightening the screws.
Proper screwdriver maintenance is also essential to ensure their longevity and functionality during the installation process. Screwdrivers should be cleaned and stored correctly to prevent rust or damage. It’s crucial to keep the screwdriver blades sharp to avoid damaging the screws or the panels. If a screwdriver becomes damaged, it should be replaced immediately to prevent any accidents during the installation process.
While screwdrivers are a necessary tool for solar panel installation, there are alternative tools that can be used to fasten the panels to the roof. For example, a power drill with a screwdriver bit can be used to speed up the installation process. However, it’s essential to use a power drill with caution and to avoid over-tightening the screws.
Proper screwdriver storage and maintenance are necessary for a successful solar panel installation. Moving on to the next step, wire stripper/cutters are necessary for wiring the solar panels.
Wire Stripper/Cutter
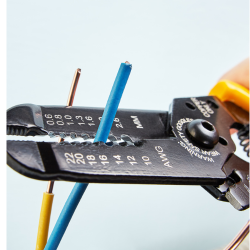
To ensure proper electrical connectivity for solar panel installation, a cutting and stripping tool is necessary. A wire stripper/cutter is a crucial tool for wiring the solar panels and ensuring that the wiring is done accurately and safely. This tool can cut and strip wires of different sizes, making it easy to work with different types of wires during the installation process.
DIY tips for using a wire stripper/cutter include ensuring that the tool is in good condition before use, selecting the appropriate size of wire to strip or cut, and avoiding damaging the wires while stripping or cutting them. Safety precautions should be observed during the entire process, such as wearing protective gloves and glasses. Common mistakes to avoid include cutting the wire too short, stripping too much of the insulation, or accidentally cutting the wire while stripping.
Maintenance techniques for this tool include keeping it clean and dry, avoiding overuse or misuse, and storing it in a safe place. Alternative options to a wire stripper/cutter include using a utility knife or scissors, but these options are less efficient and may not produce accurate and safe results. The wire stripper/cutter is an essential tool for anyone planning on installing solar panels themselves, and it is important to use it correctly to ensure a successful installation.
Using a wire stripper/cutter is just one step in the process of installing solar panels. The next step is to use a tape measure to determine the number of panels that your roof can comfortably accommodate and the exact place where you will install the mounts.
Tape Measure
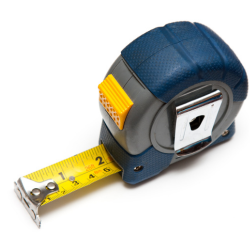
Before wiring the solar panels, it is important to ensure that the installation process is precise and accurate. The previous subtopic discussed the wire stripper/cutter, an essential tool for wiring the panels. In this section, we will explore the importance of the tape measure during a DIY solar panel installation.
Measuring accuracy is crucial when installing solar panels on your roof. A tape measure is an essential tool for determining the number of panels that your roof can comfortably accommodate and the exact place where you will install the mounts.
Before beginning the installation process, it is important to conduct a roof assessment to determine the best location for the panels. The tape measure will assist in measuring the roof’s dimensions, including the slope and angle, which will help you decide on the best panel placement.
Mounting options for solar panels vary depending on your roof’s structure. Using a tape measure will help you determine the distance between the roof rafters and the size of the mounting brackets needed. Additionally, the tape measure will come in handy when marking the drilling spots for the brackets, ensuring that they are evenly spaced and aligned.
Taking precise measurements with a tape measure will help prevent errors during the installation process, which could lead to problems with the panel’s stability or performance.
Now that we have discussed the importance of measuring accuracy and roof assessment during a DIY solar panel installation, the next section will focus on the solar panel hanger, a must-have tool for anyone who plans on installing panels.
Solar Panel Hanger
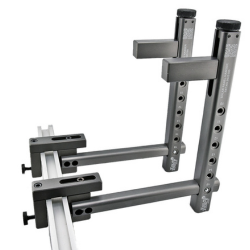
Accurately hanging solar panels can be challenging, but a DIY solar panel hanger can make the process much easier and efficient. A solar panel hanger is a must-have tool for anyone who plans on installing panels, as it helps to ensure that the panels are securely mounted and properly angled for maximum sun exposure.
Here are some advantages of using a solar panel hanger:
- Safety: A solar panel hanger can help prevent accidents during installation by providing a secure and stable platform for the panels. It can also reduce the risk of damage to the roof or the panels themselves.
- Efficiency: A solar panel hanger can help make the installation process more efficient by saving time and effort. It can also help ensure that the panels are installed at the correct angle to maximize their energy production.
- Flexibility: There are different types of solar panel mounts that can be used with a solar panel hanger, depending on the type of roof and the desired angle of the panels. This allows for greater flexibility in the installation process.
In addition to using a DIY solar panel hanger, there are other important factors to consider when installing solar panels. For example, it’s important to follow installation safety tips to avoid accidents and injuries. It’s also important to properly maintain the panels to ensure their longevity and optimal performance.
Finally, homeowners should consider the advantages of solar leasing, which can help make solar energy more affordable and accessible.
Frequently Asked Questions
What is the average lifespan of a solar panel system?
The average lifespan of a solar panel system is typically around 25-30 years. Solar panel durability and low maintenance costs make them a long-term investment for homeowners. Replacement options are available, and energy storage solutions can further increase their environmental impact.
How much maintenance is required for a solar panel system?
Regular solar panel cleaning, seasonal maintenance, and panel inspection are necessary to ensure optimal performance and durability. Repairing damages promptly and investing in energy storage can also minimize maintenance needs and prolong the system’s lifespan.
What are the different types of solar panels available in the market?
Solar panels available in the market include thin film, monocrystalline, polycrystalline, bifacial panels, and concentrated solar. Thin film panels are lighter and more flexible, while monocrystalline and polycrystalline offer higher efficiency. Bifacial panels can generate electricity from both sides, and concentrated solar uses lenses to focus sunlight.
Can solar panels be installed on any type of roof?
Roof compatibility is a crucial consideration when installing solar panels as different roofing materials require different structural requirements. Weather considerations and installation challenges may also arise. Professional assistance is recommended to ensure a safe and efficient installation process.
How does the placement of solar panels affect their efficiency?
The placement of solar panels can significantly impact their efficiency. Shade can have a negative impact, while angle optimization and orientation effect can improve performance. Panel spacing and weather influence also play a role in maximizing solar energy production.
Conclusion
DIY solar installation can be a cost-effective option to switch to solar energy. However, it is crucial to have the right tools on hand to ensure a successful installation.
According to a study by the National Renewable Energy Laboratory, the installation of solar panels can save homeowners up to $10,000 over a 20-year period. This data point highlights the financial benefits of switching to solar energy and emphasizes the importance of a successful DIY installation.
To illustrate the importance of having the right tools, consider the analogy of a chef preparing a meal. Just as a chef needs the right tools to create a delicious meal, a DIY solar installer needs the right tools to ensure a successful installation. Without proper tools, both the meal and the installation may be incomplete or unsatisfactory. Therefore, it is essential to invest in the right tools to achieve the desired results and reap the benefits of solar energy.