
Transitioning to renewable energy is a significant financial and structural decision. Whether your goal is to lower monthly utility bills, secure backup power, or reduce your carbon footprint, planning a solar electricity system for your home requires careful calculation and a clear understanding of the current market. This comprehensive guide outlines the seven distinct steps you must take to go from early research to flipping the switch on a fully permitted rooftop array. By following this roadmap, you will learn how to accurately size a solar system, compare modern financing options, choose the right equipment, and avoid the most common pitfalls homeowners face during installation.
Last updated: October 2026. This guide was reviewed by residential solar energy professionals for technical accuracy and updated to reflect current Federal tax incentives, modern battery storage integration, and evolving utility net metering policies.
Quick Summary: The 7 Steps to Solar
- Maximize Energy Efficiency: Reduce your home’s electrical load before sizing your panels.
- Analyze Solar Potential: Evaluate your roof’s age, shading, orientation, and HOA rules.
- Compare Financing Options: Weigh the pros and cons of cash, solar loans, leases, and PPAs.
- Size Your System: Calculate your annual kilowatt-hour (kWh) usage and account for future electrical needs like electric vehicles (EVs).
- Compare Installer Quotes: Request bids from multiple vetted local installers and compare hardware warranties.
- Navigate Incentives: Claim the federal solar tax credit and research state or local utility rebates.
- Manage Permitting and Interconnection: Understand the timeline for installation, local solar permits, and final utility approval.
Step 1: Maximize Efficiency Before Planning a Solar Electricity System for Your Home
Why it matters: The most cost-effective kilowatt is the one you never use. Solar panels are priced by the watt, meaning a larger system will cost you more money upfront. By reducing your home’s baseline energy consumption first, you can purchase a smaller, less expensive solar array while still offsetting 100% of your utility bill.
What to do: Start by conducting a home energy audit, often offered for free or at a heavy discount by your local utility company. Replace incandescent and CFL bulbs with LEDs. Seal drafts around doors and windows, and ensure your attic has adequate insulation. If you have older appliances, particularly energy-heavy units like refrigerators, electric water heaters, or HVAC systems, consider upgrading them to Energy Star–rated models or modern heat pumps before calling a solar installer.
Common mistakes to avoid: Homeowners often size and purchase a massive solar system based on their current energy usage, only to replace an old, inefficient 15-SEER air conditioner with a highly efficient variable-speed heat pump a year later. This leaves them with an oversized solar system that generates far more power than they need, which most utilities will not pay a premium for.
Practical tip: Review your last 12 months of electricity bills to find your highest usage months (typically summer for AC, or winter if you have electric heating). Target efficiency upgrades that address those specific seasonal spikes.
Step 2: Analyze Your Roof’s Solar Potential and Shade Profile
Why it matters: Solar panels rely entirely on unobstructed sunlight. The physical characteristics of your property dictate how efficiently panels will perform, what type of mounting hardware is required, and whether your home is structurally ready for the added weight.
What to do: Evaluate three main factors:
- Orientation and Pitch: In the Northern Hemisphere, south-facing roofs generate the most electricity, followed by west- and east-facing roofs. A roof pitch between 15 and 40 degrees is generally ideal.
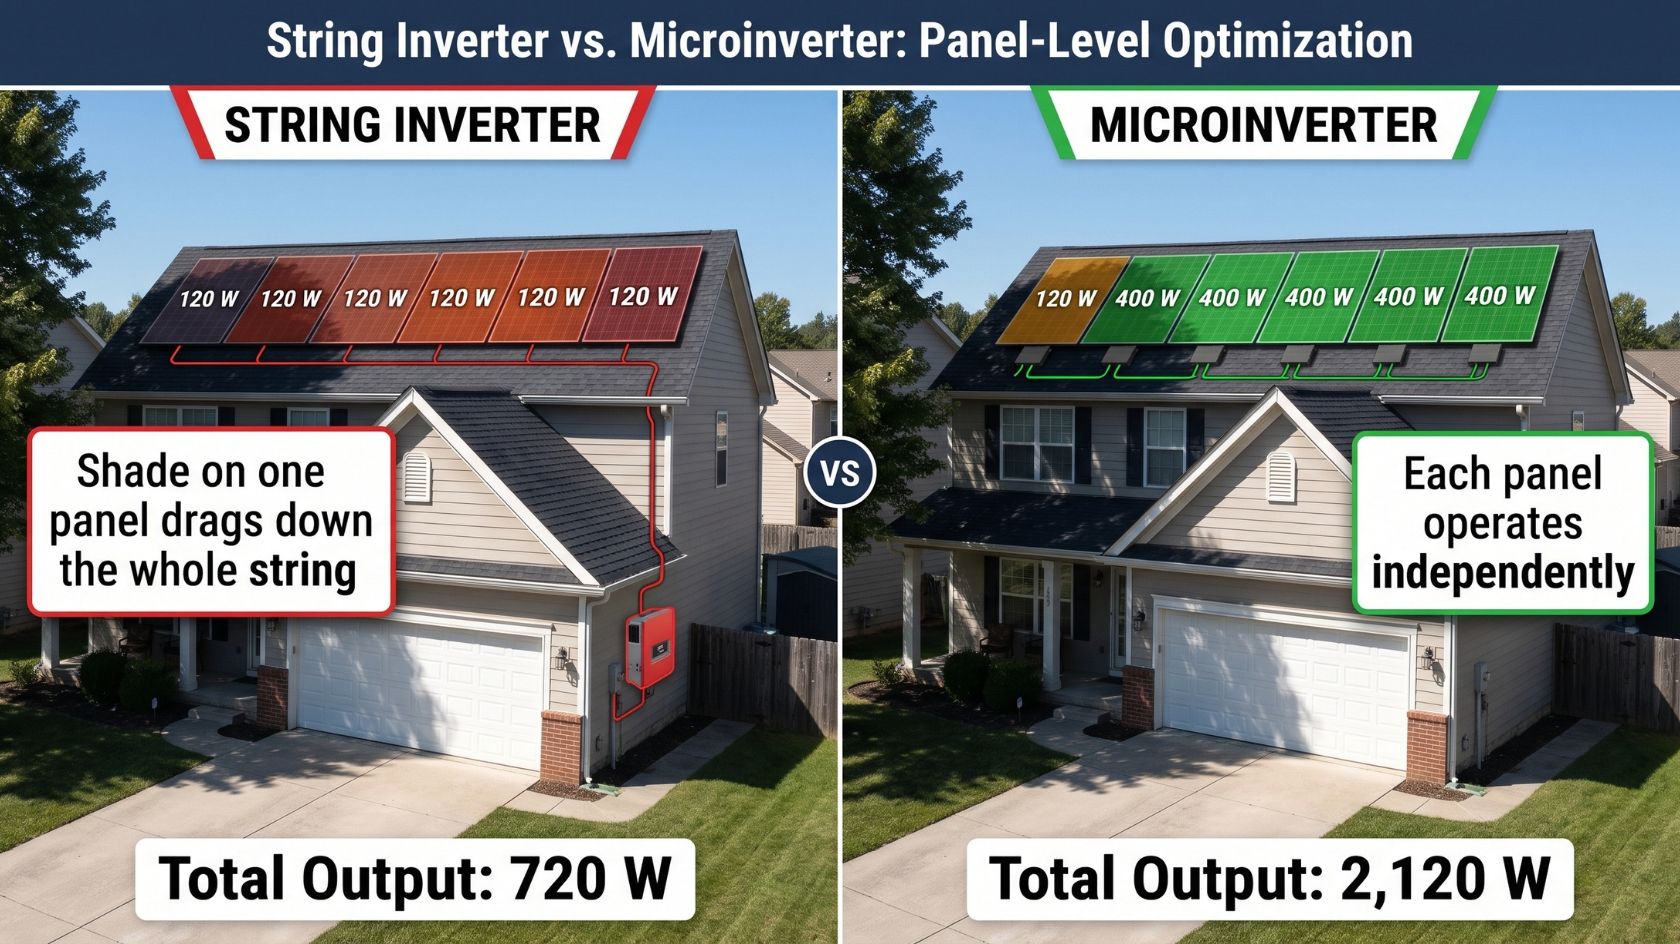
- Shading: Observe your roof at different times of the day and year. Chimneys, dormers, and neighboring buildings cast shadows. A single shaded panel can drastically reduce the output of an entire string of panels.
- Roof Condition: Solar panels last 25 to 30 years. If your asphalt shingle roof is more than 10 years old, you will likely need to replace it during the lifespan of the panels. Removing and reinstalling panels for a roof replacement later can cost thousands of dollars.
Common mistakes to avoid: Ignoring homeowners association (HOA) rules or historical district guidelines. While many states have “solar access laws” that prevent HOAs from banning solar panels entirely, they can often dictate the aesthetics, such as requiring black-on-black panels or specific wiring conduits.
Practical tip: Use the National Renewable Energy Laboratory’s (NREL) PVWatts Calculator. By typing in your address and basic roof details, this free government tool provides a highly accurate estimate of the solar radiation your specific roof receives and how much energy a system could generate there.
Step 3: Compare Financing and Ownership Options
Why it matters: How you pay for your system dictates who owns the equipment, your long-term return on investment (ROI), and crucially, who is eligible to claim the federal solar tax credit.
What to do: Evaluate your financial situation and tax appetite to choose the right model. The four primary methods for acquiring solar are cash purchase, solar loans, solar leases, and Power Purchase Agreements (PPAs).
| Feature | Cash Purchase | Solar Loan | Solar Lease | Power Purchase Agreement (PPA) |
|---|---|---|---|---|
| Upfront Cost | Highest (Full cost) | Low to None | None | None |
| Ownership | You own the system | You own the system | Third-party owns it | Third-party owns it |
| Tax Credit Eligibility | Yes (You claim it) | Yes (You claim it) | No (Third-party claims it) | No (Third-party claims it) |
| Long-term ROI | Maximum savings | High (minus loan interest) | Moderate | Low to Moderate |
| Maintenance | Your responsibility | Your responsibility | Handled by third-party | Handled by third-party |
Common mistakes to avoid: Signing a lease or PPA without reading the fine print on the escalator clause. Many of these contracts include an annual price escalator (often 2% to 3%), meaning the rate you pay the leasing company for electricity increases every year, potentially eroding your savings over a 20-year term.
Practical tip: If you choose a solar loan, pay close attention to “dealer fees.” Many low-interest solar loans (e.g., 1.99% or 2.99%) include hidden dealer fees that inflate the principal cost of the system by 20% to 30%. Sometimes a standard home equity line of credit (HELOC) or a higher-interest loan with zero dealer fees yields a better financial outcome.
Step 4: Determine How to Size a Solar System
Why it matters: A correctly sized system offsets your electricity usage without unnecessarily inflating the initial solar panel cost for homes. To do this, you must understand the difference between kilowatts (kW) and kilowatt-hours (kWh). The capacity of a solar system is measured in kW (power), while the energy you consume and produce over time is measured in kWh (energy).
What to do: Calculate your annual energy usage by adding up the total kWh consumed on your past 12 utility bills. Next, determine your area’s “production ratio”—a localized metric of how many kWh one kW of solar capacity will produce in a year (this usually ranges from 1.2 in cloudy northern areas to 1.6 in sunny southwestern states).
Sample Calculation:
If your home uses 12,000 kWh per year and you live in an area with a production ratio of 1.4:
System Size = 12,000 kWh ÷ 1.4 = 8.57 kW.
To build an 8.5 kW system using modern 400-watt panels, you would need about 21 panels.
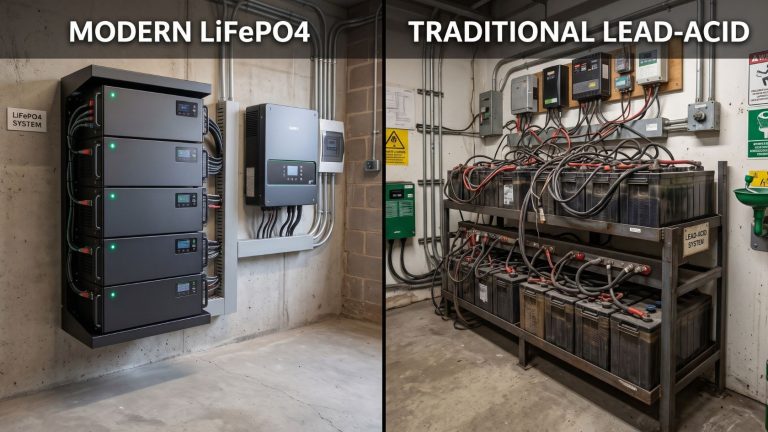
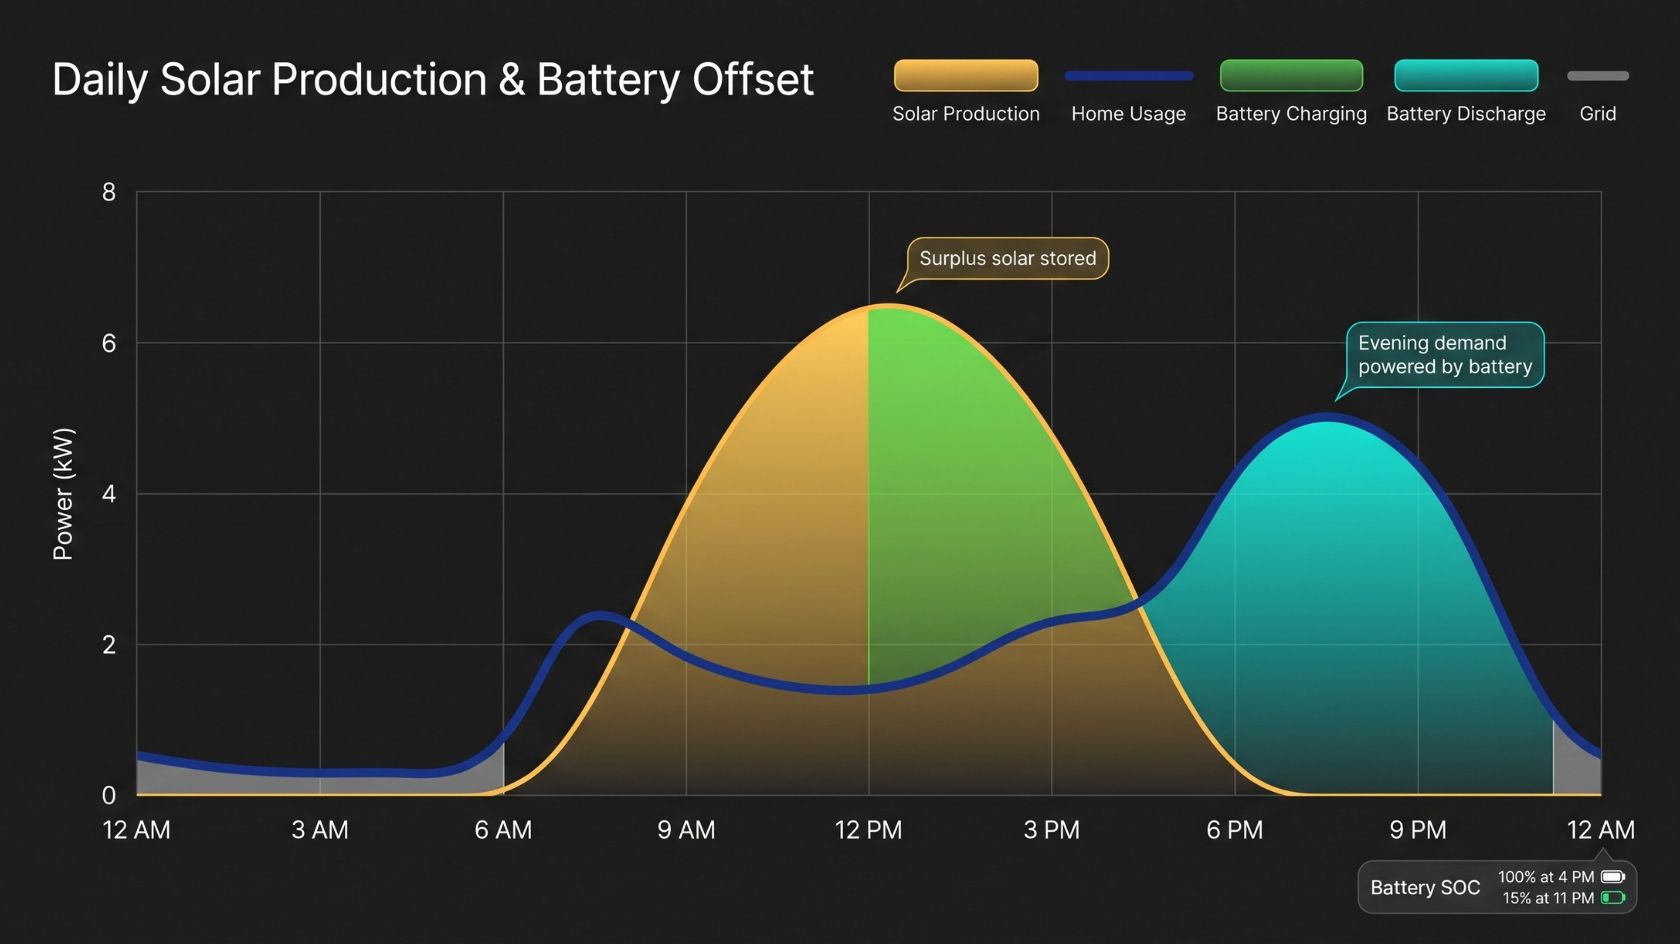
Furthermore, decide if you need solar battery storage. If your utility has frequent outages, or if your utility charges high “Time-of-Use” (TOU) rates in the evening, adding a home battery (like a Tesla Powerwall or Enphase IQ) allows you to store daytime solar production for nighttime use.
Common mistakes to avoid: Sizing strictly for the past without planning for the future. If you plan to buy an electric vehicle, switch from a gas furnace to an electric heat pump, or add an induction stove or hot tub in the next three years, you must tell your installer to factor in that future electrical load now.
Practical tip: When sizing the system, ask your installer to quote two options: one that offsets 100% of your current usage, and one that includes an extra 2-3 kW of capacity to future-proof your home.
Step 5: Follow a Solar Installer Checklist for Comparing Quotes
Why it matters: The solar industry is highly fragmented. While national brands offer brand recognition, local installers often provide better customer service, deeper knowledge of local building codes, and more competitive pricing. Prices can vary by thousands of dollars for the exact same equipment.
What to do: Obtain at least three detailed quotes. During the site visit, a reputable installer will inspect your main electrical panel to see if it requires a costly upgrade (e.g., upgrading a 100-amp panel to 200 amps).
Evaluate the hardware they propose. You will need to choose an inverter technology, which converts the direct current (DC) electricity generated by the panels into the alternating current (AC) used by your home:
- String Inverters: Cost-effective and reliable, but if one panel is shaded, the output of the whole string drops.
- Microinverters: Installed under each individual panel. They are more expensive but optimize each panel independently, making them essential for partially shaded roofs.
- String Inverters with Power Optimizers: A middle-ground solution offering independent panel optimization at a slightly lower cost than microinverters.
Common mistakes to avoid: Fixating purely on the price per watt while ignoring the warranties. A solar system should come with three warranties: a product/equipment warranty (covering hardware defects), a performance warranty (guaranteeing the panels won’t degrade below a certain percentage, usually 80-85% over 25 years), and a workmanship warranty (covering roof leaks and faulty installation).
Practical tip: Check the installer’s credentials. Ensure they are certified by the North American Board of Certified Energy Practitioners (NABCEP), which is the gold standard for solar installation training.
Step 6: Navigate the Solar Tax Credit and Local Incentives
Why it matters: Government incentives can reduce the gross cost of a solar installation by a third or more, drastically shortening your payback period. However, incentives are subject to complex tax rules and state-level expiration dates.
What to do:
- The Federal Residential Clean Energy Credit (ITC): Under current law, homeowners who purchase their system can claim a tax credit equal to 30% of the gross system cost (including panels, labor, permitting, and battery storage).
- State and Local Rebates: Many states offer additional tax credits, upfront cash rebates, or property tax exemptions (ensuring your property taxes do not increase due to the added value of the solar system).
- Solar Renewable Energy Certificates (SRECs): In some states, you earn certificates for the clean energy you produce, which you can then sell to utility companies for cash, creating an ongoing revenue stream.
Common mistakes to avoid: Confusing a tax credit with a cash refund. The 30% federal ITC is a non-refundable tax credit. It reduces the federal income tax you owe dollar-for-dollar. If you owe $0 in federal income tax, you cannot take advantage of the credit in that year (though you can roll the remaining credit forward to future tax years).
Practical tip: Search the Database of State Incentives for Renewables & Efficiency (DSIRE). Operated by NC State University, this free database allows you to enter your zip code and see a comprehensive, up-to-date list of every federal, state, and utility-level solar incentive available to you. Always consult a certified public accountant (CPA) to confirm your eligibility for tax credits.
Step 7: Manage Solar Permits, Installation, and Net Metering
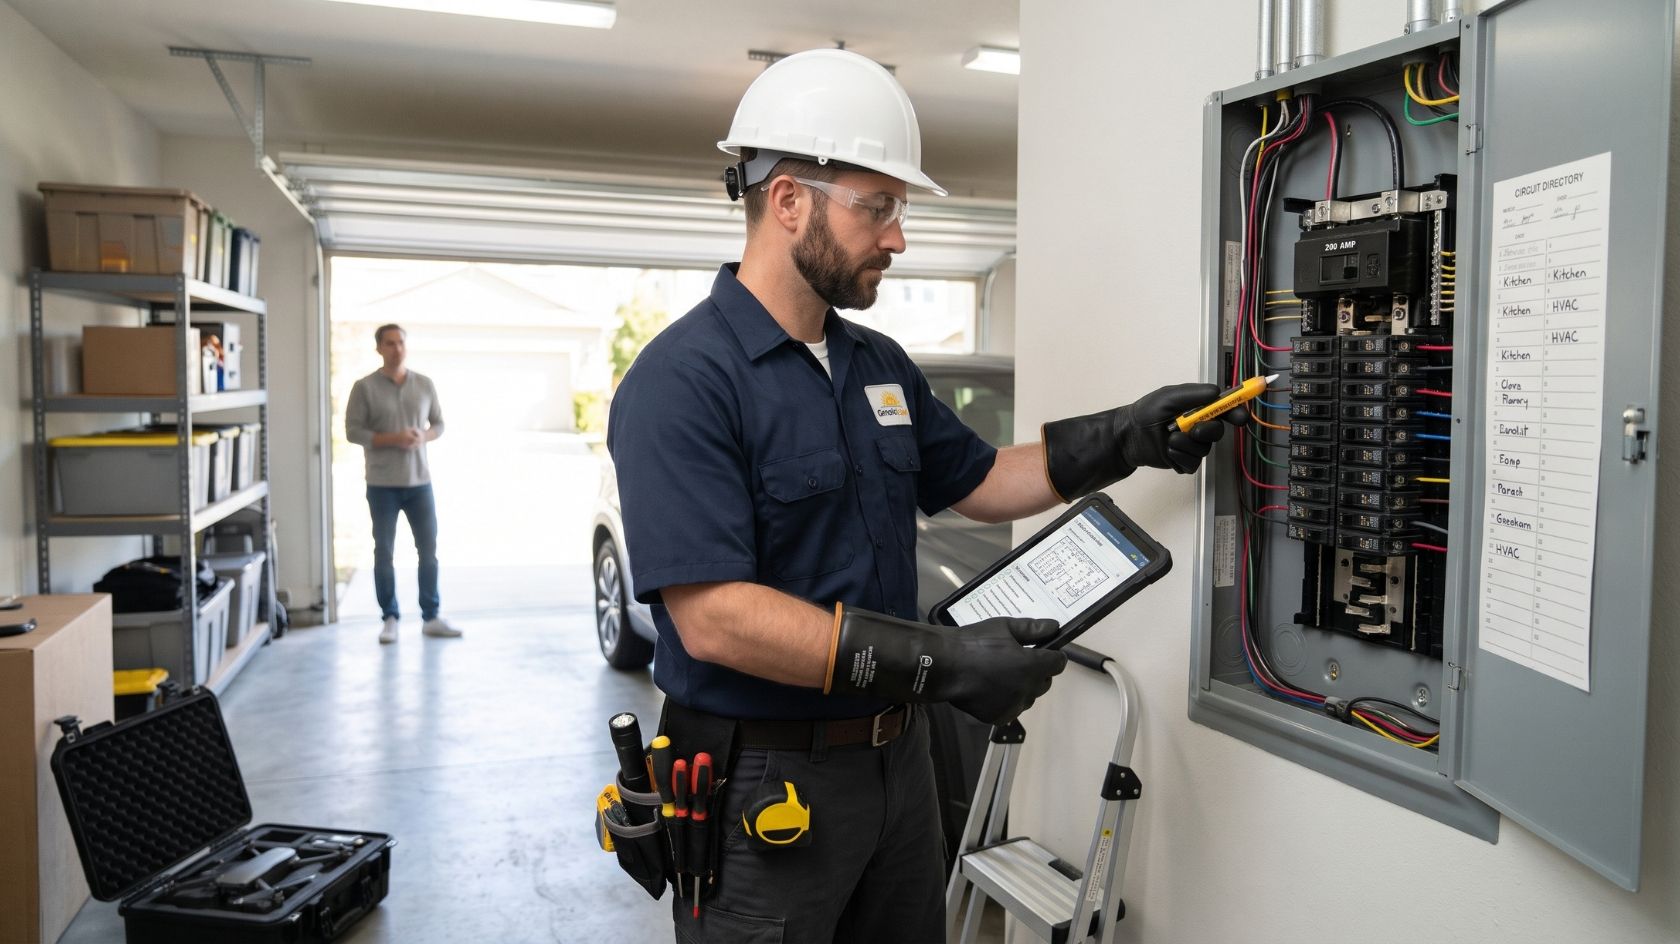
Why it matters: The actual physical installation of solar panels usually takes just one to three days. However, the administrative red tape before and after the physical work can take weeks to months. Understanding this timeline prevents frustration and ensures you are legally allowed to operate your system.
What to do: Once you sign a contract, your installer handles the engineering designs and submits them to your city or county for building and electrical solar permits.
Simultaneously, the installer will apply for an interconnection agreement with your utility company. You must also establish how you will be compensated for excess energy sent back to the grid.
- Net Metering: The utility credits you at the full retail rate for every kWh you send to the grid.
- Net Billing / Time of Use: Many utility companies are moving away from traditional net metering. Instead, they buy your excess solar at a lower “wholesale” rate and sell power to you at a higher retail rate. If you live in a state that has transitioned to net billing, adding solar battery storage is often economically necessary to maximize your savings.
After the system is built, a city inspector will visit to ensure code compliance. Finally, the utility company will install a bi-directional meter and issue your Permission to Operate (PTO).
Common mistakes to avoid: Turning on the solar system before you receive official Permission to Operate (PTO) from your utility. Doing so can result in fines, voided warranties, or even the utility company billing you for the electricity you generated and pushed onto the grid, because their old meter cannot read the flow of energy backwards.
Practical tip: Maintain open communication with your installer’s project manager. Ask for weekly updates on permit statuses, as municipal planning offices and utilities are often the primary bottlenecks in the home solar panel installation steps.
Questions to Ask Solar Installers
Before signing a contract, ensure you have clear answers to these questions:
- Are you locally licensed, bonded, and insured, and are your installers NABCEP certified?
- Do you use subcontractors for the electrical work or the roof installation?
- What is the degradation rate of the panels you are quoting?
- How long is the workmanship warranty, and does it cover roof leaks?
- Does your quote include the cost of upgrading my main electrical panel if it is required by code?
- What is the estimated timeline from signing the contract to receiving Permission to Operate?
Frequently Asked Questions (FAQ)
The gross cost of a residential solar system typically ranges from $15,000 to $30,000, or roughly $2.75 to $3.50 per watt before incentives. After applying the 30% federal tax credit, the net cost drops significantly. Pricing varies based on location, system size, and equipment quality.
No, a standard grid-tied solar system will automatically shut down during a power outage to prevent sending live electricity into the grid and injuring utility line workers. To have power during an outage, you must install solar battery storage or an specialized inverter with an islanding feature.
While the physical installation on your roof usually takes one to three days, the entire process—from signing the contract to site surveys, permitting, utility interconnection, and final inspections—typically takes two to four months depending on local bureaucracy.
If you own the system via a loan, you can either pay off the remaining balance using the proceeds from the home sale, or you can attempt to transfer the loan to the homebuyer. Homes with fully paid-off solar systems typically sell faster and at a premium.
Batteries are not strictly necessary if your utility offers strong 1-to-1 net metering, acting as a virtual battery. However, if you experience frequent blackouts or if your utility uses time-of-use pricing and low wholesale export rates, a battery is essential to maximize your savings and resilience.
Conclusion
Planning a solar electricity system for your home is a multi-step process that demands thorough research, but the long-term benefits of energy independence and lower utility bills are well worth the effort. By maximizing your home’s efficiency, accurately sizing your system, understanding your financing options, and vetting local installers, you can confidently navigate the solar landscape. Your next step is to pull your last 12 months of utility bills, calculate your annual usage, and reach out to three reputable local installers for customized quotes.
Sources and Further Reading
- National Renewable Energy Laboratory (NREL): PVWatts Calculator.
- U.S. Department of Energy (DOE): Homeowner’s Guide to the Federal Tax Credit for Solar Photovoltaics.
- DSIRE (NC Clean Energy Technology Center): Database of State Incentives for Renewables & Efficiency.
- Solar Energy Industries Association (SEIA): Residential Consumer Guide to Solar Power.
- Internal Revenue Service (IRS): Form 5695 (Residential Energy Credits) Instructions.