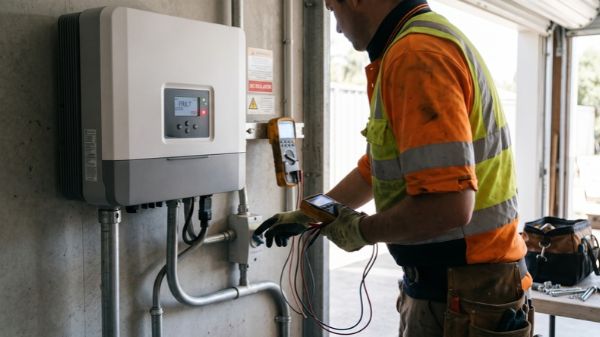
A solar inverter failure stops your entire photovoltaic (PV) system from generating usable electricity. When your inverter displays fault codes, drops production, or shuts down completely, you face an immediate decision: fix the underlying issue or upgrade the unit. Deciding whether to repair or replace depends primarily on the unit’s age, your warranty status, and the cost of replacement parts. This guide explains why inverters fail, how to safely handle solar inverter troubleshooting, and the exact framework technicians use to recommend a repair or a full replacement.
Key Takeaways
- Lifespan: String inverters typically last 10 to 15 years, while microinverters can last up to 25 years.
- Safety First: PV conductors remain energized in sunlight. Never open the inverter casing or touch DC wiring yourself.
- Warranty Factor: If your failing inverter is under a valid manufacturer warranty, a repair or authorized replacement is usually the best financial choice.
- The 50% Rule: If a unit is out of warranty and repair costs exceed 50% of the price of a new inverter, replacement is generally the smarter long-term investment.
How Long Should Solar Inverters Last?
Solar panels often produce power for 25 to 30 years, but the inverter is the hardest-working component in your system. It constantly manages high-voltage direct current (DC) and converts it to alternating current (AC), generating significant heat in the process. Because of this thermal and electrical stress, solar inverter lifespan is generally shorter than the panels they serve.
- String Inverters: 10 to 15 years. These centralized units manage power from multiple panels. Most manufacturers provide standard warranties of 5 to 10 years, with options to extend.
- Microinverters: 20 to 25 years. Installed beneath individual panels, microinverters process less power per unit and isolate thermal stress. Standard warranties typically cover 25 years.
- Power Optimizers: 20 to 25 years. These DC-to-DC converters pair with a central string inverter. The optimizers last longer, but the central unit will still follow the 10 to 15-year string timeline.
- Hybrid Inverters: 10 to 15 years. Built to handle both solar generation and battery storage charging, these units manage complex energy flows and follow similar lifespans to standard string inverters.
Keep in mind that these ranges are averages. Actual longevity varies based on internal component quality, regional climate, and installation workmanship.
Signs Your Solar Inverter Is Failing
Catching a failure early can prevent prolonged system downtime and lost energy savings. Look for these distinct warning signs of a failing solar inverter:
- Error Codes and Fault Lights: Most modern inverters feature LED status indicators or digital displays. A solid or flashing red light, or specific alphanumeric solar inverter fault codes (like “Grid Fault” or “Isolation Error”), indicates a system hardware or grid synchronization issue.
- Zero or Low Energy Production: If it is a clear, sunny day but your monitoring app shows zero kilowatt-hours (kWh) generated, the inverter is likely failing to convert or export power.
- Frequent Re-Starts and Shutdowns: An inverter that constantly clips, resets, or shuts down during peak sunlight hours is often struggling with overheating or grid voltage parameters.
- Unusual Noises: While slight humming during operation is normal, loud buzzing, clicking, or grinding sounds point to failing internal cooling fans, deteriorating capacitors, or switching component issues.
- Overheating: If the metal casing is too hot to touch, the internal cooling mechanisms (heat sinks or internal fans) are failing.
- Blank Display and Connectivity Loss: A completely dead screen or a unit that repeatedly drops off your Wi-Fi network—despite a strong router signal—can indicate a failing internal control board or blown communication chip.
Why Solar Inverters Fail
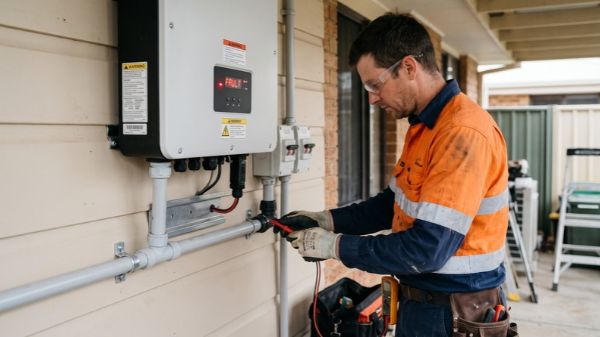
Inverters consist of complex power electronics designed to operate in harsh outdoor environments. When solar inverter failure occurs, technicians typically trace it back to one of the following root causes.
Overheating and Poor Ventilation
Heat is the primary enemy of power electronics. When an inverter operates, it generates heat that must be dissipated rapidly to protect sensitive circuits.
- Mechanism: If an inverter is installed in direct sunlight, in a hot attic, or without adequate clearance for airflow, internal components surpass their maximum temperature thresholds. Constant thermal cycling (heating and cooling) degrades solder joints and damages microchips.
- Warning Signs: Frequent clipping (automatically reducing power output to cool down), loud fan noises, or specific temperature-related fault codes.
- Prevention: Install string inverters in shaded, well-ventilated areas, preferably on a north-facing or east-facing wall (in the Northern Hemisphere). Ensure installers leave the manufacturer-specified clearance space around the chassis.
Capacitor and Component Aging
Electrolytic capacitors inside the inverter store and smooth electrical energy, ensuring a clean AC output. Over time, the electrolyte paste inside them dries out.
- Mechanism: As capacitors age and dry, their internal electrical resistance increases. This generates even more heat, eventually leading to a rupture, bulge, or short circuit on the circuit board. This is a natural wear-and-tear process.
- Warning Signs: Gradual decline in conversion efficiency, low buzzing noises, or a sudden complete failure after 10 or more years of service.
- Prevention: While aging is inevitable, keeping the unit out of direct sunlight slows electrolyte evaporation and prolongs capacitor life.
Grid Voltage Fluctuations and Outages
Grid-tied inverters must synchronize perfectly with the utility grid’s AC voltage and frequency to export power safely.
- Mechanism: If the local utility grid experiences extreme voltage spikes, drops, or frequency shifts, the inverter will automatically disconnect to protect itself and utility workers (anti-islanding). Continuous exposure to unstable grid voltage heavily stresses the internal AC contactors and relays.
- Warning Signs: “Grid Fault,” “AC Out of Range,” or “Overvoltage” error codes. The inverter may repeatedly click loudly as it tries to connect and disconnect from the grid.
- Prevention: Minor grid fluctuations are unavoidable. If faults are frequent, a technician can sometimes adjust the inverter’s grid profile settings to tolerate wider legal voltage parameters, though this requires utility approval.
Power Surges and Lightning
Solar systems are directly connected to both the exposed roof arrays and the municipal power grid, making them highly susceptible to electrical surges.
- Mechanism: A nearby lightning strike or a severe utility power surge can send massive voltage spikes through the DC or AC wiring, instantly frying the inverter’s sensitive circuit boards, fuses, and varistors.
- Warning Signs: Sudden, permanent system death immediately following a severe storm or power outage. You may notice burn marks or the smell of ozone near the inverter.
- Prevention: Install dedicated AC and DC surge protection devices (SPDs) at the inverter and main electrical panel.
Moisture, Dust, and Pest Ingress
Inverters are typically rated NEMA 3R, 4, or 4X (IP65) for outdoor use, but they are not impenetrable fortresses.
- Mechanism: Over time, rubber weather seals degrade. Condensation builds up inside, or driving rain penetrates poorly sealed conduit fittings. Furthermore, insects, spiders, and rodents often nest inside the warm casing, creating short circuits across electrical terminals.
- Warning Signs: Ground fault error codes, tripped AC breakers, visible rust on the casing, or physical debris visible in the cooling fins.
- Prevention: Regular visual inspections of the conduit seals. Do not pressure-wash near the inverter.
DC-Side Faults
Often, what looks like a solar inverter failure is actually a problem up on the roof. The inverter is simply reporting it.
- Mechanism: Degraded solar panel wiring, water trapped inside MC4 connectors, or wires chewed by squirrels can cause a path to ground. The inverter detects this electricity leak and shuts down to prevent fires.
- Warning Signs: “Isolation Fault,” “Ground Fault,” or “Arc Fault” error codes, particularly after heavy rain or snowmelt.
- Prevention: Proper wire management during installation. Cables should never rest directly on the roofing material where they can chafe or sit in puddles.
Installation or Configuration Errors
Poor workmanship accounts for a significant percentage of early failures in the solar industry.
- Mechanism: Improperly torqued terminal screws cause electrical arcing and intense heat. Mismatched string voltages (too high or too low for the inverter’s maximum power point tracking range) overwork the electronics. Incorrect regional settings cause constant grid synchronization faults.
- Warning Signs: Failures, burnt terminals, or persistent error codes occurring within the first year of operation.
- Prevention: Hire certified, licensed solar professionals. Insist on rigorous commissioning tests.
Safe First-Response Checklist
When your solar system goes offline, safety is the absolute priority. PV DC conductors can remain energized in daylight, carrying hundreds of volts of direct current, even if the inverter is powered off. Diagnostics and physical repairs strictly belong to licensed solar electricians or manufacturer-authorized technicians. Follow local electrical codes, such as NEC Article 690 in the US, which govern solar safety and disconnecting means.
What you can do safely:
- Check the display and error code: Document exactly what the screen or LED lights show. Note the time of day it happens (e.g., only in the morning, or during peak sun).
- Check the AC breaker and DC isolator: Verify that the solar AC breaker in your main electrical panel hasn’t tripped. Ensure the DC disconnect switch near the inverter is in the “ON” position.
- Check the monitoring app: Look for system alerts, firmware update notifications, or specific module-level data if you have microinverters or optimizers.
- Restart per the manual: Perform a hard reset by turning off the AC breaker, then turning off the DC isolator. Wait five minutes to let the internal capacitors fully discharge, then turn on the DC, followed by the AC.
- Visually inspect: Look for obvious external issues like chewed conduit, debris blocking the cooling fins, or flood lines on the wall.
What you MUST NOT do:
- Never open the inverter enclosure or remove the front cover.
- Never touch bare wires, MC4 connectors, or internal DC wiring.
- Never attempt to bypass fuses, breakers, or grounding protections to force the system on.
Repair or Replace: A Decision Framework
If the simple restart doesn’t clear the fault, you face the solar inverter repair or replace dilemma. Use the following framework and rules of thumb to make a financially sound decision.
Factors to Consider
| Factor | Favoring Repair | Favoring Replacement |
|---|---|---|
| Inverter Age | Under 8 years old. | Over 10 to 12 years old. |
| Warranty Status | Active, covers parts and labor. | Expired, or manufacturer bankrupt. |
| Fault Type | Screen replacement, external fan, or minor sensor glitch. | Main control board burnt, severe water ingress, capacitor blowout. |
| Repair Cost vs. Replacement Cost | Repair is less than 30-50% of a new unit. | Repair exceeds 50% of the cost of a modern replacement. |
| Parts Availability | OEM parts readily available. | Model discontinued, parts unavailable. |
| Technology Gap | Current unit meets monitoring and efficiency needs. | Desire for battery-ready (hybrid) capability or modern app monitoring. |
Rules of Thumb
These are general guidelines, not guarantees. Always consult a professional to confirm your specific situation.
- The Warranty Rule: If the inverter is under a comprehensive warranty, always pursue the repair or authorized RMA (Return Merchandise Authorization) replacement.
- The 50% Rule: If the inverter is out of warranty and the quoted repair cost (parts and labor) exceeds roughly 50% of the total cost of installing a brand-new, similarly sized unit, replacement is the better long-term choice.
- The Orphan Rule: If the manufacturer has gone out of business, replacement is usually necessary because authorized support, firmware updates, and original manufacturer parts no longer exist.
Scenario Examples
- Scenario A (Repair): A 4-year-old string inverter displays a cooling fan fault. The unit is under a 10-year warranty. The manufacturer ships a new fan, and a technician installs it. Verdict: Repair.
- Scenario B (Replace): A 12-year-old string inverter blows a main capacitor. The warranty expired at year 10. The repair quote is high because the main printed circuit board must be swapped, and replacement parts are scarce. Verdict: Replace.
- Scenario C (Replace): A 6-year-old inverter is repeatedly failing, but the original manufacturer went bankrupt two years ago. You cannot get warranty support, and firmware bugs are causing grid synchronization issues. Verdict: Replace.
Typical Repair and Replacement Costs
Solar inverter replacement cost figures vary widely based on your region, system capacity, brand, and local labor rates. The following estimates reflect standard US market averages for 2026, priced in USD.
- Diagnostic Visit (Truck Roll): Expect to pay $150 to $300 just for a licensed technician to visit, diagnose the exact fault, and provide a quote.
- Minor Repairs (Out of Warranty): Replacing a cooling fan, display screen, or external AC/DC contactor generally costs between $300 and $600, including labor.
- String Inverter Replacement: A new 5kW to 10kW string inverter typically costs $1,000 to $2,500 for the hardware. With professional labor, permitting, and setup, the total replacement cost ranges from $1,500 to $3,500.
- Microinverter Replacement: Replacing a single faulty microinverter costs $150 to $200 for the unit, plus $150 to $300 in labor. Because they are on the roof, labor is higher per unit than swapping a wall-mounted string inverter.
Factors that move the price: Upgrading from a standard string inverter to a hybrid (battery-ready) inverter will increase hardware costs. Difficult roof access, expensive local permitting fees, and the need to rewire DC strings to match a new inverter’s MPPT requirements will increase labor costs.
Warranty and What to Ask Your Installer
Before approving any major repair or replacement, understand the paperwork and ask your contractor these specific questions.
Understanding Warranties:
Standard string inverter warranties span 5 to 10 years, while microinverters usually carry 25-year warranties. Look closely at what is actually covered. Many warranties cover the replacement parts but cap the labor payout (e.g., they will provide the hardware but only pay $150 toward the electrician’s time, leaving you with the labor balance). Ensure you know if the warranty is transferable if you plan to sell your home.
Questions to Ask the Technician:
- Is this a hardware failure inside the inverter, or a wiring/ground fault on the roof?
- If replacing, will the new inverter be compatible with my existing solar panels’ voltage?
- Does the quoted replacement price include configuration, connecting to my home Wi-Fi, and setting up the new monitoring app?
- If I upgrade to a new unit, does it come with a new 10-year warranty?
- What are the labor rates if the manufacturer warranty only covers the hardware?
How to Extend Solar Inverter Life
Once you fix or replace the unit, proactive maintenance will maximize its lifespan and protect your investment.
- Optimize Placement: If installing a new unit, insist it is placed out of direct midday sun. Use a shading canopy if necessary.
- Maintain Ventilation: Keep the area around the heat sinks clear of boxes, vegetation, and cobwebs. Ensure at least 12 to 18 inches of clearance on all sides.
- Upgrade Surge Protection: Install a Type 2 AC surge protection device in your main panel to absorb grid spikes before they hit the sensitive inverter boards.
- Monitor App Consistently: Check your production app weekly. Catching a minor string failure early prevents the inverter from operating in an unbalanced state.
- Keep Firmware Updated: If your inverter connects to Wi-Fi, ensure automatic updates are enabled so the unit operates with the latest grid profiles and bug fixes.
- Schedule Inspections: Have a professional conduct a visual and electrical inspection of the system every 3 to 5 years.
FAQ
Can a solar inverter be repaired?
Yes, minor components like cooling fans, display screens, fuses, and external communication boards can often be repaired or replaced by a licensed technician. However, catastrophic failures involving the main printed circuit board (PCB) or internal capacitors usually require full unit replacement.
How much does it cost to replace a solar inverter?
In 2026, replacing a standard residential string inverter (5kW–10kW) typically costs between $1,500 and $3,500 in the US, including the hardware, professional installation labor, and necessary local permits. Prices vary by brand and system complexity.
Does a dead inverter mean my solar panels are broken?
No. Solar panels are highly durable and rarely fail at the exact same time as an inverter. If the inverter fails, the panels are likely still capable of producing DC power; the system simply lacks the device required to convert it to usable AC power.
Why does my solar inverter keep shutting off?
An inverter that repeatedly shuts off is usually experiencing overheating, grid voltage spikes, or a ground fault on the roof. The inverter disconnects itself as a built-in safety mechanism to prevent electrical fires, hardware damage, or utility backfeeding.
How do I know if my solar inverter is still under warranty?
Check your original installation contract for the manufacturer name and serial number. You can call the manufacturer’s support line directly or log into your monitoring portal, which often lists warranty terms and commissioning dates.
Conclusion
A solar inverter failure brings your renewable energy production to a halt, but diagnosing the problem doesn’t have to be overwhelming. By recognizing the warning signs—such as fault lights, overheating, or app disconnects—you can quickly initiate a safe first-response check. If your system is under warranty, lean on your installer for a covered repair. If the unit is out of warranty, aging past a decade, or facing extensive repair costs, replacing it with modern, high-efficiency technology is the most reliable long-term solution. Contact a licensed solar professional to assess your specific fault codes and get your system back on the grid.
Sources
- National Renewable Energy Laboratory (NREL): Research on Photovoltaic Inverter Reliability.
- Solar Energy Industries Association (SEIA): Residential Solar Quality and Maintenance Standards.
- National Electrical Code (NEC) Article 690: Solar Photovoltaic (PV) Systems.
- International Electrotechnical Commission (IEC) 62109: Safety of power converters for use in photovoltaic power systems.
(Last updated: November 2026. Note: This content provides general guidance and is not a substitute for a licensed solar professional’s electrical assessment.)