Investing in an off-grid solar energy system is a significant financial and technical commitment. Unlike grid-tied solar setups—where the utility grid acts as a limitless virtual battery—an off-grid system must independently generate, store, regulate, and deliver 100% of your power under all weather conditions.
If you undersize your system, you risk frequent blackouts, dead battery banks, and ruined equipment. If you oversize without proper planning, you waste thousands of dollars on unneeded panel capacity and battery storage.
This comprehensive guide breaks down the precise engineering formulas, realistic cost models, component budgeting breakdowns, sizing calculators, and cost-comparison strategies needed to size and budget an off-grid solar power system.
What Does an Off-Grid System Really Cost?
Off-grid solar systems generally cost between $8,000 and $45,000+, depending on daily kilowatt-hour (kWh) consumption, peak power demands, battery chemistry, and whether you choose a DIY installation or hire professional contractors.
Real-World Cost Tiers by Property Type & Consumption
| System Tier | Daily Energy Target | Typical System Size | Battery Bank Capacity (LiFePO4) | Total Equipment Cost (DIY) | Total Cost (Turnkey Professional Install) | Ideal Property Application |
|---|---|---|---|---|---|---|
| Micro / Mobile Tier | 1 – 3 kWh/day | 600 W – 1.2 kW | 2.4 – 5 kWh (12 V / 24 V) | $2,500 – $5,000 | $5,500 – $9,000 | Campervans, tiny workshops, hunting sheds |
| Small Cabin Tier | 4 – 8 kWh/day | 2 kW – 4 kW | 10 – 15 kWh (48 V) | $6,500 – $11,000 | $12,000 – $18,000 | Weekend cabins, energy-efficient tiny homes |
| Standard Eco-Home | 10 – 20 kWh/day | 5 kW – 8 kW | 20 – 30 kWh (48 V) | $13,000 – $22,000 | $24,000 – $35,000 | 2–3 bedroom homes with high-efficiency appliances |
| Full Residential / Heavy Load | 25 – 40+ kWh/day | 10 kW – 16 kW | 40 – 60+ kWh (48 V) | $24,000 – $38,000 | $40,000 – $65,000+ | Large family homes, well pumps, workshop tools, AC units |
The 3 Fundamental Cost Pillars of Off-Grid Solar
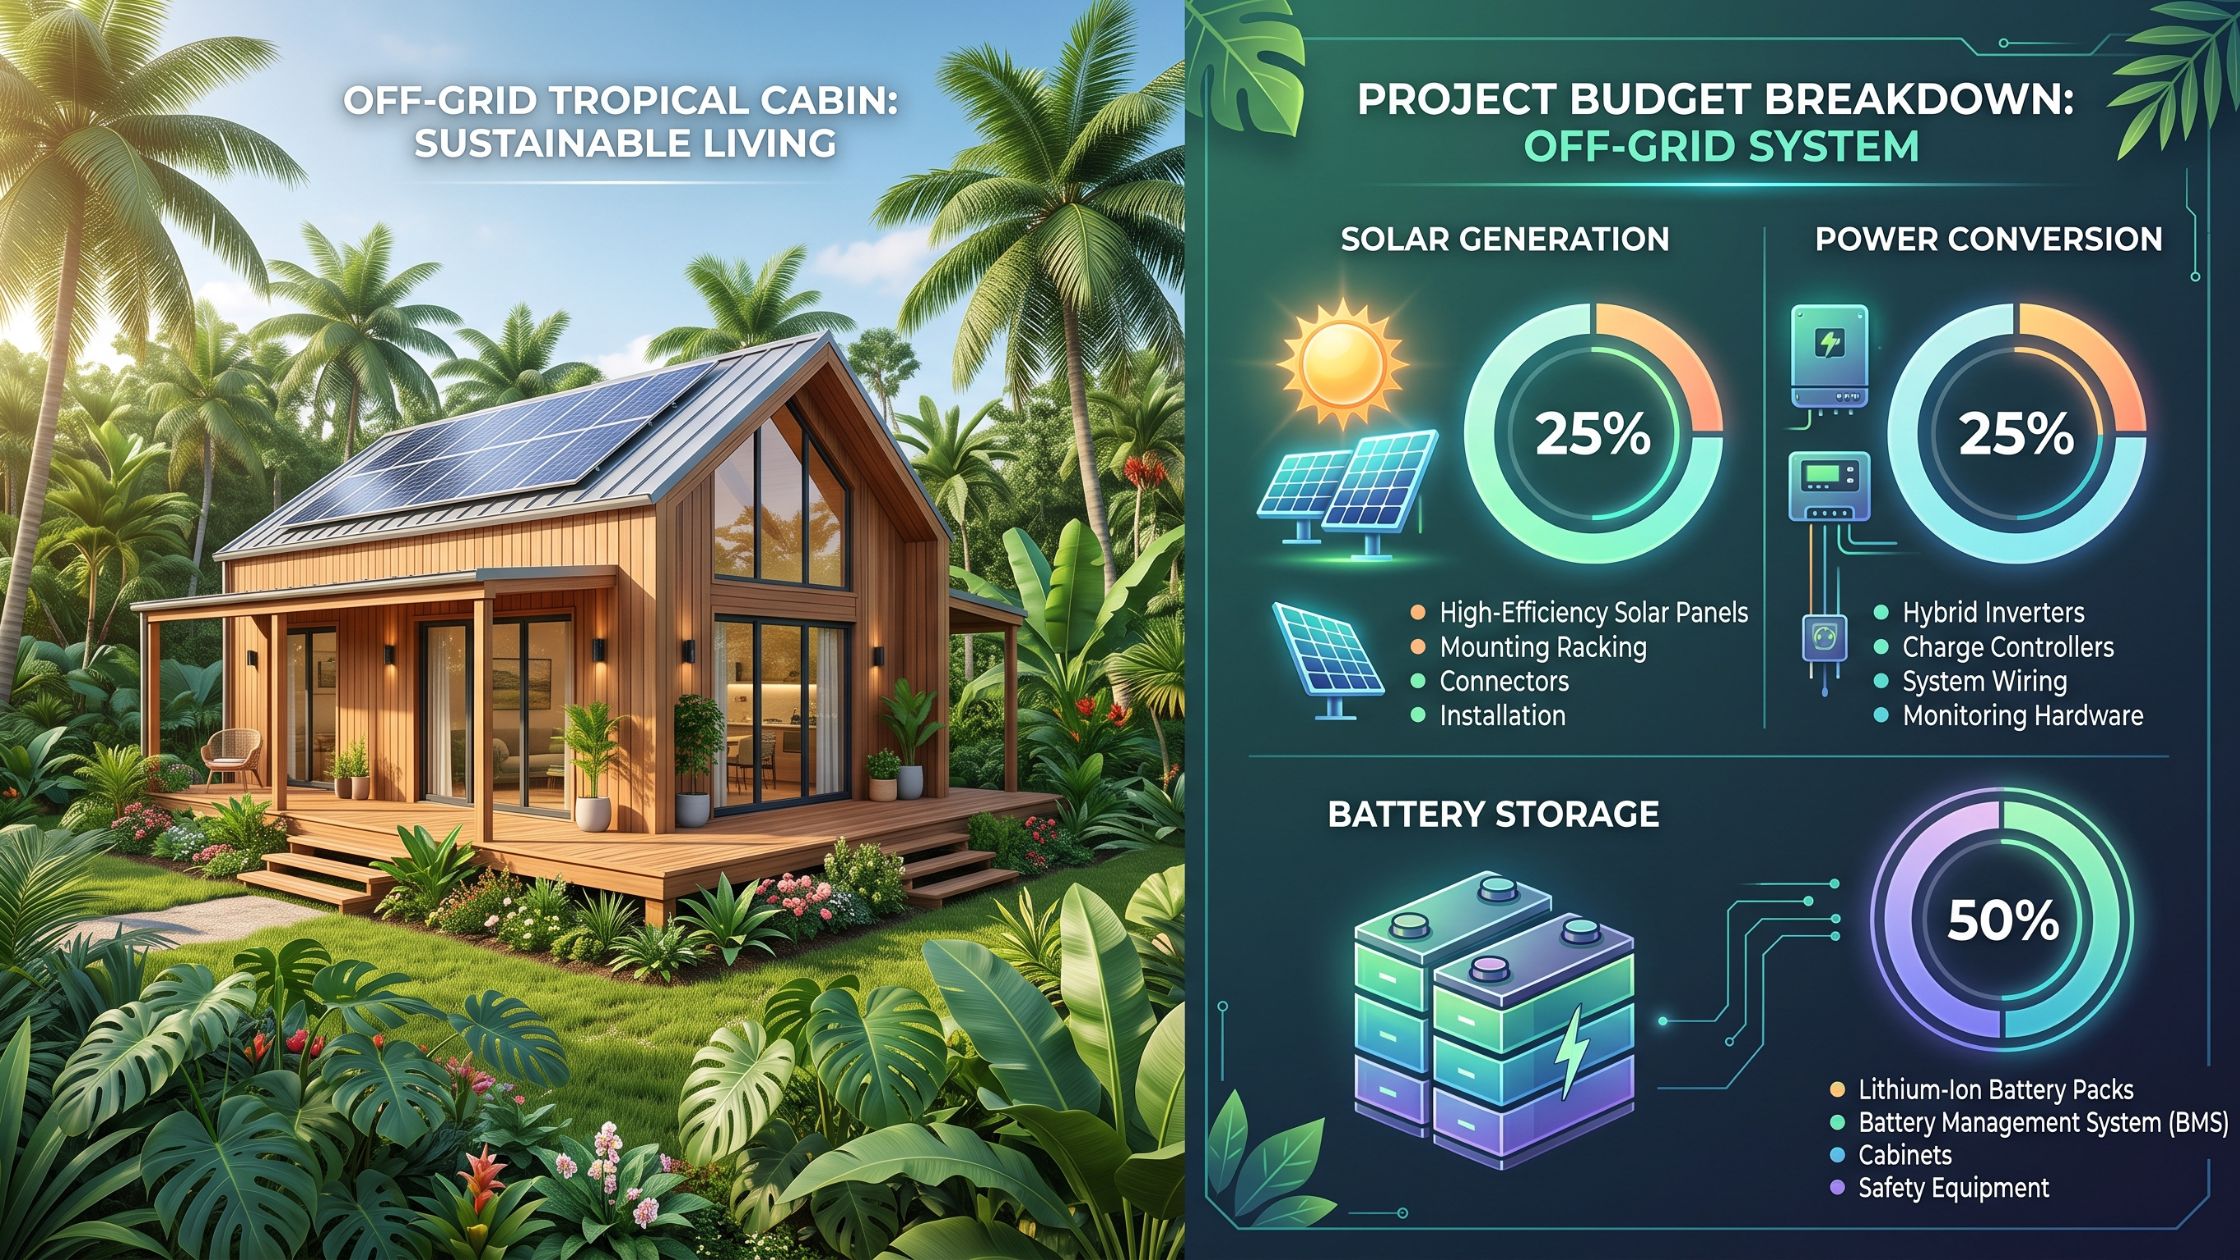
Every off-grid system budget splits into three foundational categories: Generation (Photovoltaic Array), Storage (Battery Bank), and Management / Power Conversion (Inverters, Controllers, Balance of System).
TOTAL OFF-GRID SYSTEM BUDGET
| Component Category | Percentage of Total Budget |
| Energy Storage (Batteries) | 40% – 50% |
| Power Conversion & Balance | 25% – 30% |
| Solar PV Array (Panels/Racks) | 20% – 25% |
| Auxiliary Backup (Generator) | 5% – 10% |
Cost Pillar 1: Energy Storage (The Largest Expense)
In grid-tied solar, panels are the main expense. In off-grid setups, the battery bank represents 40% to 50% of the entire equipment cost.
- Lithium Iron Phosphate (LiFePO4): Costs roughly $300 to $450 per kWh for rack-mount or server-rack units. While upfront costs are higher, they offer 4,000–7,000 cycles at 80% to 90% Depth of Discharge (DoD), delivering the lowest cost per cycle over a 10- to 15-year period.
- Sealed Lead-Acid / AGM: Costs $150 to $220 per kWh upfront, but only delivers 500–1,000 cycles at 50% DoD. Because you must buy double the nominal capacity to avoid damaging the cells, lead-acid frequently ends up costing significantly more over a 5-year operating window.
Cost Pillar 2: Power Conversion & Electrical Balance (BOS)
Converting stored DC power into clean AC electricity requires high-grade hardware:
- Off-Grid Inverter / Chargers: Quality pure sine wave inverters with built-in transfer switches and battery chargers run between $1,200 and $4,500 depending on continuous output capacity (3 kW – 12 kW).
- MPPT Solar Charge Controllers: High-voltage Maximum Power Point Tracking controllers cost $300 to $1,100 each.
- Balance of System (BOS): Wiring, combiner boxes, heavy-gauge copper battery cables, Class T fuses, DC disconnect switches, surge suppressors, and grounding rods add $1,000 to $2,500 to the total project.
Cost Pillar 3: Solar Generation (Panels & Racking)
Solar panels have dropped in price and are now the most affordable part of the system:
- Tier-1 Monocrystalline Panels (400 W – 550 W): Average $0.40 to $0.75 per watt when purchased in pallet quantities ($160 to $350 per panel).
- Racking & Mounting Hardware: Roof mounts run $40 to $80 per panel; engineered heavy-duty ground-mount systems or pole mounts run $100 to $200 per panel plus concrete footings.
Step-by-Step Sizing Engineering: How Many Kilowatts Do You Need?
Determining the exact size of your off-grid system requires a rigorous 5-step engineering calculation.
- Step 1: Daily Energy Audit (Wh)
- Step 2: Inverter Continuous & Surge Rating (Watts)
- Step 3: Battery Bank Sizing (kWh for Days of Autonomy)
- Step 4: Solar Array Sizing (Watts accounting for Sun Hours)
- Step 5: Charge Controller Voltage & Amperage Matching
Step 1: Conduct a Comprehensive Daily Energy Audit
List every appliance, its running wattage, and daily operating hours to find your total Daily Watt-Hours (Wh/day).
Daily Energy (Wh) = (Appliance Wattage (W) x Hours of Daily Operation (h)
Sample Off-Grid Energy Audit Worksheet
| Appliance / Load | Power Draw (Watts) | Daily Runtime (Hours) | Total Daily Consumption (Watt-hours) |
|---|---|---|---|
| Energy-Star Refrigerator | 120 W (cycling) | 8.0 h | 960 Wh |
| LED Lighting (10 fixtures) | 90 W total | 5.0 h | 450 Wh |
| Well Pump (1/2 HP, 240V) | 900 W | 1.5 h | 1,350 Wh |
| Laptop & Workstation | 130 W | 6.0 h | 780 Wh |
| Starlink Internet Terminal | 50 W | 24.0 h | 1,200 Wh |
| Washing Machine | 500 W | 0.7 h | 350 Wh |
| Microwave / Induction Burner | 1,200 W | 0.5 h | 600 Wh |
| Ceiling Fans (3 units) | 75 W total | 8.0 h | 600 Wh |
| Subtotal | — | — | 6,290 Wh/day |
| System Inefficiency Factor (1.25 times) | — | — | 7,862 Wh/day (7.86 kWh/day) |
Note: Always multiply your raw total by an inefficiency factor of 1.20 to 1.25 to account for inverter conversion loss (8 – 12), cable resistance, and battery charging efficiency.
Step 2: Calculate Inverter Sizing (Continuous vs. Surge Power)
The inverter must handle two distinct power demands:
- Continuous Power: The total wattage of all appliances that might run at the exact same moment.
- Surge / Starting Power: Inductive motor loads (refrigerators, well pumps, power tools, air conditioners) draw 2x to 4x their running watts for 2–5 seconds upon starting.
Continuous Inverter Size = (Simultaneous Loads) x 1.25 safety margin
- Example: Well pump (900W) + Refrigerator (150W) + Microwave (1,200W) + Lights & Electronics (400W) = 2,650 W.
- Applying a 1.25 buffer results in 3,312W.
- Recommendation: Select a 4,000W – 6,000W (48V) Pure Sine Wave Inverter with a surge rating of at least 10,000W.
Step 3: Size the Battery Bank for True Autonomy
Days of Autonomy represents how many days your home can run exclusively from battery storage without any sunlight (heavy rain, snow storms, overcast weather). Standard practice targets 2 to 3 days of autonomy.
Required Usable Storage (kWh) = Adjusted Daily kWh x Days of Autonomy
Total Nominal Battery Capacity (kWh) = Required Usable Storage (kWh) / Maximum Allowable Depth of Discharge (DoD)
- Daily Consumption: 7.86 kWh/day
- Autonomy Requirement: 2.5 days
- Usable Energy Target: 7.86 x 2.5 = 19.65 kWh
- Using LiFePO4 (90% DoD):
Nominal Bank = 19.65 / 0.90 = 21.83 kWh
- Using 48V Architecture:
Amp-Hour Rating = 21,830 Wh / 48V = 454.8 Ah
- Purchasing Target: 4 to 5 standard 48V 100Ah (5.12 kWh) rack-mount lithium batteries (20.48 – 25.6 kWh total).
Step 4: Size the Solar Panel Array & Calculate Peak Sun Hours
Your solar array must generate enough power during peak daylight hours to simultaneously power daytime loads and fully replenish the battery bank.
- Find Peak Sun Hours (PSH): This is not the total hours of daylight, but the equivalent hours per day when solar irradiance averages 1,000 W/m2. Most temperate and tropical regions receive between 3.5 and 5.5 PSH depending on seasonal variation.
- Calculate Minimum Solar Array Output:
Array Size (Watts) = Adjusted Daily Consumption (Wh) / Worst-Month Average Peak Sun Hours (h) x Derating Factor (0.80)
- Daily Energy: 7,862 Wh
- Winter / Rainy Season PSH: 3.5 hours
- Derating Factor (Dirt, heat coefficient, wire drop): 0.80
Array Size = 7,862 / 3.5 x 0.80 = 7,862 / 2.8 = 2,807 Watts
- Add Safety Buffer for Cloudy Days (1.25x): 2,807 x 1.25 = 3,509 Watts
- Panel Count Calculation:
Number of Panels = 3,509W / 450W per panel = 7.79 – 8 to 10 panels (400W–450W each)
Step 5: Charge Controller Voltage & Amperage Matching
The charge controller is the vital link between your solar array and your battery bank. Sizing an MPPT (Maximum Power Point Tracking) charge controller requires two distinct mathematical calculations: Output Current (Amperage) and Maximum Input Voltage.
1. Calculating Output Current Requirements
The charge controller’s primary job is to take the raw, high-voltage power from the solar panels and step it down to the exact charging voltage required by the battery bank.
To determine the minimum amperage rating of your controller, divide the total wattage of your solar array by the nominal voltage of your battery bank.
Controller Current (Amps) = Total Array Wattage (W) / Battery Bank Voltage (V)
- Total Array: 3,509W (From Step 4)
- Battery Bank: 48V (Nominal)
Controller Current = 3,509 / 48 = 73.1 Amps
- Safety Margin: Add a standard 1.25 NEC (National Electrical Code) continuous-load multiplier for safety: 73.1 x 1.25 = 91.3A.
- Purchasing Target: A robust 100A MPPT charge controller, or two 50A controllers wired in parallel, to comfortably handle the 3,500W array.
2. Calculating Maximum Input Voltage (The Cold Weather Threat)
Solar panels generate more voltage as the ambient temperature drops. If the open-circuit voltage (V_oc) of your solar panel string exceeds the maximum input voltage rating of the charge controller (e.g., 150V or 250V) on a freezing winter morning, it will instantly destroy the controller’s internal circuitry.
You must calculate the worst-case cold-weather voltage using the panel’s temperature coefficient (found on the spec sheet, typically around -0.28%/degree C).
Cold V_oc = V_oc (STC) x [1 + Temperature Coefficient x (T_min – 25 degrees C)]
- Standard Panel V_oc at 25 degrees C: 49.5V
- Temperature Coefficient: -0.0028/ degree C
- Record Low Temperature (T_min): -10 degrees C
Cold V_oc = 49.5 x [1 + (-0.0028) x (-10 – 25)]
- Cold V_oc = 49.5 x [1 + (-0.0028 x -35)]
- Cold V_oc = 49.5 x [1 + 0.098]
- Cold V_oc = 49.5 x 1.098 = 54.35V per panel
- Cold V_oc = 49.5 x [1 + 0.098]
3. String Sizing & Configuration
Now that you know a single panel can produce up to 54.35V on a freezing day, you must configure how they wire together (series vs. parallel) so the total string voltage never exceeds your controller’s limit.
- Example 1 (3 Panels in Series): 54.35V x 3 = 163.05V.
- Result: This string will instantly fry a 150V charge controller. You must upgrade to a 250V charge controller.
- Example 2 (4 Panels in Series): 54.35V x 4 = 217.40V.
- Result: This is perfectly safe for a 250V charge controller. Wiring two of these 4-panel strings in parallel (217.40V total) completes an efficient 8-panel array that minimizes wire gauge thickness from the roof to the utility room.
How Many kW to Run a Typical Off-Grid House?
A frequent point of confusion is mixing up instantaneous power output (kW) with daily energy consumption (kWh).
Quick Sizing Matrix by House Scale
- [ Tiny Cabin: 1-3 kW Array ] —> [ 5-10 kWh Battery ] —> [ Lights, Fridge, Laptop, Fans ]
- [ Medium Home: 4-7 kW Array ] —> [ 15-25 kWh Battery ] —> [ Well Pump, Induction, Starlink ]
- [ Heavy Home: 8-15 kW Array ] —> [ 30-60 kWh Battery ] —> [ Mini-Splits, Workshop, Washer ]
- 1kW – 3kW Array (5 – 10kWh Storage): Powers modest cabins with propane water heaters, mini-fridges, LED lighting, small electronics, and gravity-fed water.
- 4kW – 7kW Array (15 – 25kWh Storage): Powers energy-conscious full-time homes with efficient full-size refrigerators, pressure pumps, computers, microwave ovens, kitchen appliances, and washing machines.
- 8kW – 12kW Array (30 – 50kWh Storage): Powers standard residential properties with deep-well pumps (1HP – 2HP), inverter-driven mini-split heat pumps/air conditioning, multiple refrigeration units, and small power tools.
- 15kW+ Array (60kWh+ Storage): Powers large homesteads, farms with electric vehicle charging, walk-in coolers, continuous machine operations, and electric water heating.
5. All-in-One Kits vs. Custom DIY Component Builds
When budgeting an off-grid installation, choosing between a pre-packaged solar kit and a custom-engineered component build significantly impacts both cost and flexibility.
| Evaluation Metric | Pre-Packaged All-in-One Solar Kit | Custom DIY Component System |
|---|---|---|
| Typical Cost Delta | 15% – 25% premium for packaging/convenience | Lowest raw hardware cost; maximum value per watt |
| Component Compatibility | Guaranteed by manufacturer; plug-and-play wiring looms | Requires user calculation of wire gauges, fuses, and voltage matching |
| Expansion Capability | Often limited by integrated controller/inverter limits | Highly modular; easy to scale panel strings and battery racks |
| Troubleshooting & Repairs | If internal inverter/charger fails, whole unit must be serviced | Individual components can be isolated, bypassed, or replaced |
| Warranty Management | Single point of warranty contact | Multiple component warranties (10-yr battery, 25-yr panel) |
| Best For | Beginners, small cabins, weekend properties, fast setup | Full-time homes, advanced DIYers, maximum scalability |
6. 9 Actionable Strategies for Comparing Off-Grid Costs
Before purchasing equipment or hiring contractors, use these 9 technical comparison strategies to avoid overpaying:
1. Calculate Levelized Cost per Cycle (LCOC) on Batteries:
Do not compare batteries on initial purchase price alone. Divide the purchase price by the total lifetime usable kilowatt-hours:
Cost per Cycle kWh = Initial Cost / Rated Cycles x Capacity (kWh) x DoD
LiFePO4 typically delivers 0.08 – 0.12/kWh cycle, whereas lead-acid averages 0.25 – 0.40/kWh cycle.
2. Verify Inverter Low-Frequency vs. High-Frequency Architecture:
Low-frequency inverters use large iron transformers capable of handling massive motor starting surges (300% surge rating for 20 seconds). High-frequency inverters are lighter and cheaper, but can struggle with well pumps or heavy air-conditioning startup surges.
3. Check Solar Panel Temperature Coefficients:
In hot or tropical climates, panel efficiency drops as temperatures exceed 25 degrees C (77 degrees F). Compare the Pmax temperature coefficient: high-quality monocrystalline panels average -0.30% / degrees C to -0.35% / degrees C, while budget panels drop at -0.45% / degrees C or worse.
4. Audit Inverter Idle Power Consumption (“Tare Loss”):
Large off-grid inverters draw continuous standby power just staying turned on. A unit drawing 75W at idle wastes 1.8 kWh/day—over 20% of a small cabin’s total energy budget. Compare tare losses and prioritize inverters with efficient eco/sleep modes.
5. Opt for High-Voltage MPPT Charge Controllers:
Controllers that support 150V – 450V DC inputs allow you to wire panels in series strings. Higher voltage means lower amperage, enabling thinner copper wiring (e.g., 10 AWG instead of 4 AWG), saving hundreds of dollars in electrical line runs from the roof or ground array.
6. Integrate an Auto-Start Auxiliary Generator:
Sizing an off-grid system to survive the single darkest week of winter solely through panels and batteries increases system costs by 40% – 60%. Sizing for 85% – 90% of year-round conditions and backing it with an auto-start inverter generator (2.5kW – 6kW) saves thousands of dollars in battery bank sizing.
7. Ensure 48-Volt Nominal System Architecture:
Avoid 12V or 24V system architecture for setups exceeding 2,000W. A 4,000W load at 12V requires carrying over 330 Amps, necessitating expensive heavy copper cables (4/0 AWG). The same power at 48V draws only 83 Amps, lowering component costs, heat loss, and safety risks.
8. Evaluate Server-Rack Lithium Ecosystems:
Closed-loop communication server-rack batteries (such as EG4, Pylontech, or SOK) provide automated, balanced cell management at roughly $280 – $350/kWh. Their modular rack designs let you start with 10kWh and expand simply by slotting in additional modules as your budget allows.
9. Compare Freight, Permitting, and Delivery Overhead:
Panels and large battery banks ship via freight delivery. Confirm whether supplier pricing quotes include lift-gate delivery, residential freight surcharges, disconnect compliance labeling, and engineering plan stamping for local building permits.
7. Practical Sizing Blueprint: The 10 kWh/day Master Model
To see all these equations combined into a single, concrete engineering blueprint, review this full specification for a standard 10 kWh/day energy-conscious residential setup:
COMPLETE 10 kWh/day OFF-GRID SPECIFICATION BLUEPRINT
- Daily Energy Target: 10,000 Wh/day (Raw) | 12,500 Wh/day (with losses)
- Target System Voltage: 48V DC Nominal
- Average Daily Sun Hours: 4.0 Peak Sun Hours (Winter baseline)
- Autonomy Target: 2.5 Days without Sunlight
SOLAR PV GENERATION ARRAY
- Target Output: 4,200 Watts DC
- Panel Configuration: 10x 425W Monocrystalline Panels (2 strings of 5)
- Est. Panel Cost: $2,100 – $2,800
- Mounting/Racking: Heavy-duty ground mount / roof racking ($650 – $900)
BATTERY STORAGE BANK (LiFePO4)
- Usable Capacity Target: 31.25 kWh (Gross) @ 85% DoD = ~26.5 kWh Net
- Battery Configuration: 6x 48V 100Ah Server-Rack Batteries (5.12 kWh each)
- Total Storage: 30.72 kWh Nominal Storage
- Est. Battery Cost: $8,500 – $10,500 (including rack & busbars)
POWER CONVERSION & ELECTRICAL MANAGEMENT
- Inverter/Charger: 6kW – 8kW 48V Pure Sine Wave Split-Phase Inverter
- Charge Controller: Dual 250V / 80A MPPT Controllers (or integrated)
- BOS Components: Class-T fuses, 250A breaker, 2/0 AWG cabling, SPD
- Est. Conversion/BOS Cost: $2,400 – $3,800
TOTAL ESTIMATED HARDWARE BUDGET: $13,650 – $18,000 (DIY Execution)
8. Summary: Steps to Finalize Your System
- Complete a realistic energy audit including phantom loads and seasonal spikes.
- Calculate your peak sun hours using worst-month winter/rainy season baselines.
- Build around 48V architecture with LiFePO4 battery chemistry.
- Size your battery storage for 2 to 3 days of autonomy, backed by a reliable auxiliary inverter generator.
- Purchase Tier-1 monocrystalline panels in pallet quantities to minimize per-watt freight expenses.
By following this sizing and cost blueprint, your off-grid installation will deliver steady, reliable, self-sufficient power for years to come.
Off-Grid Solar Kits Amazon Comparison
Selecting the right off-grid solar equipment is a balance between energy needs, technical expertise, and budget. Whether you are outfitting a weekend getaway cabin, looking for reliable battery storage, or seeking a complete home backup solution, Amazon offers a variety of specialized kits. This guide compares three distinct tiers of solar technology to help you determine which system fits your specific energy profile.
Renogy Solar Starter Kits: The Entry-Level Standard
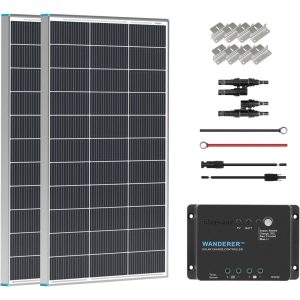
Renogy has established itself as the go-to brand for those entering the world of DIY solar. Their starter kits are designed for simplicity and reliability, making them perfect for micro-tier systems.
200W Starter Kit and 100W Expansion
The 200W Starter Kit is the quintessential beginning for small-scale power. It typically includes high-efficiency monocrystalline panels and a charge controller. For those who realize they need a bit more headroom, the 100W Expansion Kit allows for modular growth without replacing the existing architecture.
Ideal Use Cases
- Weekend Cabins: Perfect for running LED lighting, small fans, and charging mobile devices.
- Micro-Tier Systems: Ideal for sheds, remote gates, or small workshops.
- Energy Production: Under optimal conditions, these systems produce roughly 1000Wh per day, providing enough energy for basic essentials without the complexity of a high-voltage installation.
Eco-Worthy LiFePO4 Batteries: High-Performance Storage
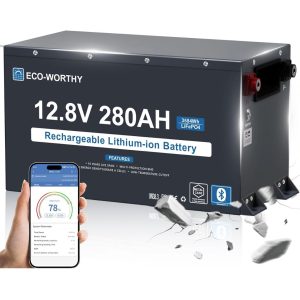
A solar panel is only as good as the battery storing its energy. Eco-Worthy’s Lithium Iron Phosphate (LiFePO4) series represents a significant upgrade over traditional lead-acid batteries, focusing on long-term value and safety.
Technical Superiority: 280Ah and 314Ah Models
The 12V 280Ah and 314Ah models are the workhorses of the Eco-Worthy lineup. These batteries are designed for extreme durability and longevity, often lasting ten times longer than conventional AGM or Lead-Acid counterparts.
- Massive Energy Capacity: The 314Ah model offers up to 4019Wh of energy storage in a single unit.
- Smart Management: Every battery features a built-in smart Battery Management System (BMS) that protects against overcharging, deep discharge, and short circuits.
- Climate Resilience: Equipped with low-temperature protection, these batteries ensure safety during the charging process in colder environments.
- Levelized Cost per Cycle: While the initial investment is higher than lead-acid, the superior cycle life (often 3000-5000+ cycles) means the cost per kilowatt-hour over the battery’s life is significantly lower.
EcoFlow DELTA Pro Ultra: The Ultimate Turnkey Solution
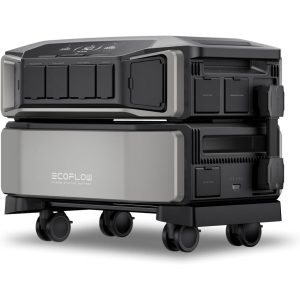
For those who require a professional-grade, all-in-one system for heavy loads or full residential backup, the EcoFlow DELTA Pro Ultra stands in a category of its own.
Residential Power Capability
The DELTA Pro Ultra is designed to bridge the gap between portable power and permanent home standby generators. It offers a massive 6900W AC output, which is sufficient to run heavy appliances like central air conditioners, well pumps, and electric dryers simultaneously.
Scalability and Charging
- Expandable Capacity: The system is modular, starting at 6kWh and expandable up to a staggering 30kWh, allowing users to tailor their storage to their home’s specific demands.
- Multi-Charging: It supports fast charging through multiple sources, including solar panels, AC wall outlets, and even EV charging stations, ensuring you stay powered regardless of the weather.
- User Experience: As a turnkey solution, it eliminates the need for complex wiring, making it accessible for homeowners who want professional performance without a DIY component-based installation.
Comparison Summary
| Feature | Renogy Starter Kits | Eco-Worthy LiFePO4 | EcoFlow DELTA Pro Ultra |
| Primary Goal | Power Generation (Small) | Energy Storage | Whole-Home Solution |
| Target User | Beginners / DIYers | Off-Grid Enthusiasts | Homeowners / Heavy Users |
| Capacity | Homeowners / Heavy Users | Up to 4019Wh per unit | 6kWh to 30kWh |
| Key Advantage | Affordable & Modular | Exceptional Cycle Life | High AC Output (6900W) |
| Complexity | Low to Moderate | Moderate (Requires Inverter) | Plug-and-Play |
Whether you are starting small with a Renogy kit, building a robust storage bank with Eco-Worthy, or investing in the comprehensive EcoFlow ecosystem, each of these solutions offers a reliable path toward energy independence.