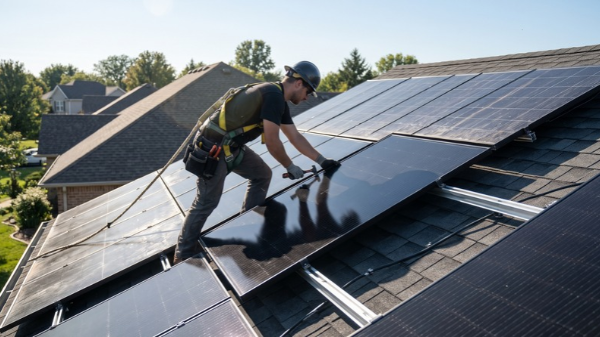
Adding solar panels to an existing system is almost always possible, whether you just bought an electric vehicle, switched to a heat pump, or realized your original array was undersized. However, the cost and complexity of a solar expansion depend heavily on three factors: your inverter architecture, your main electrical panel capacity, and your utility’s net metering rules.
In many cases, expanding a microinverter array takes a single day. Expanding an older string-inverter array, on the other hand, can trigger inverter replacements, electrical panel upgrades, or even the loss of grandfathered utility rates if you aren’t careful.
Before requesting quotes or buying hardware, use this step-by-step guide to evaluate whether expanding your array makes technical and financial sense.
Quick Comparison: How Your Current System Affects Expansion
| Existing System Type | Expansion Difficulty | Can You Mix Panel Wattages? | Primary Bottleneck |
| Microinverters (e.g., Enphase) | Easy | Yes (each panel operates independently) | Branch circuit breaker limit & main panel busbar |
| String Inverter + DC Optimizers (e.g., SolarEdge) | Moderate | Yes (with compatible optimizers) | Inverter max DC input & string length limits |
| Traditional String Inverter | Hard | Not on the same string (causes mismatch losses) | Inverter capacity, MPPT channels, & Voc limits |
| Off-Grid / Hybrid Charge Controller | Moderate | Only on separate MPPT charge controllers | Charge controller amperage & battery bank capacity |
Step 1: Audit Your True Energy Deficit First
Before sizing an expansion, verify that you actually need more panels rather than a repair or a simple efficiency upgrade.
- Pull 12 months of utility bills: Add up your net annual kilowatt-hour (kWh) deficit. Solar production fluctuates drastically by season, so never size an expansion based on a single summer or winter bill.
- Factor in planned electrical loads: If you are expanding for upcoming lifestyle changes, add realistic annual usage estimates:
- Electric Vehicle (EV): ~3,000 to 4,500 kWh/year (assuming 10,000–12,000 miles driven annually).
- Heat Pump HVAC Conversion: ~2,500 to 4,000 kWh/year depending on climate and insulation.
- Heat Pump Water Heater or Pool Pump: ~1,200 to 2,500 kWh/year.
- Rule out underperformance: Solar panels naturally degrade by roughly 0.5% to 0.8% per year. If your system’s output dropped sharply over the past year, check for new tree shading, dirty panels, or a failing inverter before spending thousands on new modules.
Once you know your exact kWh gap, divide it by your local peak sun hours (factoring in ~15%–20% system losses) to estimate the additional kilowatt (kW) capacity you need. If you are trying to visualize how much roof space that requires, our breakdown of how many solar panels are in a 10kW system walks through panel wattage and sizing math in detail.
Step 2: Evaluate Inverter Compatibility and Sizing Limits
Your inverter is the single biggest factor dictating how you can expand.
Microinverter Systems (Easiest to Expand)
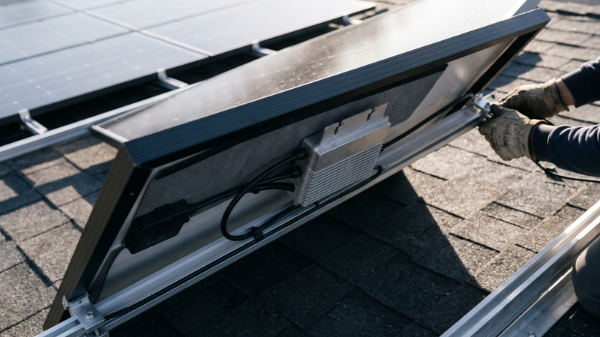
If your roof uses microinverters, each solar panel converts DC to AC power independently at the module level. Expanding is modular: an installer mounts new panels with compatible microinverters and connects them to an open branch circuit or a combiner box. You do not need to match the exact wattage or brand of your older panels—though matching frame color and dimensions keeps the roof looking uniform.
Traditional String Inverters (Strict Electrical Matching)
Traditional string inverters wire panels together in series. If you try to add modern 400W–430W panels into an existing string of older 300W–330W panels, the entire string drops to the current (Imp) of the weakest panel—wasting the extra wattage you paid for.
To expand a string-inverter system properly, you have three options:
- Use an open MPPT input: If your inverter has a spare Maximum Power Point Tracking (MPPT) channel and spare wattage capacity, you can run a brand-new, separate string of modern panels into that channel without affecting the old string.
- Check your DC-to-AC ratio: Most inverters can handle a DC array rated 15% to 35% higher than the inverter’s AC output (a 1.15–1.35 DC-to-AC ratio). Exceeding this causes inverter clipping (wasted midday power) and can violate manufacturer limits if the string’s open-circuit voltage (Voc) spikes above the inverter’s maximum voltage on freezing mornings.
- Install a second, parallel system: If your existing inverter is already maxed out—or nearing the end of its 10-to-12-year lifespan—installing a separate inverter (or microinverter sub-array) alongside the old system is often more reliable than forcing old and new hardware together. If your current unit is already showing fault codes, review why a solar inverter fails and whether to repair or replace it before investing in an add-on.
Off-Grid and DIY Charge Controller Systems
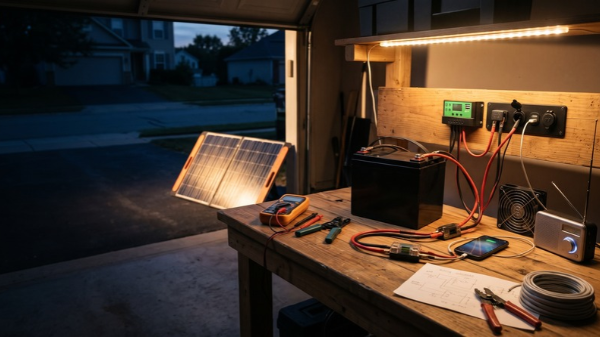
For off-grid cabins or backup setups, avoid wiring mismatched panels into the same charge controller string. Instead, add a dedicated second MPPT charge controller wired to your existing battery busbar—just verify that the combined charging amperage stays within your battery bank’s maximum C-rate. (If you are experimenting with small-scale setups, see our guide on how to build solar panels in 7 basic steps.)
Step 3: Check Main Electrical Panel Capacity and Roof Space
Even if your inverter has room, your home’s main service panel might not.
The NEC 120% Rule
Max Solar Breaker = (Busbar Rating x 1.20) – Main Breaker Rating
For example, a standard 200-amp panel with a 200-amp main breaker allows a maximum 40-amp solar backfeed breaker ((200 x 1.20) – 200 = 40A), which caps continuous solar output at roughly 7.6 kW AC. If your existing array already uses that 40-amp slot, expanding requires one of the following:
- Main breaker derate: Swapping the 200A main breaker for a 175A breaker (freeing up 25A of solar capacity) if your home’s electrical load calculation allows it.
- Line-side (supply-side) tap: Connecting the new solar array ahead of the main breaker, bypassing the busbar limit (subject to utility approval).
- Main Panel Upgrade (MPU): Upgrading to a higher-rated busbar (e.g., a 225A busbar with a 200A main breaker).
Roof Space, Structural Load, and Aesthetics
Modern residential panels are physically larger than panels manufactured five or ten years ago. Check that your remaining roof planes have:
- Unshaded sun exposure (avoiding chimneys, vents, and mature trees).
- Fire setback clearances required by local building codes (typically 18 to 36 inches along roof ridges and edges).
- Roof life remaining: If your roof is over 15 years old, re-roofing before expanding saves you from paying to remove and reinstall two separate arrays later. Homeowners in hot, high-wind, or high-humidity regions should also review specific mounting and ventilation requirements for a roof-mounted solar panel system for tropical homes.
Step 4: Watch Out for Permits, Net Metering Traps, and Incentives
Paperwork is where many solar expansions unexpectedly stall or lose financial value.
The Net Metering Grandfathering Trap
If your original system is locked into a favorable legacy net metering agreement (such as 1-to-1 retail credit export), check your utility’s expansion threshold before applying for an interconnection update.
Many utilities allow you to expand an existing grandfathered system by only the greater of 10% or 1 kW over the life of the system. Exceeding that cap can force your entire system onto a newer, lower-value export tariff (like California’s NEM 3.0 / Net Billing Tariff).
Workaround: If an expansion would void your legacy net metering rate, ask an installer about a non-export (zero-export) solar and battery expansion. The new panels charge a dedicated home battery and power household loads behind the meter without exporting excess electricity to the grid, keeping your original utility agreement intact.
Permits, PTO, and Financial Incentives
Any grid-tied expansion requires a new building/electrical permit, an inspection, and updated Permission to Operate (PTO) from your utility. Never connect unauthorized panels to a grid-tied system; utilities detect unexplained export spikes via smart meters and can disconnect service or void interconnection agreements.
On the financial side, tax credits and local rebates for system expansions change frequently and depend on your jurisdiction and tax status. Before factoring incentives into your payback math, review the U.S. Department of Energy’s Homeowner’s Guide to the Federal Tax Credit for Solar Photovoltaics and confirm current eligibility rules with a qualified tax professional.
Step 5: Protect Your Warranties and Vet Your Installer
Touching an existing solar array introduces warranty liability. If a new contractor modifies your existing racking, splices into existing wiring, or drills new roof penetrations near the original array, your original installer may void their roof-penetration and workmanship warranties.
Follow these steps to protect your investment:
- Call your original installer first: They already have your site plans, structural engineering stamps, and monitoring account access. Even if you don’t hire them, get their written policy on third-party modifications.
- Request 2 to 3 itemized quotes: Small expansions (4 to 8 panels) carry a higher cost per watt than full installations because fixed “soft costs”—engineering, permitting, inspection fees, and crew mobilization—remain nearly identical. Compare quotes carefully to ensure you aren’t being overcharged.
- Verify credentials and monitoring integration: Look for NABCEP-certified professionals and confirm whether the new panels will appear in your existing monitoring app or require a second app. To avoid high-pressure sales tactics and shady subcontracting, review our checklist of 7 warnings to watch out for when picking a solar provider.
When Expanding Isn’t the Smartest Move
Because fixed permitting and labor fees make tiny add-ons (2 to 4 panels) expensive per watt, consider whether an alternative upgrade delivers a faster return on investment:
- Add a home battery instead: If your utility uses Time-of-Use (TOU) pricing with steep evening peak rates, storing your existing midday solar power in a battery often cuts your bill more than adding extra daytime panels.
- Cut wasted base load first: Upgrading attic insulation, sealing air ducts, or replacing an old electric resistance water heater with a heat pump water heater typically costs less per kWh saved than a small rooftop solar expansion.
Frequently Asked Questions
Can you mix different wattage or brand solar panels on the same roof?
Yes, as long as they are electrically isolated from one another. You can mix brands and wattages freely using microinverters, DC optimizers, or a separate MPPT channel on a string inverter. Never wire mismatched wattages in series on the same bare string, or the lower-current panels will bottleneck the higher-wattage ones.
How many solar panels can I add without upgrading my inverter?
Check your inverter’s spec sheet for its maximum DC input power and maximum input voltage. If your existing array is smaller than 1.25× to 1.35× your inverter’s AC rating and you have an open MPPT input (or open microinverter branch capacity), you can usually add panels without replacing the inverter. If your string inverter is already near its max DC limit, you will need a second inverter or an upgrade.
Can I DIY add solar panels to an existing grid-tied system?
While DIY solar is legal in many jurisdictions for homeowners pulling their own permits, adding panels to a grid-tied array requires utility interconnection approval, updated single-line electrical diagrams, and NEC-compliant rapid shutdown hardware. Doing an unpermitted DIY add-on risks voiding your homeowner’s insurance, losing your original installer’s warranty, and violating your utility’s interconnection agreement.
Will adding solar panels void my existing warranty?
Manufacturer equipment warranties (for panels and inverters) remain valid as long as the new hardware is installed within spec. However, workmanship and roof-leak warranties from your original installer are frequently voided if a different company alters the existing wiring or mounting hardware. Always get written clarification from your original installer—or install the expansion as a completely independent parallel array—to minimize warranty disputes.