Designing a compact outdoor space does not mean sacrificing ecological impact. Whether you manage a tiny urban lot, a townhouse courtyard, or a modest suburban backyard, eco-friendly small yard landscaping offers a practical way to manage water responsibly, support local pollinators, and build healthy soil. You can transform even the smallest footprint into a thriving, sustainable ecosystem that requires fewer resources and less weekend upkeep.
This guide breaks down proven, budget-conscious design strategies tailored for spaces under 1,000 square feet. You will learn how to select native plants, implement lawn alternatives, manage stormwater, and choose sustainable materials. By applying these concepts, you can reduce upfront costs, minimize ongoing maintenance, and create a beautiful landscape that gives back to the local environment.
Quick-Reference Summary
Here is an overview of the designs covered in this guide to help you prioritize your planning:
- Native Plant Borders: Best for perimeter planting | Cost: Moderate | Maintenance: Low | Eco Benefit: Supports local biodiversity
- Micro-Clover & Creeping Thyme Lawns: Best for small, low-traffic areas | Cost: Low | Maintenance: Moderate | Eco Benefit: Eliminates synthetic fertilizers
- Compact Rain Gardens: Best for capturing roof runoff | Cost: Low | Maintenance: Low | Eco Benefit: Filters non-point source pollution
- Permeable Paving Patios: Best for seating areas | Cost: High | Maintenance: Low | Eco Benefit: Prevents stormwater runoff
- Vertical Gardens: Best for bare fences or walls | Cost: Moderate | Maintenance: Moderate | Eco Benefit: Maximizes green space and cools walls
- Pollinator Pocket Gardens: Best for sunny corners | Cost: Low | Maintenance: Low | Eco Benefit: Feeds native bees and butterflies
- Rainwater Harvesting Systems: Best for container gardening | Cost: Moderate | Maintenance: Low | Eco Benefit: Conserves municipal water
- Small-Scale Edible Landscaping: Best for sunny yards | Cost: Moderate | Maintenance: High | Eco Benefit: Reduces food transportation emissions
- Organic Compost Hubs: Best for side yards | Cost: Low | Maintenance: Moderate | Eco Benefit: Diverts organic waste from landfills
- Drought-Tolerant Rock Gardens: Best for hot, dry microclimates | Cost: Moderate | Maintenance: Low | Eco Benefit: Eliminates irrigation needs
- Dark-Sky Friendly Lighting: Best for safety and ambiance | Cost: Moderate | Maintenance: Low | Eco Benefit: Reduces light pollution for nocturnal wildlife
- Reclaimed Material Raised Beds: Best for poor native soils | Cost: Low | Maintenance: Low | Eco Benefit: Repurposes existing waste materials
12 Ideas for Eco-Friendly Small Yard Landscaping
1. Drought-Tolerant Native Plant Borders
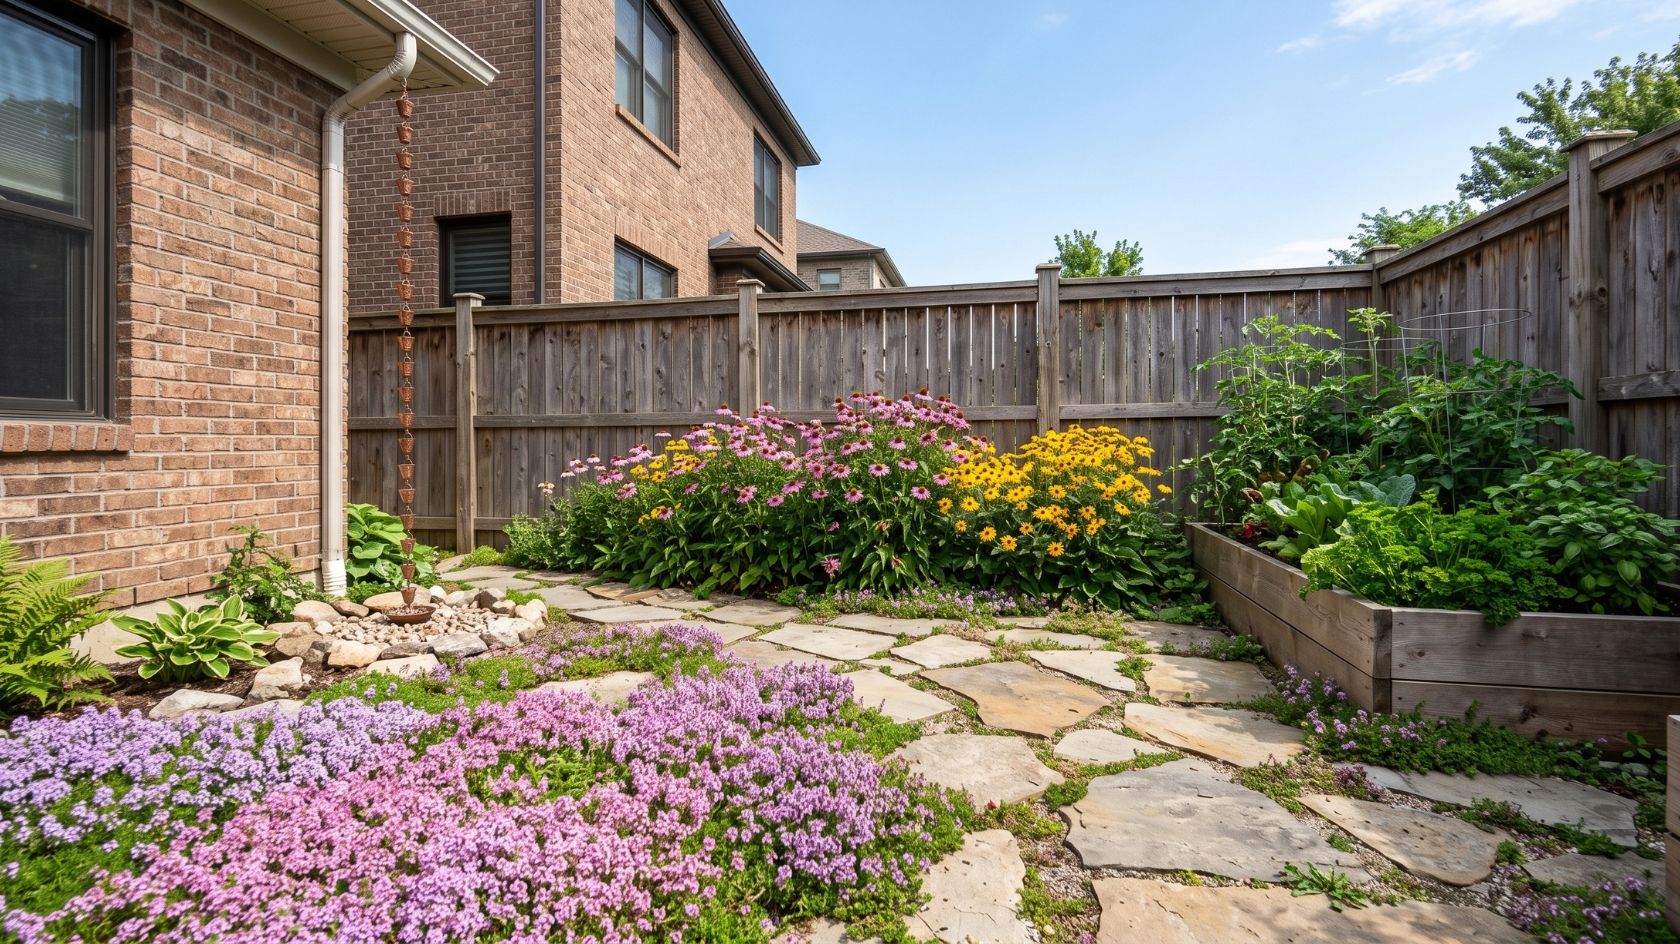
Replacing traditional, thirsty perimeter shrubs with deep-rooted native perennials creates a resilient framework for your small yard. Native plants evolved in your specific local climate, meaning they require zero supplemental watering or chemical fertilizers once their root systems are fully established. Their deep roots also sequester carbon more effectively than shallow-rooted ornamentals.
Choose plants by referencing the USDA Plant Hardiness Zone Map and your local moisture levels. For example, Purple Coneflower and Black-eyed Susan thrive in many temperate zones, while Salvia and Agave are better suited for arid regions.
When installing, group plants by their water needs—a practice known as hydrozoning. Dig planting holes twice as wide as the root ball to allow roots to spread easily in uncompacted soil. Maintain a low maintenance level and moderate cost by purchasing starter plugs rather than mature gallon-sized plants.
Common mistake to avoid: Planting too close together. Small plants grow quickly; always adhere to the mature spread spacing listed on the plant tag (typically 18 to 24 inches) to ensure adequate airflow and prevent fungal diseases.
2. Lawn Alternatives: Micro-Clover and Creeping Thyme
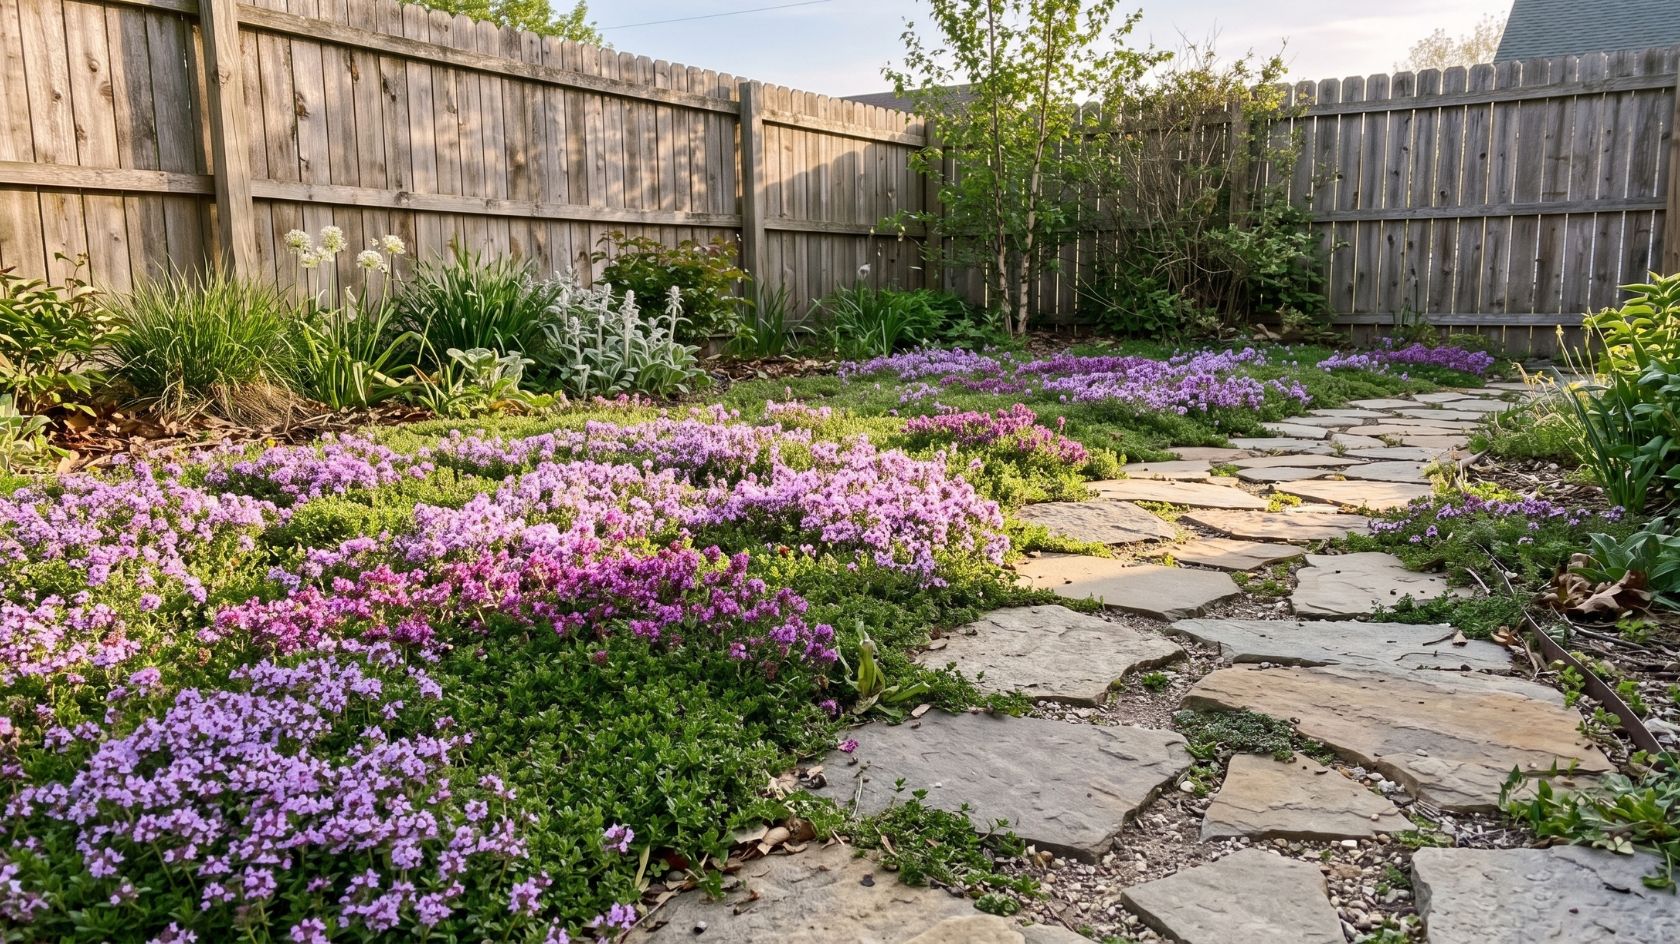
Traditional turfgrass requires immense amounts of water, gas-powered mowing, and synthetic nitrogen. Swapping turf for low-growing, walkable groundcovers transforms a high-maintenance chore into a self-sustaining asset. Clover actively fixes atmospheric nitrogen into the soil, feeding itself and surrounding plants, while creeping thyme is highly drought-tolerant and provides essential nectar for early-season bees.
For small yards, sow micro-clover (a smaller leafed variety of white clover) or creeping thyme seeds in early fall or spring. Solarize or manually remove existing grass first. Rake the bare soil to loosen the top quarter-inch, broadcast the seeds, and lightly press them into the dirt. Keep the area consistently moist until germination.
Common mistake to avoid: Expecting lawn alternatives to survive heavy, daily foot traffic. These plants are perfect for small yards and visual greenery but will trample under the stress of large dogs or daily sports activities.
3. Compact Rain Gardens and Mini Bioswales
A rain garden is a shallow, planted depression designed to catch, filter, and slowly absorb runoff from your roof, downspouts, or patio. This ecological mechanism filters out pollutants like roofing tar or pavement oil before the water reaches local streams or aquifers.
Select deep-rooted, moisture-tolerant native plants like Swamp Milkweed, Joe-Pye weed, or regional sedges for the basin, and drier species for the upper berms. To install, locate the garden at least 10 feet away from your home’s foundation to prevent basement flooding. Dig a basin roughly 6 to 12 inches deep with a flat, level bottom to encourage even pooling. Amend heavy clay soil with compost and coarse sand to ensure water drains within 24 to 48 hours.
Common mistake to avoid: Siting a rain garden over a high water table, a septic field, or buried utility lines. Always call your local utility marking service before digging.
4. Permeable Paving Patios and Pathways
Solid concrete or asphalt patios create impermeable surfaces that force rainwater into overwhelmed municipal storm sewers. Permeable paving allows water to percolate through the surface directly into the soil below. This prevents runoff, allows tree roots to breathe, and reduces the urban heat island effect by absorbing less solar radiation.
Ideal materials include crushed granite, open-cell concrete pavers filled with gravel, or dry-laid reclaimed flagstone. When preparing the site, excavate 4 to 6 inches, lay a non-woven geotextile fabric to prevent weed growth, and use an open-graded crushed stone base (like #57 stone). This base lacks fine dust, creating empty voids that temporarily store water while it drains.
Common mistake to avoid: Sweeping polymeric sand into the joints between pavers. Polymeric sand hardens like glue when wet, completely sealing the surface and destroying its permeability. Use fine, clean gravel for joints instead.
5. Vertical Gardens and Living Walls
In yards under 1,000 square feet, ground space is a premium. Vertical gardening utilizes fences and walls to grow upward. This approach maximizes green space, provides a cooling microclimate against hot brick walls, and offers structural habitat for birds and beneficial insects.
Use sustainable materials like untreated cedar trellises, cattle panels, or modular wall planters made from recycled plastics. Plant climbing natives such as Coral Honeysuckle or Virginia Creeper, or use vertical space for edible trailing plants like cherry tomatoes and snap peas. Secure your trellis firmly to wind-rated posts, leaving a one-inch gap between the trellis and the home’s siding to prevent moisture damage to your walls.
Common mistake to avoid: Neglecting irrigation. Vertical wall planters dry out much faster than ground soil due to increased wind exposure and smaller soil volumes. Install a gravity-fed micro-drip line for consistent moisture.
6. Pollinator Pocket Gardens
A pollinator pocket garden is a densely planted, continuous succession of blooms designed to feed native bees, butterflies, and hummingbirds. By selecting a highly diverse mix of flower shapes (tubular, flat, bell-shaped), you support a wider variety of specialized pollinator mouthparts.
Choose three species that bloom in spring, three in summer, and three in fall to provide a continuous food supply. Include host plants—like Milkweed for Monarch butterflies—where insects can lay their eggs. Strip the sod from a sunny corner of your yard, mix in two inches of organic compost, and plant your plugs.
Common mistake to avoid: Buying plants treated with neonicotinoids. These systemic pesticides persist in the plant’s vascular system, meaning the nectar and pollen become highly toxic to the exact insects you are trying to attract. Always ask nurseries if their plants are chemical-free.
7. Rainwater Harvesting with Rain Barrels and Chains
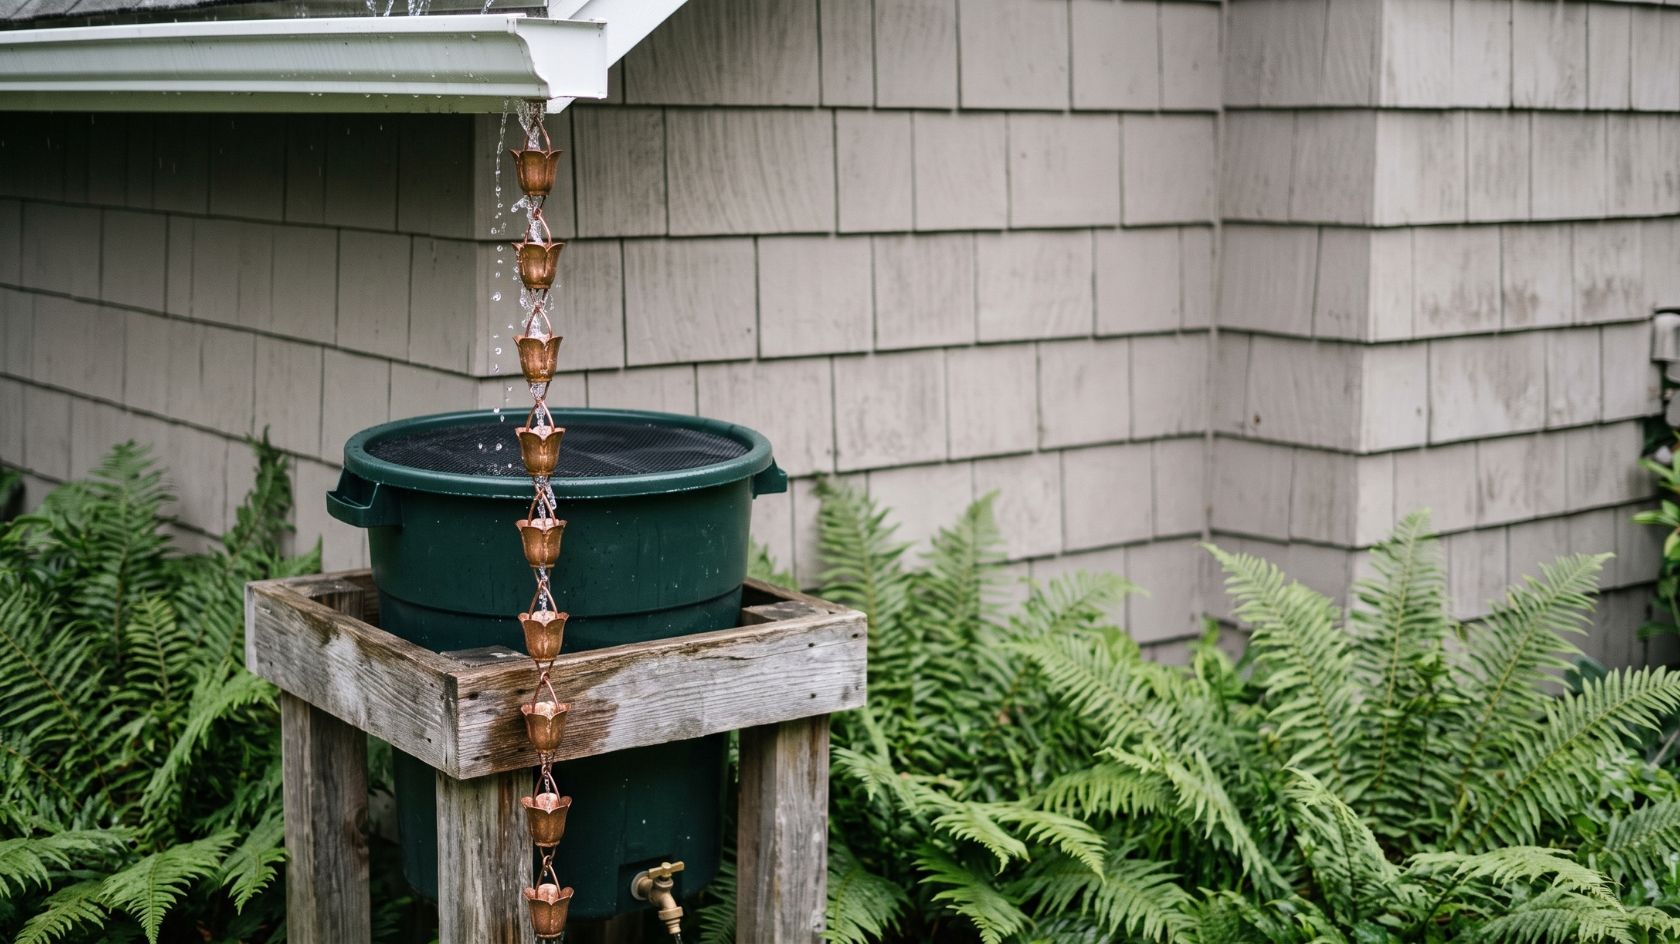
Capturing rainwater reduces your reliance on treated, municipal water for irrigation and prevents excess runoff from eroding your topsoil. Rain chains—an alternative to traditional closed downspouts—slow the velocity of falling water, turning a heavy downpour into a controlled trickle that guides water into a collection barrel or directly into a planted infiltration basin.
Install a UV-resistant rain barrel equipped with an overflow valve and a spigot. Elevate the barrel on concrete cinder blocks to increase the gravitational water pressure for your hose. Connect your rain chain to the gutter opening and anchor the bottom securely to a heavy basin or the barrel screen.
Common mistake to avoid: Allowing mosquitoes to breed. Ensure your rain barrel has a tight, fine-mesh screen over the inlet to block insects and organic debris. Use a naturally occurring Bacillus thuringiensis israelensis (Bti) dunk in the water to safely eliminate larvae without harming plants or pets.
Taking small steps like adding a rain barrel or compost bin is a great start. But if your ultimate goal is to lower your grocery bills and slash your utility costs using just the land you have, you need a cohesive plan. Learn how over 100,000 families are turning their small properties into independent micro-farms with The Self-Sufficient Backyard.
8. Small-Scale Edible Landscaping
Integrating food-producing plants into your landscape reduces the carbon emissions associated with transporting commercial produce. In small yards, edible landscaping replaces purely ornamental plants with functional, beautiful food sources.
Opt for dwarf fruit trees, which max out at 8 to 10 feet tall, or incorporate rainbow chard and curly kale directly into your flower beds. Blueberries make excellent perennial hedges and offer stunning red autumn foliage. Prepare the soil by testing the pH—blueberries require highly acidic soil (pH 4.5 to 5.5), while most vegetables prefer neutral soil. Add organic compost to build a friable soil structure.
Common mistake to avoid: Planting edibles in soil contaminated by old lead paint or historic chemical runoff. If you live in an older urban home, test your soil for heavy metals before planting food crops, or opt for raised beds with imported soil.
Ready to grow more than just a few tomatoes? If you want to maximize your small yard’s potential, The Self-Sufficient Backyard is an incredible step-by-step guide that shows you exactly how to transform even a quarter-acre lot into a fully independent, food-producing homestead.
9. Sustainable Mulch and Organic Compost Hubs
Mulching and composting are the backbones of an eco-friendly yard. Mulch suppresses weeds without herbicides, regulates soil temperature, and slows moisture evaporation. Composting turns your kitchen scraps and yard waste into nutrient-dense humus, diverting methane-producing organic waste from landfills.
For small yards, use a compact, enclosed tumbling composter to keep pests out and speed up the decomposition process. Balance your compost with roughly three parts “browns” (dried leaves, shredded cardboard) to one part “greens” (vegetable scraps, grass clippings). For mulch, choose locally sourced, undyed arborist wood chips or pine needles. Apply a 2- to 3-inch layer of mulch across all bare soil.
Common mistake to avoid: Creating “mulch volcanoes” by piling mulch tightly against the trunks of trees or stems of shrubs. This traps moisture against the bark, leading to rot and inviting boring insects. Always leave a 3-inch bare ring around the base of any plant.
10. Drought-Tolerant Rock Gardens (Xeriscaping)
Xeriscaping relies on plants that thrive in arid conditions, heavily reducing or eliminating the need for irrigation. It is particularly effective for small, sun-baked yards or south-facing microclimates that dry out rapidly. The ecological mechanism here is extreme water conservation and soil stabilization through rock placement.
Use a combination of locally sourced boulders, cobble, and pea gravel to create topographical interest. Plant tough, drought-adapted species like Sedum, Hens and Chicks (Sempervivum), Yucca, or ornamental grasses. Dig out the existing topsoil and replace it with a gritty, fast-draining mix of sand, pumice, and topsoil.
Common mistake to avoid: Laying down plastic weed barriers beneath the rocks. Plastic degrades into microplastics, suffocates the soil microbiology, and prevents native ground-nesting bees from accessing the earth. Use a biodegradable cardboard layer instead.
11. Dark-Sky Friendly and Solar Lighting
Artificial outdoor lighting heavily disrupts the mating, feeding, and migratory behaviors of nocturnal wildlife, from moths to migratory birds. Dark-sky friendly lighting practices reduce this light pollution while keeping your pathways safe and functional.
Choose lighting fixtures that are fully shielded, meaning the bulb is tucked up inside an opaque housing so light points strictly downward. Opt for warm-white or amber LED bulbs (under 3,000 Kelvins), which are less disruptive to wildlife than stark blue-white lights. Solar-powered pathway lights are ideal for small yards, eliminating the need to trench electrical wires through root zones.
Common mistake to avoid: Leaving aesthetic landscape lighting on all night. Put all outdoor lighting on motion sensors or timers so the yard returns to total darkness when not in active use.
12. Reclaimed Material Raised Beds
Building raised garden beds is a highly effective way to garden in small yards with poor, compacted, or contaminated native soil. Using reclaimed materials saves energy and resources that would otherwise go into manufacturing and shipping new lumber or metal.
Source untreated, salvaged materials such as urbanite (broken chunks of old concrete sidewalks), reclaimed retaining wall blocks, or untreated pallet wood. Assemble the beds to a height of 12 to 18 inches, which provides plenty of root depth for most vegetables and perennials. Fill with a mixture of high-quality screened topsoil and organic compost.
Raised Bed Common mistake to avoid: Using old railroad ties or pressure-treated lumber manufactured before 2004. These materials are heavily treated with creosote or chromated copper arsenate (CCA), which will slowly leach toxic chemicals into your soil and groundwater.
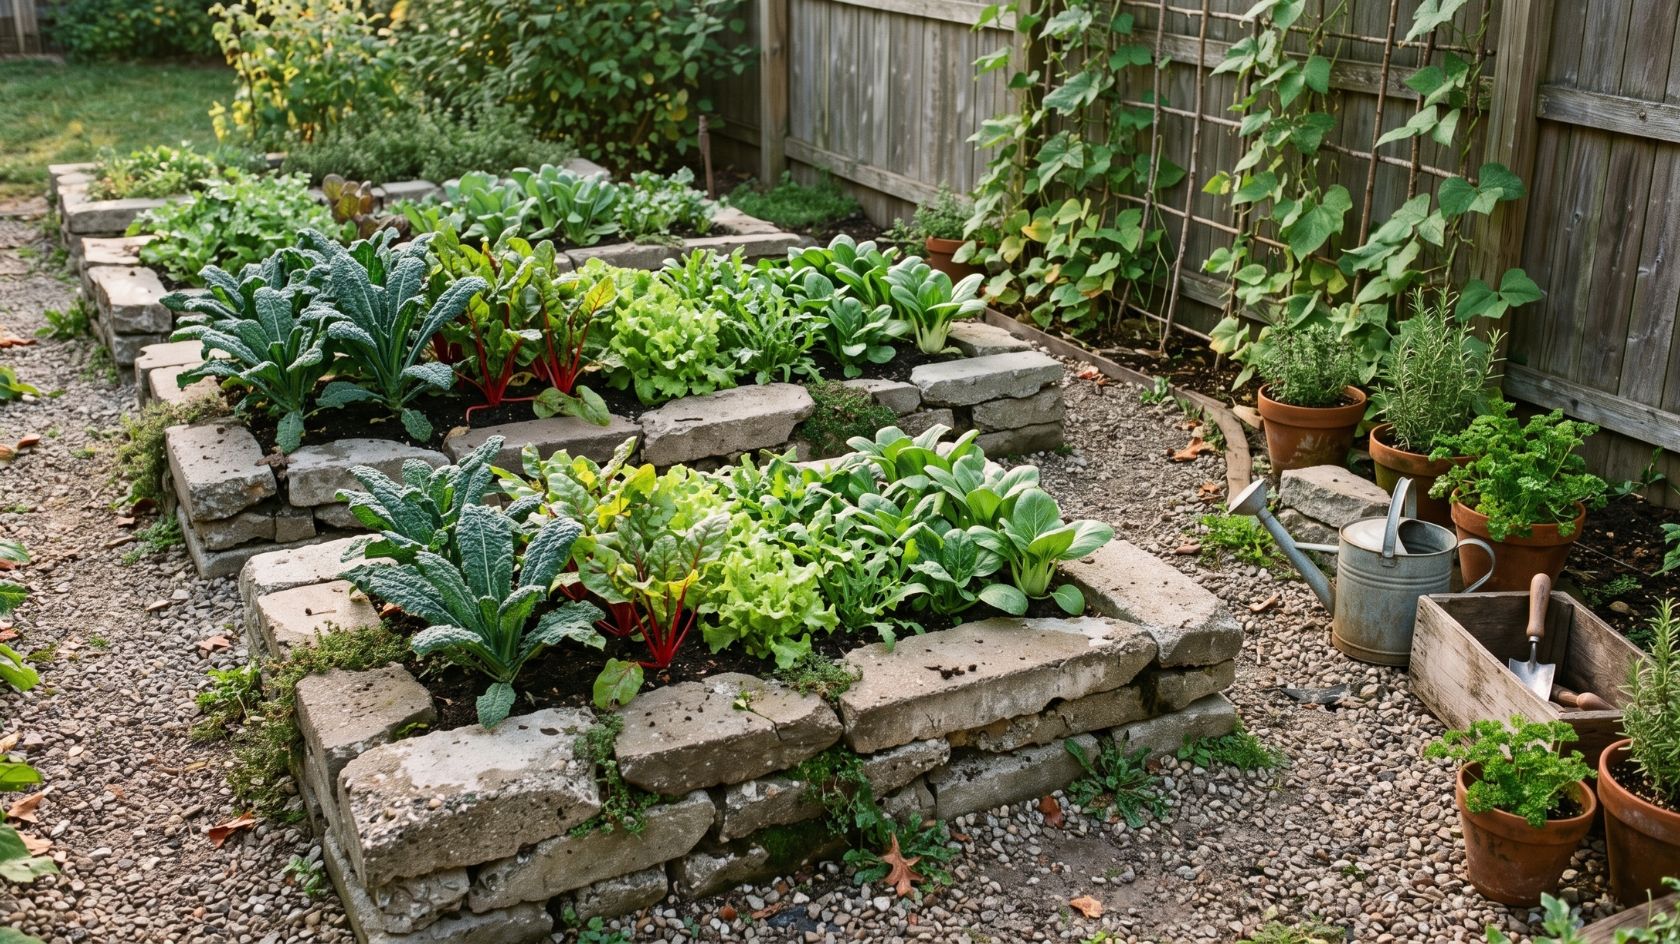
How to Plan Your Small Yard Landscape
Proper planning is the most important step in eco-friendly landscaping. Rushing into planting without assessing the site usually results in dead plants and wasted money.
Assess Sun, Soil, and Drainage: Track how many hours of direct sunlight your yard receives in the summer. Dig a small hole and fill it with water to test drainage; if it takes more than 24 hours to drain, you have heavy clay and need to select moisture-tolerant plants. Have your soil tested through a local university extension service to determine its pH and nutrient deficiencies before applying any amendments.
Map Microclimates: Small yards often have extreme microclimates. The south-facing brick wall of a townhouse may act as a heat sink, baking plants, while the north side of a solid fence may remain in damp, permanent shade. Map these zones out on a piece of paper.
Design for Scale and Visual Flow: In a space under 1,000 square feet, clutter is the enemy. Stick to a simple material palette (e.g., cedar, gravel, and one type of stone) and limit your plant list to five or six species planted in sweeping masses. Draw the eye upward with vertical elements like trellises or small, multi-stemmed understory trees to make the yard feel larger.
Set a Budget and Phase the Project: Sustainable landscaping can require high upfront costs for hardscaping. To manage your budget, break the project into phases. Focus on soil remediation, removing invasive species, and establishing trees in year one. Tackle hardscaping in year two, and fill in perennial borders in year three.
💡 Planning Tip: Designing an eco-friendly space from scratch can feel overwhelming. If you want a complete, done-for-you blueprint for water collection, solar energy, and year-round gardening in a small space, check out The Self-Sufficient Backyard. It takes the guesswork out of off-grid landscaping and saves you months of trial and error.
Sustainable Materials and Practices Checklist
Follow these core practices to ensure your yard remains ecologically sound year after year:
- Avoid synthetic pesticides and herbicides: Manual weed pulling and biological pest control (like introducing ladybugs or relying on birds) keep toxins out of the local food web.
- Source materials locally: Buy stone mined in your region and plants grown at local nurseries to reduce the massive carbon footprint of heavy shipping.
- Conserve water: Use smart irrigation controllers that adjust watering schedules based on local weather data, and install drip lines rather than overhead sprinklers to reduce evaporation.
- Go peat-free: Peat moss is harvested from ancient bogs that act as massive carbon sinks. Use coconut coir or leaf mold as a sustainable alternative for moisture retention.
- Leave the leaves: In autumn, rake leaves directly into your garden beds instead of bagging them for the curb. They act as free mulch and provide crucial winter shelter for overwintering caterpillars and lightning bugs.
Seasonal Maintenance Guide
A sustainable yard works with nature, but it still requires light management. Follow this brief seasonal rhythm:
- Spring: Cut back dead perennial stalks only after temperatures consistently stay above 50 degrees Fahrenheit, allowing overwintering insects time to emerge. Top-dress garden beds with an inch of fresh compost. Inspect and clean rain barrels.
- Summer: Monitor new plantings for drought stress. Adjust smart irrigation controllers for peak heat. Keep birdbaths scrubbed and filled with fresh water. Turn the compost tumbler weekly.
- Fall: Plant new trees, shrubs, and spring-blooming bulbs; the cooler air and warm soil encourage rapid root growth. Sow micro-clover or creeping thyme seeds. Allow fallen leaves to remain in garden beds as organic mulch.
- Winter: Drain rain barrels and hoses to prevent freezing and cracking. Prune dormant deciduous trees and shrubs. Use this downtime to clean and sharpen your hand tools and plan next year’s additions.
Frequently Asked Questions
Will a rain barrel attract mosquitoes to my yard?
Mosquitoes breed in stagnant water, so an open bucket will attract them. However, a properly designed rain barrel includes a fine-mesh screen over the inlet to keep insects and debris out. Using a specialized mosquito dunk (Bti), a naturally occurring bacterium, is a highly effective, eco-friendly way to eliminate any larvae without harming plants, pets, or wildlife.
How do I find plants that are native to my specific area?
The best way to find truly native plants is to visit a local native plant society or your state’s university cooperative extension service website. They maintain specific, vetted lists of plants that thrive in your ecoregion. You can also ask local, independent nurseries for native cultivars rather than shopping at large big-box home improvement stores.
Can I implement eco-friendly landscaping if I live in a strict HOA?
Yes. While some Homeowner Associations require specific lawn percentages, many states have passed “Right to Garden” laws that prevent HOAs from banning drought-tolerant landscaping or native plants. Start by submitting a neat, professional design plan to your architectural review committee. Focus on tidy, intentional designs like defined native plant borders and clearly edged beds.
How often do I need to water drought-tolerant plants?
“Drought-tolerant” does not mean “never needs water.” During their first year, all new plants require deep, consistent watering once or twice a week to establish a healthy root system. Once fully established—usually by the second or third growing season—drought-tolerant native plants will only need supplemental watering during severe, prolonged dry spells.
Is a creeping thyme lawn expensive to install?
Installing creeping thyme from mature potted plants can be very expensive. However, starting a creeping thyme or micro-clover lawn from seed is highly cost-effective and budget-friendly for small yards. Seed packets are inexpensive, though you will trade money for time, as germination and full coverage can take an entire growing season to establish.
Conclusion
Creating an eco-friendly landscape in a small yard is an ongoing, rewarding process of working alongside nature rather than fighting against it. You do not have to implement every sustainable design at once. Choose one practical next step this weekend—whether that is setting up a small compost tumbler, purchasing a rain barrel, or mapping out a 10-foot section of lawn to replace with native perennials—and begin building a healthier, more resilient outdoor space.
Take Your Eco-Friendly Yard to the Next Level. You don’t need dozens of acres to live sustainably. If you are serious about reducing your reliance on the grid, growing organic food year-round, and building a self-sustaining ecosystem right outside your back door, we highly recommend The Self-Sufficient Backyard.
Sources and Further Reading:
- EPA WaterSense Program
- USDA Plant Hardiness Zone Map
- University Cooperative Extension Services
- The National Wildlife Federation
- The Xerces Society for Invertebrate Conservation
- Local Native Plant Societies