Choosing the right wood joinery method is the foundation of every successful woodworking build. Whether you are crafting an outdoor picnic bench, assembling kitchen cabinets, or building heirloom-quality furniture, the strength, durability, and appearance of your project depend heavily on how your boards are connected. Below is a comprehensive breakdown of the 13 essential wood joinery types, how they work, their primary pros and cons, and when to use them.
💡 Woodworker’s Shortcut: Knowing which joint to use is only the first step. If you want exact cut lists, clear 3D schematics, and step-by-step blueprints for over 16,000 builds using these exact joints, check out the complete archive below: Explore Ted’s 16,000 Woodworking Plans Archive ➔
1. Basic Butt Joint
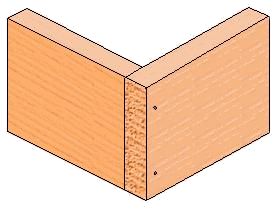
The butt joint is the simplest method for joining two pieces of wood. One piece of stock is placed directly against another at a right angle and secured with adhesive, nails, or screws.
Square Cuts are Key
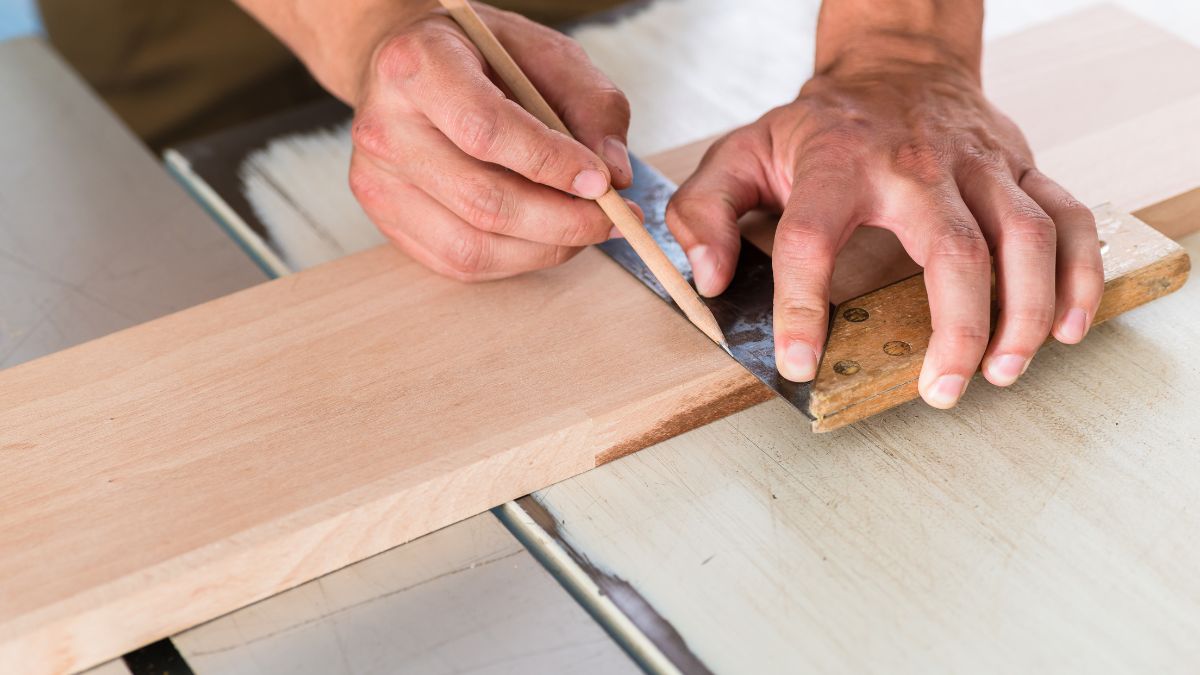
Because there is no interlocking mechanism, your end cuts must be perfectly square (90 degrees). A miter saw or a circular saw paired with a reliable layout square is essential to prevent unsightly gaps.
Glue Provides the Strength
End grain absorbs adhesive rapidly because it acts like tiny drinking straws. Apply a generous layer of wood glue, and always reinforce the joint with mechanical fasteners (nails, dowels, or screws). If working with hardwood, pre-drill pilot holes to avoid splitting.
2. Mitered Butt Joint
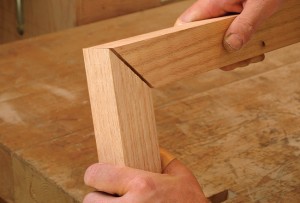
A mitered butt joint connects two boards cut at complementary angles (typically 45 degrees) to form a clean 90-degree corner without exposing end grain.
Angles Must Be Precise
Achieving a seamless miter requires a fine-tuned compound miter saw. Even a half-degree error will result in a visible gap at the heel or toe of the corner.
Reinforcement is Mandatory
Like a standard butt joint, miters rely on end-grain glue contact. For load-bearing frames or structural boxes, reinforce them with corner splines, internal biscuits, or brad nails.
3. Half-Lap Joint
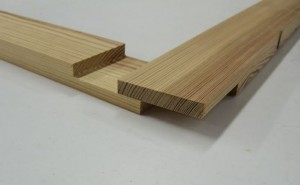
A half-lap joint joins two overlapping boards by removing half the thickness from each piece, allowing them to nest flush together.
When to Use Half-Lap Joints
Half-laps offer exceptional face-to-face glue surface area. They are ideal for door frames, window sash assemblies, structural timber framing, and rustic furniture bases.
How to Cut
Use a table saw equipped with a stacked dado blade or multiple parallel cuts with a standard blade, clearing the remaining waste with a sharp hand chisel.
4. Tongue and Groove Joint
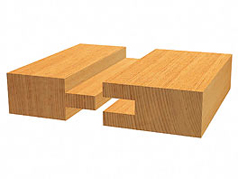
Commonly seen in flooring, beadboard paneling, and table tops, tongue and groove joinery features a protruding ridge (tongue) along the center of one edge that fits snug into a corresponding slot (groove) on the adjacent board. This allows wide panels of wood to expand and contract across seasonal humidity shifts without separating or cupping.
Step1: This joint is really only used for timber boards so the first thing you must do is measure and cut up some timber boards to your required length.
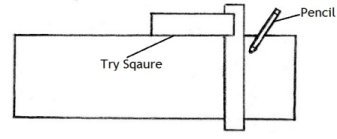
Step2: This step is not entirely necessary if you have some experience using a router but if not you need to mark the giving and receiving ends on your boards.
Step3:This step needs to be done with a router bench to create a successful joint and the first thing you do is start with a router bit to cut the groove. After the groove has been cut you now use another router bit to cut the tongue.
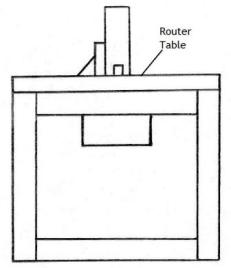
Step4:Check to see if the joint fits tightly and if it does you can now glue and clamp the boards together which will interlock from your tongue and groove joints.
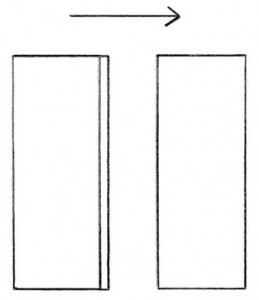
Tip: You can buy lining boards which already have tongue and groove joints cut which makes this option a simpler and easier method for people with time restraints or inexperienced woodworkers.
5. Mortise and Tenon Joint
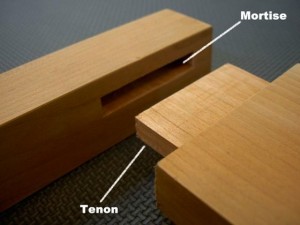
One of the strongest and oldest wood joints in history. A peg-like projection (tenon) on the end of one board inserts tightly into a corresponding rectangular cavity (mortise) on another.
- Forming the Tenon: Cut using a table saw, band saw, or tenoning jig.
- Chiseling the Mortise: Cut using a dedicated mortising machine, drill press with a Forstner bit, or hand mortise chisels.
Best suited for: Sturdy dining chairs, heavy table bases, bed frames, and structural framing.
6. Biscuit Joint
A biscuit joint uses football-shaped wooden biscuits made of compressed beech wood. Using a biscuit joiner, matched slots are cut into the edges of two boards. When glue is introduced, the biscuit expands inside the slots, locking the boards into alignment.
- Size #0: Best for narrow picture frames and small trim.
- Size #10: Versatile standard size for general builds.
- Size #20: Maximum holding strength for wide edge-to-edge glue-ups like dining table slabs and butcher blocks.
7. Pocket Joint (Pocket Hole Joinery)
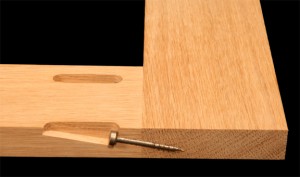
Pocket joinery involves drilling an angled pilot hole into one board and securing it to another with a self-tapping screw. Popularized by modern pocket jigs (such as Kreg), it is one of the fastest and most accessible methods for DIY furniture making.
💡 Project Match: Pocket joints are widely used for face frames, cabinets, nightstands, and consoles. You can find hundreds of simple pocket-hole blueprints inside the Ted’s 16,000 Woodworking Collection.
Stop Guessing Your Cut Dimensions & Angles
Whether you are building a dining table with traditional mortise-and-tenon joints or an entryway bench with simple pocket screws, having complete cut lists and clear assembly blueprints prevents costly lumber waste. Download 16,000+ Step-by-Step Plans Here ➔
8. Dado Joint
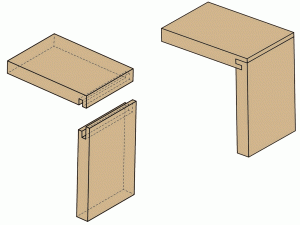
A dado is a flat-bottomed trench or channel cut across the grain of a board, allowing the square edge of a mating piece to slip tightly inside.
Dadoes are the gold standard for shelving units, bookcases, and entertainment centers because the physical wood beneath the shelf supports all vertical weight.
9. Rabbet Joint
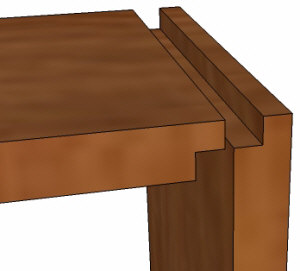
A rabbet is an open-faced recess or channel cut directly into the edge or end of a board. Commonly used to recess back panels into cabinetry and bookcases, keeping the back flush and hiding exposed fasteners.
10. Through Dovetail Joint
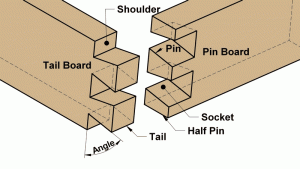
Renowned for both its mechanical strength and timeless visual beauty, a through dovetail consists of interlocking wedge-shaped “pins” and “tails” that resist pull-out forces from all directions.
Both end grains remain visible on the outside of the joint, signaling artisan craftsmanship. Commonly cut using dovetail jigs with routers or hand-sawn with Japanese pull saws and bench chisels.
💡 Project Match: Through dovetails are ideal for high-end drawer construction, tool chests, and blanket boxes. Explore master-craft project plans in Ted’s Woodworking Archive.
11. Half-Blind Dovetail Joint
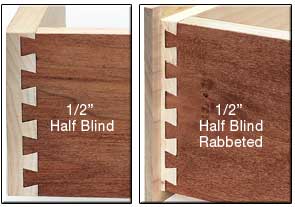
In a half-blind dovetail, the pins and tails interlock inside the wood, so the joint is visible from only one side. This keeps the front face of a drawer box completely clean while retaining the robust locking strength of a dovetail inside.
12. Sliding Dovetail Joint
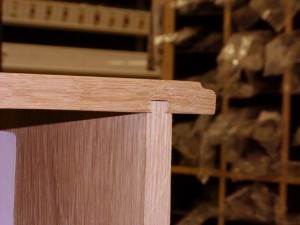
A sliding dovetail consists of a tapered, angled tenon sliding into an identical angled slot running along the face of an intersecting board.
It combines the load-bearing strength of a dado with the locking pull-resistance of a dovetail, making it an excellent choice for floating shelves and partition walls in solid-wood cabinetry.
13. Box Joint (Finger Joint)
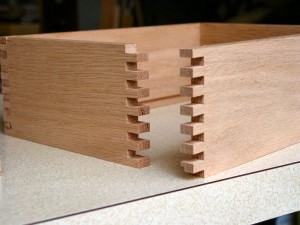
A box joint features interlocking rectangular fingers that mesh together at a 90-degree corner. While it lacks the angled locking mechanism of a dovetail, its extensive glue surface provides immense durability and a striking modern geometric look for storage crates, small boxes, and speaker cabinets.
Ready to Put These Joints to Work on Your Next Project?
Never get stuck on dimensions or missing steps again. Get instant access to the world’s largest archive of step-by-step woodworking plans—complete with beginner-friendly guides, full materials lists, and 3D schematics. Check Out Ted’s 16,000 Woodworking Plans Today ➔