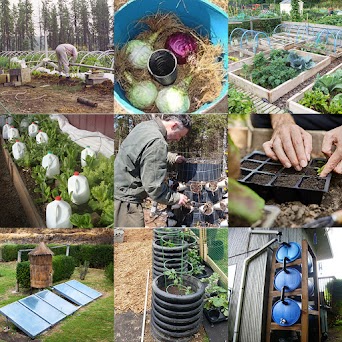
Like seeds waiting for the right conditions, your backyard holds untapped potential. You can transform it into a self-sustaining sanctuary with seven targeted DIY projects. Each project builds on the next, creating an integrated system that reduces your reliance on external resources. From raised beds to rainwater harvesting, these methods are practical and proven. What comes next will change how you see your outdoor space entirely.
Key Takeaways
- Build raised garden beds using 40% topsoil, 40% compost, and 20% drainage material to control soil conditions and boost yields.
- Set up a DIY compost tumbler for $45–$95 to recycle nutrients and eliminate reliance on store-bought fertilizers.
- Install rainwater harvesting barrels under downspouts to reduce water bills by 30–50% and minimize stormwater runoff.
- Create vertical gardens using stacked racks or trellises to maximize growing space without expanding your garden’s ground footprint.
- Plant pollinator gardens with diverse species to attract beneficial insects, supporting natural pest control and improving crop yields.
Build Raised Garden Beds That Feed Your Family
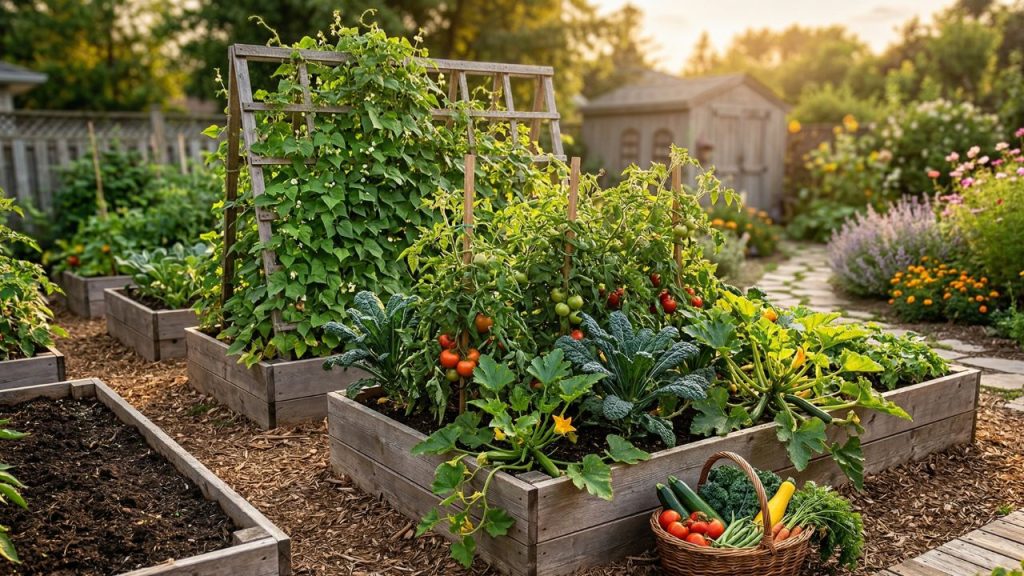
Raised garden beds solve several common growing challenges simultaneously, offering controlled soil conditions, improved drainage, and extended growing seasons that ground-level planting can’t reliably provide.
You’ll reclaim independence from poor native soil by building a 4×8 foot bed with a 40% topsoil, 40% compost, and 20% drainage material mixture, producing 40+ pounds of tomatoes through intentional soil health management.
Implement companion planting and crop rotation strategically, pairing heirloom varieties with biodiversity enhancement techniques that naturally support pest management without compromising organic practices.
Your raised bed’s localized climate advantage extends production from March through November, with soil temperatures reaching 50°F weeks before ground-level conditions allow.
Nutrient cycling through seasonal planning and consistent compost replenishment preserves long-term productivity, transforming previously unworkable spaces into abundant, self-sustaining food systems you’ll control completely.
Incorporating cover crops like legumes between growing seasons further protects your raised bed soil from erosion while adding essential nutrients and suppressing weeds naturally.
Set Up a Composting System That Runs Itself

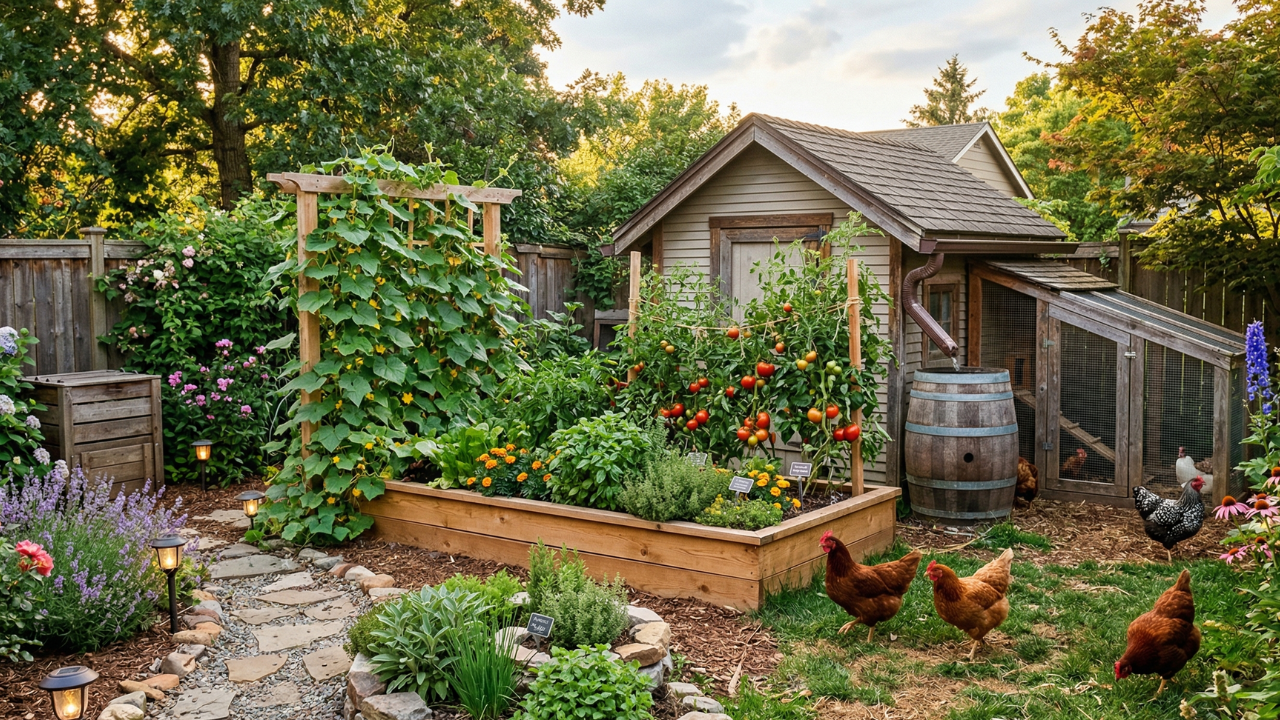
Setting up a composting system that largely manages itself begins with selecting the right composter type, as a DIY tumbler built from a 55-gallon food-grade barrel mounted on a wooden A-frame stand costs between $45 and $95 to construct, offering a cost-effective and mechanically efficient alternative to store-bought models priced at $100 to $300 or more.
Once you’ve chosen your composter, you must balance nitrogen-rich green materials, such as food scraps and fresh yard waste, with carbon-rich brown materials, such as dried leaves and cardboard, to maintain the chemical ratio that drives microbial decomposition and internal heat generation.
You can accelerate the breakdown process naturally by drilling aeration holes throughout the barrel to optimize oxygen flow, positioning the system near your primary waste sources to reduce handling time, and turning the tumbler on an infrequent but consistent schedule to sustain the thermal conditions necessary for efficient decomposition.
Keeping your compost’s moisture content between 40-60% ensures the microbial activity needed for consistent breakdown remains active without creating the anaerobic conditions that lead to foul odors or stalled decomposition.
Choosing Your Composter Type
Selecting the right composting method determines how much time, space, and effort you’ll invest in managing organic waste, and each approach carries distinct trade-offs worth evaluating before committing to a system.
| Method | Timeline | Best For |
|---|---|---|
| Cold composting | 6–24 months | Low-effort, large spaces |
| Hot composting | 4–8 weeks | Speed, pest management |
| Worm bins | Continuous | Small spaces, nutrient cycling |
Beyond these three, Bokashi fermentation handles meat and dairy through anaerobic processing, while trench composting eliminates infrastructure entirely by burying materials directly in soil.
Each method serves composting benefits differently — hot composting destroys pathogens, worm bins maximize nutrient cycling, and Bokashi fermentation reduces odors. Identify your constraints first, then choose the system that liberates you from unnecessary labor.
Balancing Browns And Greens
Two ratios define whether your compost pile thrives or stagnates: the carbon-to-nitrogen balance, expressed practically as 2:1 to 4:1 browns to greens by volume, determines how efficiently microorganisms break down organic material, since nitrogen fuels microbial growth and reproduction while carbon supplies energy and structural integrity.
Mastering these material ratios liberates you from dependency on synthetic inputs, as the decomposition process becomes self-regulating when you layer correctly. Start with 4-6 inches of bulky browns, add 2-3 inches of organic matter like kitchen scraps, then cover greens with 1-2 inches of browns.
Nutrient balance signals itself clearly: slimy, odorous piles need more carbon, while dry, inactive ones need nitrogen. Turn your compost regularly, maintaining consistent layering methods, and you’ll sustain genuine soil health indefinitely.
A well-maintained compost system also promotes beneficial microorganisms that aid in releasing essential nutrients back into the soil, making your garden more fertile over time.
Accelerating Breakdown Naturally
Whether you choose passive or active composting determines how much ongoing labor your system demands, and understanding that distinction lets you design a setup aligned with your actual capacity for maintenance.
Passive systems extend decomposition to 8–12 months but liberate you from frequent turning, watering, and temperature monitoring, while active systems compress that timeline to 3–6 months through consistent management.
Maintaining temperatures between 40–80 degrees Fahrenheit preserves microbial diversity, and balancing acidic materials like citrus peels with carbon-rich natural amendments prevents environmental disruption that slows biological activity.
Moisture levels require monitoring without promoting anaerobic conditions, yet passive approaches still yield finished compost equal in quality to labor-intensive methods, freeing you from unnecessary obligation while sustaining a productive, self-directed decomposition cycle throughout each season.
Beyond convenience, composting creates an aerobic decomposition environment that significantly reduces methane production from landfills, helping mitigate the greenhouse gas emissions that make organic waste disposal one of the more impactful contributors to climate change.
Catch Rainwater and Cut Your Garden’s Water Bill

Harvesting rainwater offers three significant advantages for backyard gardeners: reduced utility costs, improved plant health, and measurable environmental benefits, all achievable through a straightforward collection system.
By implementing rainwater harvesting techniques, you’ll cut water bills by 30% to 50% annually, reclaiming financial freedom from municipal supply dependence. Position 55-gallon barrels beneath gutter downspouts, install mesh filters to block debris, and connect overflow valves to prevent overfilling during heavy rainfall.
Understanding rainwater benefits extends beyond cost savings, since naturally soft, chlorine-free water enhances nutrient absorption, promoting measurably healthier plant growth. Environmentally, captured rainwater reduces stormwater runoff, minimizes soil erosion, and preserves groundwater levels.
Calculate your collection potential using your roof area, local rainfall data, and the formula: Roof Area × Rainfall × 0.623 × Efficiency Factor. Many homeowners also find that government rebates and tax credits help offset the initial installation costs, making the system an even more financially sound long-term investment.
Grow More Food Without Adding More Space

Once you’ve secured a reliable water supply, you can turn your attention to extracting maximum food production from the ground you already have, without breaking new soil or expanding your footprint.
Successive planting keeps every bed actively producing throughout the season, as you replace harvested crops immediately with new starts, rotating families to prevent nutrient depletion and pest accumulation.
Pairing this approach with heirloom seed selection and permaculture design principles reduces your external inputs considerably, since heirlooms allow you to save and replant seed stock year after year while permaculture structures your garden around self-sustaining biological relationships that build soil fertility, suppress weeds, and support yields with diminishing labor over time.
For growers with limited horizontal space, vertical farming systems use stacked racks or hydroponic setups to multiply your output indoors without claiming any additional ground footprint.
Successive Planting Maximizes Yields
Succession planting staggers your crop plantings across the growing season, ensuring a continuous harvest rather than a single, overwhelming flush of produce followed by bare, unproductive beds. By developing a deliberate planting schedule for each crop variety, you eliminate wasted garden space and distribute yields evenly.
| Strategy | Benefit |
|---|---|
| Staggered planting dates | Continuous harvests |
| Cold-to-warm crop rotation | No idle beds |
| Intercropping varieties | Overlapping maturity windows |
| Sequential bed replacement | Maximum space utilization |
This method requires advance planning, including knowledge of local frost dates and each crop’s days-to-maturity. You’re not expanding your garden footprint, you’re liberating its full productive potential, generating considerably more food from the identical square footage you already cultivate.
Pairing succession planting with crop rotation disrupts pest life cycles between plantings, reducing pest populations without relying on chemical interventions.
Heirloom Seeds Enable Replanting
Pairing succession planting with a reliable seed strategy compounds your garden’s productivity without demanding additional square footage, and heirloom varieties deliver precisely that reliability. Among the most liberating heirloom benefits is your ability to save, replant, and share seeds indefinitely, breaking dependency on commercial supply chains.
Heirloom seed adaptations empower you through:
- True-to-type reproduction, ensuring consistent harvests across every generation you cultivate
- Multigenerational resilience against local pests, diseases, and climate conditions
- Elimination of annual seed purchasing costs, freeing your resources permanently
- Community seed sharing, strengthening neighborhood food sovereignty and collective independence
These varieties carry cultural heritage within every seed you save, connecting your garden to ancestral agricultural wisdom while simultaneously securing your food future without external interference, approval, or dependency. Strengthening your heirloom garden further through crop rotation and cover crops helps prevent disease buildup, replenish soil nutrients, and reduce pest cycles across successive growing seasons.
Permaculture Reduces Growing Inputs
Permaculture’s core principle—working with natural systems rather than against them—eliminates the dependency cycle of purchased fertilizers, pesticides, and supplemental irrigation that conventional gardening demands.
By designing your backyard to mirror natural ecosystems, you’re activating self-regulating biological processes that continuously build soil fertility without your intervention.
Nutrient cycling occurs automatically when you layer canopy trees, understory shrubs, ground covers, and nitrogen-fixing plants together, because each organism feeds the next through decomposition, root activity, and organic matter contribution.
Dense polyculture plantings suppress weeds naturally, integrated animals provide pest control and pollination, and perennial emphasis reduces annual soil disturbance. Your system becomes increasingly productive over time as biological activity intensifies, ultimately liberating you from the expensive, labor-intensive input cycle that keeps conventional gardeners permanently dependent.
Incorporating rainwater harvesting systems into your permaculture design further reduces external inputs by collecting and storing precipitation for use during dry periods, strengthening your backyard’s overall self-sufficiency.
Plant a Pollinator Garden That Boosts Your Harvest
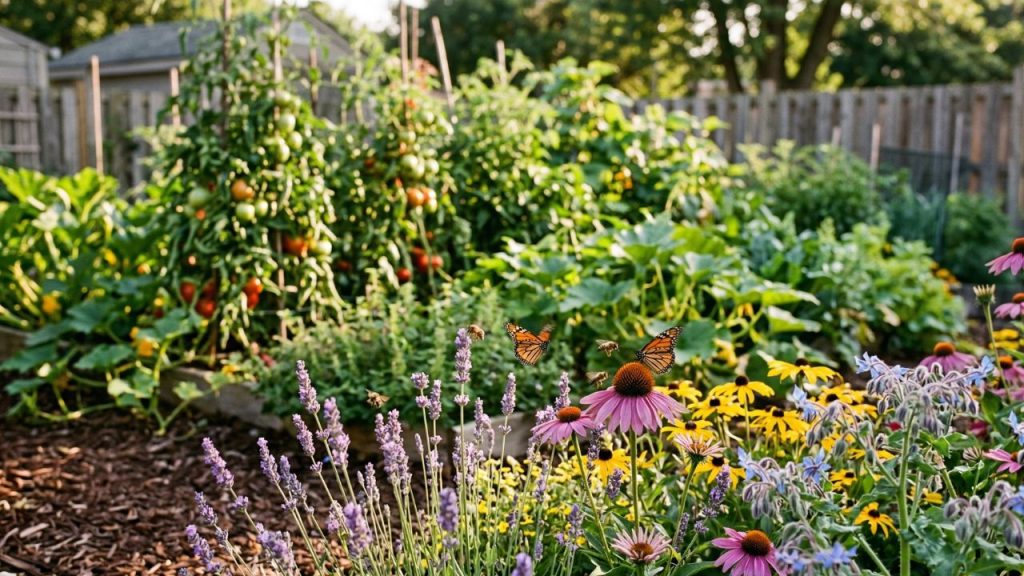
When you plant a pollinator garden, you’re doing more than adding color to your backyard — you’re actively supporting the bees, butterflies, and other insects that fertilize up to 75% of flowering plants and 35% of global food crops. Reclaim your garden’s independence through intentional native plant selection, which attracts four times greater pollinator diversity than non-native species. Follow these steps:
- Choose at least three blooming species per season for continuous nectar production
- Group plants in patches, maximizing foraging efficiency for visiting pollinators
- Add a shallow water source with stones, preventing drowning while providing hydration
- Eliminate pesticides completely, liberating your garden from chemicals that harm beneficial insects
Native plants thrive without synthetic pesticides or fertilizers, making them a naturally resilient choice that further protects the pollinators your garden depends on. Perennial natives, once established, require minimal water, sustaining themselves while dramatically boosting your harvest yields year after year.
Power Your Backyard Systems With the Sun
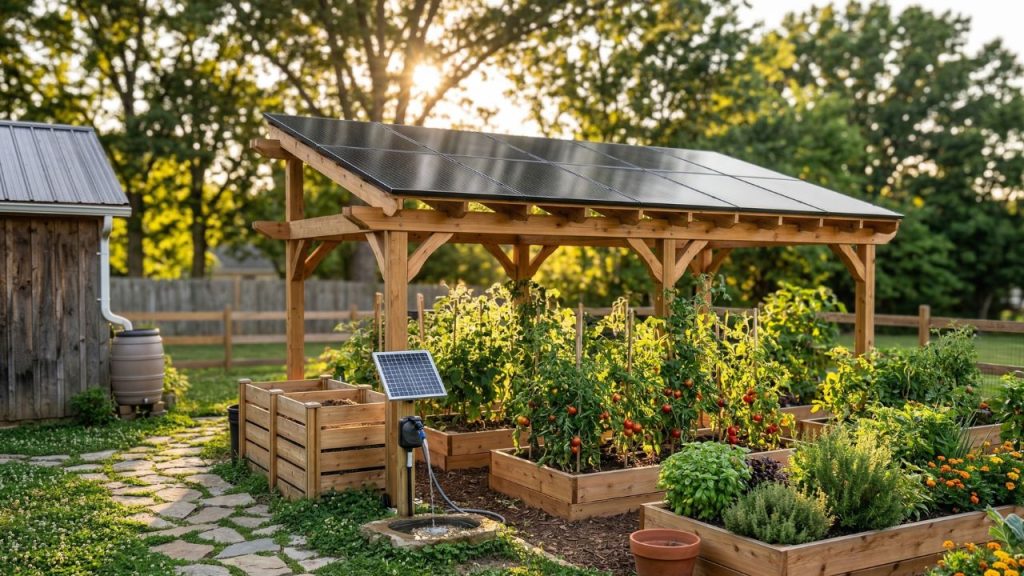
Taking your backyard off-grid starts with understanding four essential stages: collection, regulation, storage, and conversion. Sunlight collection begins with solar panels generating direct current, while power regulations depend on charge controllers preventing battery damage. Battery storage requires sizing based on daily consumption, and energy conversion relies on inverters transforming DC into usable AC power.
| Component | Your Freedom Gained |
|---|---|
| Solar Panels | Sunlight collection, endless energy |
| Charge Controllers | Safe power regulations, protected investment |
| Battery Storage | Two days backup, uninterrupted independence |
| Inverters | Energy conversion powering every device |
| Safety Equipment | Reliable solar installation, lasting peace |
Calculating your solar efficiency requires dividing daily watt-hours by peak sun hours, ensuring your sustainable systems and energy independence remain firmly within your control.
Turn Your Backyard Into One Self-Sustaining System
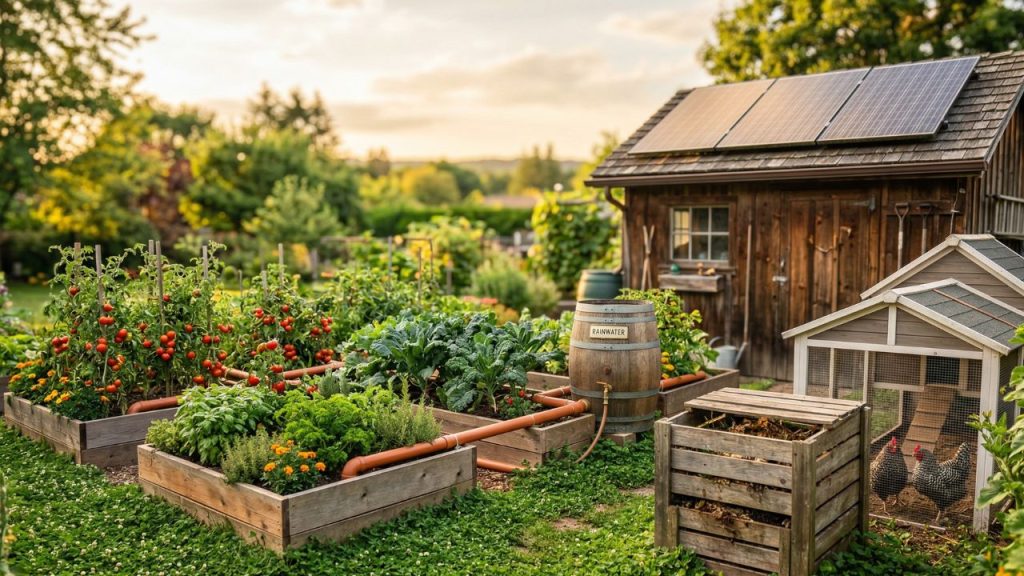
Designing your backyard as a unified ecosystem, rather than a collection of isolated systems, transforms individual components into a resilient, self-regulating environment that requires fewer external inputs over time.
Applying permaculture principles through intentional garden zoning, edible landscapes, and seasonal planting liberates you from dependency on industrial food systems. Biodiversity benefits emerge naturally when wildlife habitats, companion plantings, and soil regeneration strategies interconnect deliberately.
Consider these transformative integration priorities:
- Establish fruit tree canopies that anchor your edible landscape permanently
- Deploy rotational livestock systems that rebuild soil regeneration cycles continuously
- Design rain gardens that close water loops while supporting wildlife habitats
- Pursue community engagement through surplus sharing, strengthening collective food independence
Every interconnected decision compounds toward a thriving, self-sustaining backyard that genuinely serves your freedom.
Frequently Asked Questions
How Long Does It Typically Take for a Backyard Sanctuary to Become Fully Self-Sustaining?
Isn’t it worth knowing the full scope of your commitment before you begin? Your backyard ecosystem won’t reach full self-sufficiency overnight; it’ll require 15-35 years of dedicated sustainable gardening, progressing through distinct phases: 3-6 months of planning, 6-12 months of infrastructure setup, 1-2 years of food production establishment, and 15 years for permaculture maturation, ultimately achieving 80% food self-sufficiency through thorough, integrated system development.
What Is the Estimated Total Cost to Implement All These DIY Backyard Systems?
You’ll find your budget breakdown ranges from $200 to $12,500, depending on your selected systems. A cost comparison reveals that individual DIY projects stay under $50, rainwater capture and greywater systems start under $200, while hybrid solar and wind installations reach $3,000–$12,000. Combining composting, water harvesting, basic animal shelters, and renewable energy, you’re looking at a total investment between $3,500–$12,500 for extensive backyard self-sufficiency.
Can These Backyard Systems Work Effectively in Cold or Extreme Weather Climates?
Zone 3 climates experience temperature swings of 40°F between day and night, yet cold climate adaptations make self-sustaining backyard systems entirely viable. You’ll need passive solar greenhouses with double-panel south-facing windows, deeply mulched root zones, and backup plant starts comprising 50% reserve capacity. Extreme weather resilience depends on simplified property layouts, shortened driveways, vertical construction, and strategic wind-shelter placement, all of which reduce maintenance burdens during extended, demanding winter periods.
Are There Local Permits Required Before Starting Any of These Backyard Projects?
Yes, you’ll likely need permits for several backyard projects. Local regulations vary considerably by municipality, so you must consult your local building authority before starting construction. Permit requirements typically apply to large sheds, pools, decks exceeding 30 inches, and permanent structures with utility installations. Zoning setbacks, HOA covenants, and floodplain designations may impose additional restrictions, while smaller temporary structures without foundations or utilities frequently qualify for exemptions.
How Much Time Weekly Is Needed to Maintain All These Combined Backyard Systems?
You’ll need roughly 10–20 hours of weekly time depending on your system’s scale, animal count, and seasonal demands. Prioritize maintenance tips like batching daily feeding, watering, and health checks into consolidated routines, rotating chicken tractors bi-weekly, and scheduling beehive inspections seasonally. Neglecting interconnected systems compounds failures exponentially, demanding more corrective hours than consistent upkeep would’ve required, so structured, disciplined scheduling preserves your capacity for autonomous, self-determined living beyond homestead obligations.
Conclusion
You’ve got the tools, the knowledge, and the blueprint to make it happen. By building your beds, composting your waste, harvesting your rainwater, maximizing your space, supporting your pollinators, and harnessing your sunlight, you’re creating a system that works for itself. Each project strengthens the next, turning your backyard into something that feeds, sustains, and renews itself season after season.