Did you know that the precise alignment of magnets in an electric generator significantly impacts its efficiency and power output? Understanding the intricacies of magnet installation is key to maximizing the performance of your DIY electric generator. As you progress through each step in this guide, you will uncover the secrets to achieving optimal magnet placement and harnessing the full potential of your homemade energy source. So, are you ready to take the first step towards unlocking the power of magnets in your DIY electric generator?
⚡OFF-GRID POWER⚡
Build a Home Power Backup—No Utility Needed
Looking to keep essentials running during outages? The Ultimate Off-Grid Generator course walks you through a DIY backup system with simple parts and step-by-step plans — ideal for homesteads, cabins, or emergency prep.
Key Takeaways
- Proper magnet placement is crucial for efficient electricity generation.
- Securely attach and insulate magnets on the metal shaft for safety.
- Regular maintenance includes checking wire connections and magnet alignment.
- Experiment with configurations to optimize DIY electric generator performance.
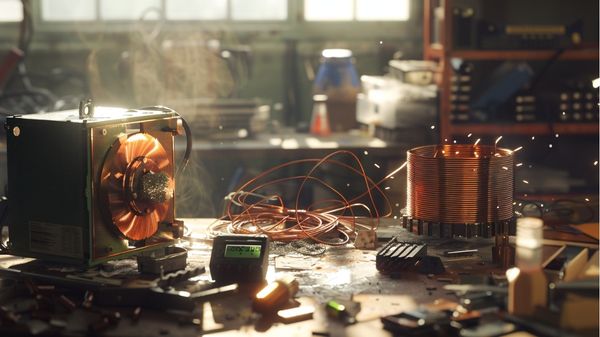
Necessary Tools and Materials
To assemble the DIY electric generator successfully, gathering essential tools and materials such as copper wire, magnets, a metal shaft, a support frame, and electronic devices is crucial. The copper wire serves as the primary conductor for electricity generation, while the magnets create the magnetic field necessary for inducing current.
The metal shaft acts as the central axis for the rotating components, connecting the magnets and facilitating movement. A sturdy support frame ensures stability and alignment of the generator components. Electronic devices like a multimeter are essential for testing voltage output and ensuring the generator functions correctly.
Understanding the role of each component — copper wire, magnets, metal shaft, support frame, and electronic devices — is fundamental to constructing a functional DIY electric generator.
⚡OFF-GRID POWER⚡
Build a Home Power Backup—No Utility Needed
Looking to keep essentials running during outages? The Ultimate Off-Grid Generator course walks you through a DIY backup system with simple parts and step-by-step plans — ideal for homesteads, cabins, or emergency prep.
Setting Up the Work Area
Preparing the workspace for assembling the electric generator involves ensuring a clear, well-lit environment with ample room to work efficiently and safely. When setting up your work area, consider the following:
- Organize Tools: Arrange all necessary tools like wire cutters and screwdrivers within reach for easy access.
- Secure Components: Keep all magnetic and copper components organized to prevent misplacement or confusion during the building process.
- Protective Gear: Wear safety gloves and glasses to shield yourself from any potential hazards while working with the magnetic ends.
- Stable Surface: Use a sturdy work surface to provide a stable foundation for assembling the generator, reducing the risk of accidents or damage to the components.
Preparing the Magnet Placement
For optimal performance, ensure the magnet is positioned at a distance of ¼ inch (.6 cm) from the nail head. The proper placement of magnets is crucial in building a magnetic generator to efficiently produce electricity. To wind the wire effectively and maximize electricity generation, follow these steps in preparing the magnet placement:
| Step | Action |
|---|---|
| 1. Attach Magnet | Securely attach the magnet to the metal shaft for a consistent magnetic field. |
| 2. Align Magnet | Properly align the magnet for efficient electricity generation in the generator. |
| 3. Test Rotation | Spin the magnet and check if the electronic device receives power to verify placement. |
| 4. Adjust Position | If needed, adjust the magnet position to enhance the magnetic field’s impact on electricity production. |
| 5. Optimize Placement | Fine-tune the magnet’s location to ensure optimal performance of the magnetic generator. |
Installing the First Set of Magnets
Positioning the first set of magnets on the wheel rim with alternating poles facing outward is crucial for the effective installation process. To ensure a successful magnet installation, follow these steps:
- Wrap wire around the wheel rim: Begin by wrapping coated copper wire around the wheel rim where the magnets will be placed.
- Create a small magnetic field: Connect the ends of the wire to start building a small magnetic field in preparation for magnet attachment.
- Place magnets with alternating poles: Affix the magnets securely onto the wheel rim, ensuring that the alternating poles are facing outward.
- Check polarity alignment: Verify that the magnets are aligned correctly to optimize the magnetic flux interaction for efficient energy generation.
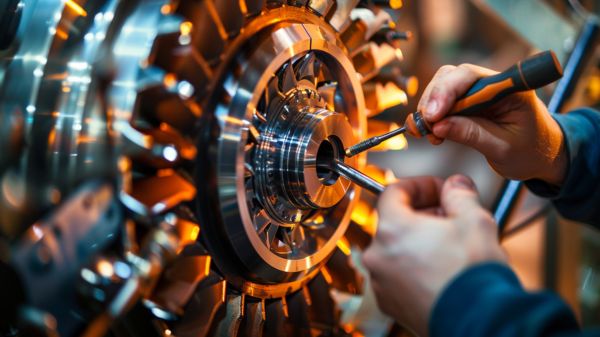
Securing the Magnet Alignment
To ensure optimal performance of your DIY electric generator, the secure attachment and alignment of the magnets on the metal shaft are critical steps in the assembly process.
Start by building a solid foundation by gluing the magnets onto the shaft with precision. Ensure the magnets are placed with insulation off the ends to prevent short circuits. Position the two magnets carefully to maximize the magnetic field strength.
Test the alignment by spinning the magnet and checking power output using a light bulb at the end of the wire. This step is crucial in verifying that the magnets are correctly secured and aligned for efficient electricity production.
Positioning Additional Magnets
Have you considered how strategically placing additional magnets around the spinning shaft can boost the power output of your magnetic generator? When positioning extra magnets, aim for an optimal configuration to maximize efficiency and electricity production. Here are some key points to keep in mind:
- Ensure even placement for balanced magnetic field distribution.
- Experiment with various magnet arrangements to find the most efficient setup.
- Proper alignment and spacing are crucial for enhancing power generation.
- Seek to optimize the magnetic flux density by strategically positioning the additional magnets.
Testing the Magnet Configuration
After strategically placing additional magnets around the spinning shaft to optimize power output, the next crucial step is testing the magnet configuration for proper attachment and function in your DIY electric generator. Ensure the magnet is securely attached to the metal shaft, allowing it to spin freely without obstructions. Proper alignment on the shaft is essential for maximizing power generation efficiency.
Manually spin the magnet to test if the electronic device connected to the generator receives power as intended. Regularly conduct tests on the magnet setup to identify any issues or malfunctions that could impact the generator’s performance. This meticulous testing phase guarantees the reliability and functionality of your DIY electric generator, empowering you to generate sustainable electricity.
Adjusting Magnet Placement
Experimenting with the placement of the magnet in relation to the coil allows for optimization of the magnetic field for enhanced electricity generation efficiency. When adjusting magnet placement, consider these key points:
- Distance Matters: Ensure the magnet isn’t too far or too close to the coil.
- Optimize Magnetic Field: Adjust the magnet position to maximize electricity generation.
- Experimentation is Key: Try different distances to find the ideal placement.
- Fine-Tuning Enhances Performance: Small adjustments can significantly impact the generator’s effectiveness.
Finalizing Magnet Installation
To ensure optimal performance of your DIY electric generator, the final step in the magnet installation process involves securing the magnets firmly onto the metal shaft. Proper alignment is crucial for maximizing efficiency in generating electricity. Test the magnet installation by spinning the shaft and observing the magnetic field’s effect on power generation. Use a strong adhesive like hot glue to affix the magnets firmly, preventing dislodging during operation.
The placement and spacing of the magnets on the shaft significantly impact the generator’s performance. Ensuring a stable magnetic field by securely attaching the magnets will lead to a more reliable and effective electric generator. Take your time to double-check the positioning and firmness of the magnets before moving on to the next steps.
Maintenance and Troubleshooting
Continuously monitor the wire connections for optimal performance by regularly checking for any loose or damaged parts to ensure the smooth functioning of your DIY electric generator. Utilize a multimeter to troubleshoot voltage output effectively. Inspect the alignment and stability of the magnets to prevent disruptions in the magnetic field. Ensure the wire winding is uniform and tight to maximize power output. Experiment with different wire lengths or magnet configurations to troubleshoot and enhance the generator’s performance.
- Regularly check wire connections for any loose or damaged parts.
- Use a multimeter to troubleshoot voltage output.
- Inspect magnet alignment and stability.
- Ensure uniform and tight wire winding for maximum power output.
⚡OFF-GRID POWER⚡
Build a Home Power Backup—No Utility Needed
Looking to keep essentials running during outages? The Ultimate Off-Grid Generator course walks you through a DIY backup system with simple parts and step-by-step plans — ideal for homesteads, cabins, or emergency prep.
Frequently Asked Questions
How Do You Make a Homemade Generator With a Magnet?
To make a homemade generator with a magnet, wind enamel-coated copper wire around a frame, attach a strong magnet to the center, connect wire ends to devices for testing, adjust wire length and magnet size, and ensure proper alignment.
Can You Run a Generator With Magnets?
Yes, you can power a generator with magnets. By harnessing magnetic forces to generate electricity, you can create a sustainable energy source. Magnets induce an electric current in a generator through movement, enabling you to produce power effectively.
How Do You Get Power From a Magnet?
To get power from a magnet, move it near a coil of wire. The changing magnetic field induces an electric current in the wire, following Faraday’s principles. This interaction generates voltage, producing electrical power that you can harness for various applications.
How to Make a Magnetic Field Generator?
To create a magnetic field generator, wind copper wire around a metal shaft to form a coil. Attach a strong magnet to induce the magnetic field. Ensure secure alignment for efficiency. Spin the magnet to test power output.
Conclusion
Congratulations on successfully completing the installation of magnets in your DIY electric generator! As you stand in your workshop surrounded by the hum of machinery, envision the endless possibilities that come with generating your own electricity. The magnetic force within your generator is now ready to power your world, symbolizing the fusion of innovation and sustainability. Embrace the future of energy independence and feel the electric buzz of achievement coursing through your veins. Happy generating!
⚡OFF-GRID POWER⚡
Build a Home Power Backup—No Utility Needed
Looking to keep essentials running during outages? The Ultimate Off-Grid Generator course walks you through a DIY backup system with simple parts and step-by-step plans — ideal for homesteads, cabins, or emergency prep.