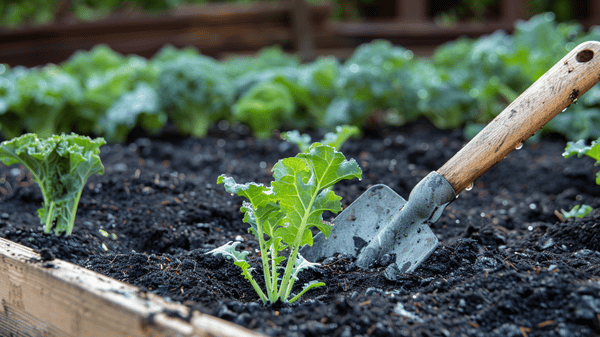
You can transform your garden’s productivity by understanding what lies beneath the surface. Soil composition directly affects drainage, nutrient retention, and root development, yet most gardeners overlook this critical foundation. The Mason jar test gives you a precise, visual breakdown of your soil’s sand, silt, and clay percentages without expensive lab equipment. What you discover next will fundamentally change how you approach every planting decision.
Key Takeaways
- The Mason jar test determines soil composition by separating sand, silt, and clay particles using water suspension and gravity over 24-48 hours.
- Fill a mason jar one-third with dry soil, add distilled water and a teaspoon of non-foaming dish detergent, then shake vigorously.
- Sand settles within 60 seconds, silt settles in approximately 2 hours, and clay fully settles after 24-48 hours.
- Measure each settled layer, convert depths into percentages, and plot results on a soil texture triangle for accurate classification.
- Amend soil based on results: add compost to sandy soils, organic material to silty soils, and gypsum to clay soils.
What Is the Mason Jar Test and Why Does It Work?
Soil’s composition determines how well it supports plant life, and the Mason jar test offers a straightforward method for identifying the proportions of sand, silt, and clay within a given sample.
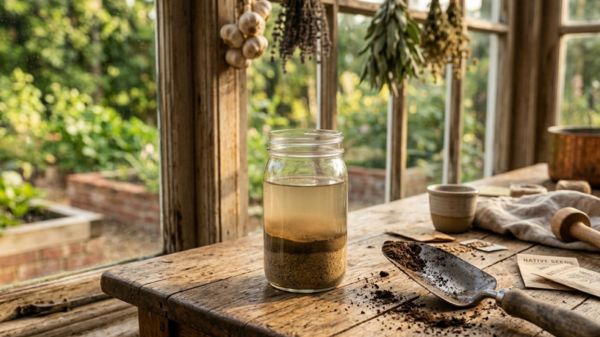
Understanding mason jar function requires recognizing that water suspends soil particles, allowing gravity to separate them according to density and size. Sand, being heaviest, settles within 60 seconds, while silt follows after approximately two hours, and clay requires 24-48 hours to fully settle.
Soil particle dynamics operate through this sequential separation, revealing precise compositional percentages you can measure directly. You’ll also notice organic matter floating at the surface, forming a distinct uppermost layer. This gravity-driven process gives you accurate, actionable data about your soil’s structural composition without requiring laboratory equipment.
What You Need Before You Start the Mason Jar Test
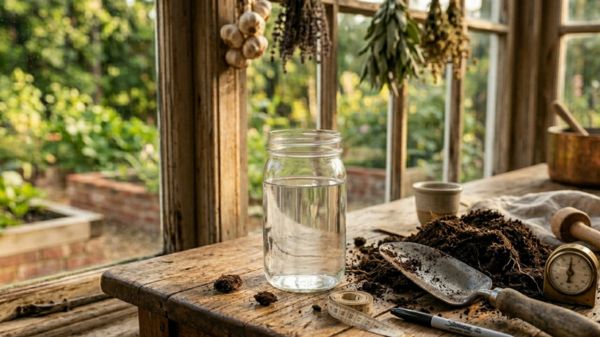
Before conducting the Mason jar test, you’ll need five categories of materials, each serving a distinct functional role in producing accurate results. Gathering these supplies beforehand guarantees your jar preparation and soil mixing processes proceed efficiently without interruption.
- A clear, quart-sized glass mason jar with a tight-fitting, sealable lid
- A soil sample collected from 5-8 inches deep, sifted through a mesh strainer for uniform consistency
- Two cups of distilled water, one teaspoon of non-foaming dish detergent, a ruler, and a marker
These materials work together systematically, where the soap disperses particles, the distilled water eliminates mineral interference, and your measurement tools document each settled layer’s height, ultimately allowing you to calculate precise soil composition percentages independently.
How to Run the Mason Jar Test Step by Step
With your materials assembled and your soil sample sifted, you’re ready to begin the Mason jar test, a straightforward process that unfolds across five sequential stages, each building directly on the previous one to produce a readable, measurable soil profile. Soil sample preparation and particle dispersion are foundational to accurate results.
| Stage | Action |
|---|---|
| 1 | Fill jar one-third with dry, pulverized soil |
| 2 | Add water, leaving minimal headspace |
| 3 | Incorporate one teaspoon of dispersant soap |
| 4 | Shake vigorously for several minutes |
| 5 | Set jar level; observe settling layers |
Sand settles within one minute, silt distinguishes itself after two hours, and clay completes its formation between 24 and 48 hours.
How to Measure and Calculate Your Soil Layer Percentages
Once the 24-hour settling period has concluded, you can begin taking the four critical measurements that form the foundation of your soil composition analysis: total soil depth, sand layer depth, silt layer depth, and clay layer depth. These soil layer measurement techniques empower you to truly understand what you’re working with.
- Measure total soil depth from the jar bottom to the settled soil’s top using a metric ruler.
- Measure the sand layer from the jar bottom to the sand layer’s top.
- Calculate silt and clay depths by subtracting preceding layer measurements from combined totals.
Finally, divide each individual layer measurement by total soil depth, then multiply by 100, converting your results into precise percentages that reveal your soil’s complete composition. Just as saltwater gargle remedies are cost-effective and simple to prepare for oral health, this straightforward measurement process offers an affordable and accessible way to diagnose your soil without expensive laboratory testing.
How to Use Your Mason Jar Results to Identify Soil Type
Once your settlement layers have fully separated and you’ve recorded your measurements, you can begin reading each layer’s depth against your total sediment height to calculate the percentage each component represents.
To determine sand percentage, divide your sand layer’s depth by the total sediment depth and multiply by 100, repeating this calculation for both your silt and clay layers to produce three distinct percentage values.
With these percentages calculated, you’ll plot each value on the corresponding axis of the soil texture triangle, locating where all three lines intersect to identify your soil’s classification.
Reading Your Layers
After 48 hours have elapsed, your jar will display three distinct, measurable layers that directly reveal your soil’s composition, and reading these layers accurately requires both careful observation and precise measurement. Soil stratification exposes your soil’s true character, and layer identification empowers you to make informed amendments.
Measure each layer using these steps:
- Mark each boundary line with a permanent marker on the jar’s exterior.
- Measure each individual layer’s height with a ruler.
- Divide each layer’s height by the total combined height to calculate percentages.
Your bottom layer represents sand, your middle layer represents silt, and your top layer represents clay, and these three percentages, once calculated accurately, enable precise placement on the soil texture triangle for definitive classification.
Calculating Soil Percentages
Three measurements drive your entire soil classification process, and converting those raw layer heights into percentages reveals your soil’s definitive texture profile. Divide each layer’s height by the total settled height, then multiply by 100 to determine individual layer composition percentages.
Your sand percentage equals sand height divided by total height, multiplied by 100, while silt follows identical measurement techniques. Calculate clay by subtracting both sand and silt percentages from 100, eliminating the need for direct measurement.
For example, 9mm sand divided by 23mm total yields 39% sand composition. Verify your calculations by confirming all three percentages sum to exactly 100%, which validates your arithmetic accuracy. These precise percentages then correspond directly to coordinates on the soil texture triangle, revealing your soil’s definitive classification.
How to Read a Soil Texture Triangle
The soil texture triangle, an equilateral triangle with each side representing 0% to 100% of one soil separate, provides a standardized method for classifying soil based on its sand, silt, and clay composition. To complete your texture analysis and soil classification accurately, follow these steps:
- Locate your clay percentage on the left axis, tracing horizontally across the triangle.
- Find your silt percentage on the upper right side, tracing diagonally downward and to the left.
- Identify your sand percentage on the bottom base, tracing diagonally upward and to the left.
Where all three lines intersect determines your soil’s textural class among twelve distinct categories, empowering you to make informed decisions about irrigation, nutrient management, and cultivation practices suited to your specific soil composition.
How to Fix Sandy, Silty, or Clay Soil
Once you’ve identified your soil’s textural class using the mason jar test and the soil texture triangle, you can begin selecting the appropriate amendments and management strategies to improve its structure, drainage, and nutrient-holding capacity. For sandy amendments, incorporate compost and aged manure to increase water retention and microbial activity.
To address silty compaction, minimize tilling, avoid heavy foot traffic, and add woody organic materials like bark chips to maintain friability. For clay drainage, apply gypsum, construct raised beds, and introduce coarse organic materials to create permanent drainage pathways.
Consistent organic integration across multiple growing seasons gradually transforms any problematic soil toward an ideal loam composition, and regular soil testing every one to two years monitors your measurable progress.
Incorporating compost into your soil amendments also reduces dependence on chemical fertilizers, while simultaneously supporting the microbial activity essential for breaking down organic matter into plant-available nutrients.
Frequently Asked Questions
Can I Test Soil From Multiple Garden Areas in One Session?
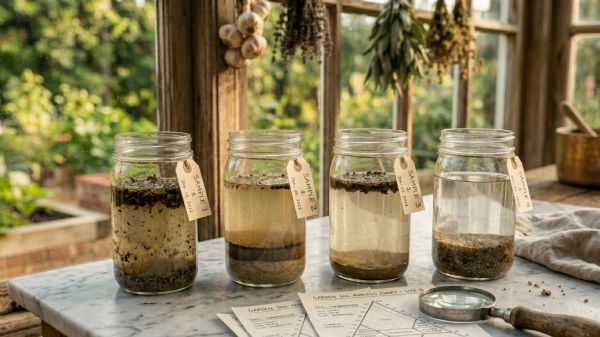
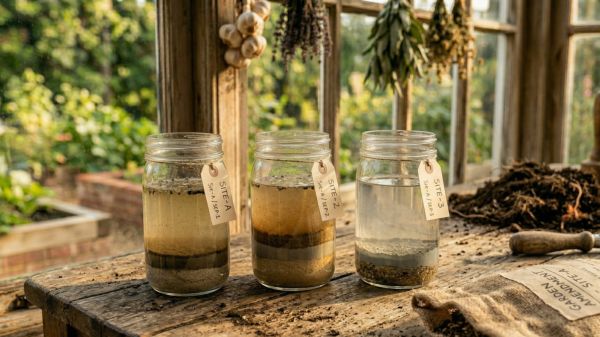
You can test soil from multiple garden areas in one session by applying efficient sample collection and testing techniques. Fill separate, clearly labeled Mason jars halfway with soil from each zone, add water, and shake all jars simultaneously. You’ll complete one 24-hour settlement period for all samples concurrently, then measure sand, silt, and clay layers across all jars in a single analytical session.
How Often Should I Retest My Soil After Adding Amendments?
After adding soil amendments, you should wait one full growing season before retesting, as ideal timing guarantees accurate nutrient readings. If your soil has ongoing problems, you’ll need annual testing until stability is achieved.
Sandy soils require retesting every 2-3 years, clay soils every 3-4 years, and loam soils every 3-5 years, allowing amendments sufficient time to integrate and reflect genuine improvement.
Does Soil Texture Change Naturally Over Time Without Human Intervention?
Yes, your soil’s texture changes naturally over time without human intervention. Natural processes like physical, chemical, and biological weathering continuously alter soil composition, breaking down larger sand particles into smaller silt and clay fractions over decades to centuries.
Pioneer organisms, including bacteria, fungi, and lichens, accelerate these transformations by producing organic acids that dissolve minerals, while temperature and precipitation patterns further influence the rate at which these changes occur.
Can Extreme Weather Conditions Affect My Mason Jar Test Accuracy?
Yes, weather fluctuations greatly compromise your mason jar longevity and accuracy. Temperature extremes alter settling rates, humidity distorts moisture content, and wind scatters fine particles before collection.
You’ll find that cold slows particle stratification, heat accelerates premature separation, and saturated soils obscure distinct compositional layers. To reclaim control over your results, collect samples during stable, moderate conditions, ensuring consistent thermal environments throughout the 24-48 hour settling period.
Is Store-Bought Bagged Soil Worth Testing Before Using It?
Yes, you should absolutely test store-bought bagged soil before using it, since soil quality and nutrient content vary dramatically between manufacturers, with no legal definitions governing what’s actually inside the bag.
You can conduct physical inspections, sniff tests, and mason jar tests to assess composition accurately. Mixing bagged topsoil with compost, after testing confirms its needs, empowers you to create superior, customized soil blends that serve your garden’s specific requirements.
Conclusion
Now that you’ve mastered the Mason jar test, you’re equipped to transform your garden’s potential. You’ve learned to read your soil’s composition, calculate its texture, and apply the right amendments to correct imbalances. Remember, healthy soil isn’t built overnight — it’s a continuous process of testing, adjusting, and observing. Whether you’re battling dense clay or draining sand, you now have the knowledge to cultivate thriving, resilient plants from the ground up.