How to Build Solar Panels: 7 Basic Steps to Follow
Are you looking to save money and live a more sustainable life? Solar panel installation is one of the most rewarding investments you can make. Not only does it reduce your monthly bills, but it also helps protect the environment. And with some basic know-how, anyone can build their own solar panels!
In this article, I’m going to show you the essential steps for building your own solar panels at home. You’ll be able to enjoy all the benefits of clean energy without costing an arm and a leg.
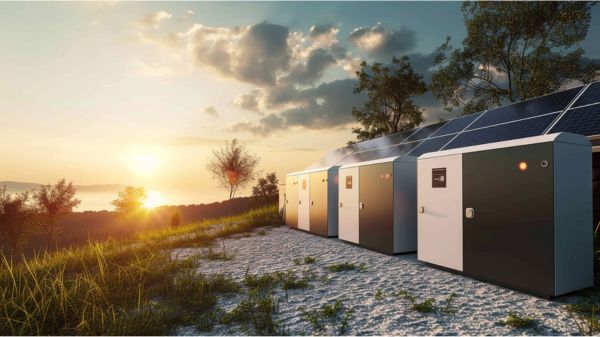
Elevate Your Energy Solutions with Nature-Inspired Solar Sphere Technology
Researching Your Solar Panel Needs
The sun is our best friend and a reliable source of energy. It has the potential to free us from traditional electricity and fuel. However, to harness this resource effectively, careful assessment of our needs is necessary. This includes conducting a cost analysis and considering our current and future energy requirements. By doing so, we can make informed decisions about the type of solar panel system that would work best for us.
It is also important to take into account any local regulations or environmental factors that may affect the system’s performance. Once these considerations are made, we can calculate the number of solar panels needed to meet our objectives. By paying attention to detail and conducting proper research, we can ensure that the installation not only meets our expectations but also saves us money in the long run.
Calculating The Amount Of Solar Panels Required
To effectively install solar panels, you must first calculate the amount of solar panels required. This is an important step to ensure that your system will generate enough energy to meet your needs and still be cost-effective.
When evaluating costs, consider the following:
- Your total daily power consumption in kilowatt-hours (kWh)
- The size of roof or land area available for installation
- Cost per watt of installed capacity
- State and local incentives offered for renewable energy systems
These factors should all be taken into account when determining how many solar panels are needed for a successful installation. By calculating this accurately, you can maximize the efficiency of your system while also maximizing potential energy savings over time. In addition, it’s important to understand suitable roofing materials for supporting a photovoltaic array and any weight load requirements. With these considerations in mind, it’s time to purchase the components and tools needed for building a solar panel system.
Purchasing The Components And Tools
Once you’ve designed your solar panel system, it’s time to purchase the components and tools necessary for installation. The first step is locating suppliers of parts like photovoltaic cells, inverters, racking systems, batteries and other related items. You may want to consider buying from multiple suppliers in order to compare prices and assess what works best for your budget. It also can be beneficial to research if there are any local companies that offer discounts or incentives for purchasing these materials.
The next part is assessing costs associated with each component in order to determine how much money is needed for successful completion of the project. This includes labor costs as well as taxes and fees which vary depending on where the panels will be installed. Keep in mind that while some parts may seem expensive initially, they often come with warranties which could save you money in the long run.
After gathering all the necessary information, the next step is to select the appropriate components that meet your power requirements and fit within your budget. Once these decisions are made, everything else should easily fall into place. You can then proceed to correctly wire the solar panels together, ensuring efficient production of electricity.
7 Basic Steps on How to Build Solar Panels
Before you start, please prepare the following components required: Solar cells, Plywood, Plexiglass, Tin Wire, Silicon, Soldering Iron, Solder, Rosin Flux Pen, UV protector, Batteries and Volt Meter. Let’s get started and follow this step by step on how to build solar panels!
Step 1: Cut the Plywood
Cut the plywood to the right shape and size so that your solar cell fits completely on the plywood. There are a lot of solar cells you can purchase from the market. The best option to buy is polycrystalline cells. The number of Solar cells you want basically depends on your solar panel size. Normally 80 solar cell generates 100 Watts of power.
Step 2: Apply UV Protector and Flux Pen
Apply UV protector coats to plywood. It makes the plywood more durable and helps in preventing wear and tear of plywood. After applying the UV protector, draw with a flux pen around the solder which helps in keeping the wiring down.
Step 3: Combine Solar Cells with Plywood
But before the connection of plywood with the cells, solder together all wiring and cells which helps in connecting the cells. After the connection of the rows, you have to attach the rows by using the wire. After that attach the cells with the plyboard with the help of silicon. Use silicon in a less quantity.
Step 4: Connect the Wires and Create a Border
Drill holes in the plywood so that the wires can go through. Also, around the plywood make a border that covers your panel. Silicon should be used to as an adhesive which helps in preventing any water leakage from the borders of the panel.
Step 5: Connect Plexiglass with the Border
Plexiglass is a transparent acrylic plastic that often used in place of glass. Connect Plexiglass with the borders which will be able to cover the panel. Again use the silicon. After the previous step, you have to screw the plexiglass with the plywood for adding support. Keep in mind that the holes which you drill should be smaller than the screws so that it will not loose in future.
Step 6: Wire Your Panel to the Battery
Connect the final wire to a diode. A diode is a semiconductor with two terminals that allows the flow of current in one direction. After that connect your panel to a charge controller and then connect the charge controller to your batteries. Use the batteries. Once you have the batteries connected you can run your electronics appliances from the batteries.
Step 7: Moisture Prevention
Moisture can go into the panel whether your cells are completely sealed. So it is very important to prevent the moisture to save your Solar Panel drill a hole at the bottom of the panel which helps in passing the air and helps in preventing the moisture.
Wiring The Solar Panels Together
Now that the components and tools are purchased, it’s time to begin wiring the solar panels together. According to recent estimates, there is a global installed capacity of over 500 gigawatts for solar energy. This highlights just how important solar power has become in our modern world; powering up homes and businesses with clean renewable energy.
When wiring solar panels, carefully plan and pay attention to detail. Connect cables correctly, either parallel or series based on system design. Use long enough cables to avoid voltage drops. Ensure watertight connections to protect against corrosion from weather elements.
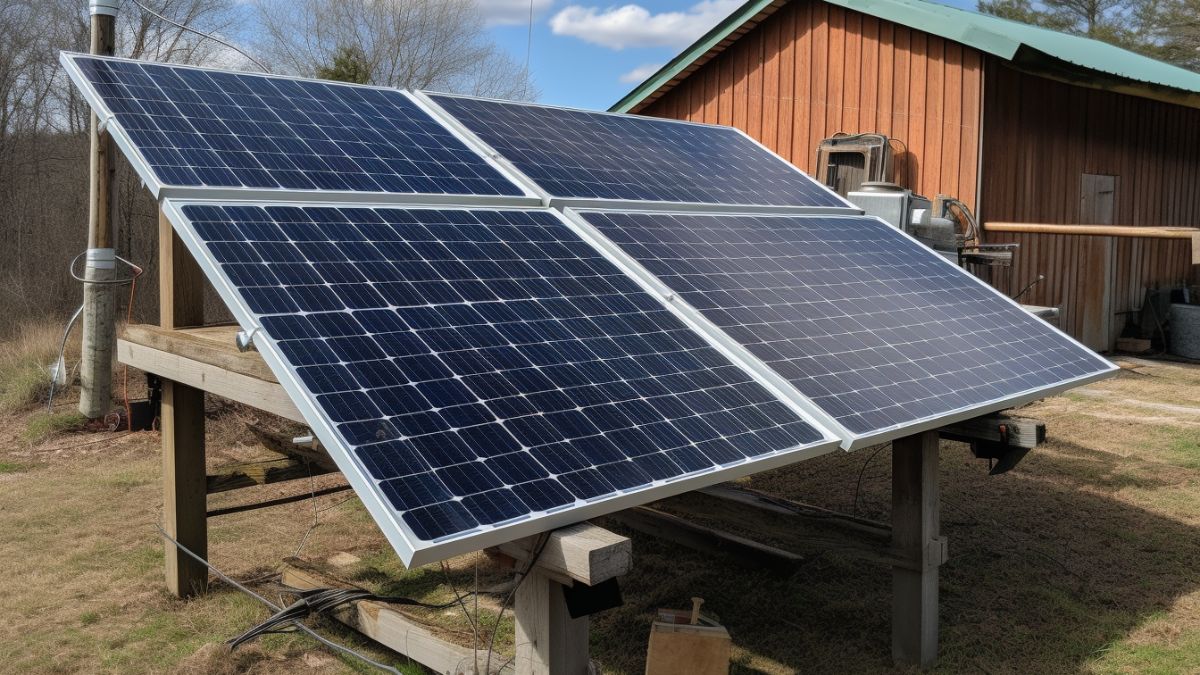
Finally, once everything is securely connected, mount the panels on a rooftop or wall where they’ll receive direct sunlight during peak daylight hours. By considering these steps, you can ensure your home solar installation runs smoothly for years to come!
Installing The Panels On The Roof
Before installing the panels on the roof, it is crucial to consider the type of roofing materials in place. This awareness will enable you to plan for secure mounting methods and ensure a safe installation, whether your home has asphalt shingles or metal sheets.
Next, when installing the solar panel frames on your roof, it is important to ensure proper alignment. Avoid any gaps between each frame to prevent potential water leakage over time. Additionally, carefully inspect any holes made by screws or bolts in the roof material, and if needed, seal them with caulk or roof adhesive. Taking this extra step will effectively protect these areas from moisture and potential future damage.
To wrap things up, it’s important to double-check all connections before finishing the install. Ensure all nuts and bolts are securely tightened and none have come loose during transit or handling. With proper planning and execution, confidence in the job done is key. Now, all that remains is connecting the solar panels to the electrical system – but we’ll save that for another day!
Connecting The Solar Panels To The Electrical System
Connecting the solar panels to your home’s electrical system is like plugging in a phone charger. It may feel intimidating but with some preparation and safety measures it can be done safely and efficiently. Here are three steps for making this connection:
- Shut off power from your main breaker box before beginning any work on wiring or connections
- Use high quality wire nuts that meet local building codes when connecting the solar panel cables to the existing wiring
- Attach the solar controller, which regulates current from the array of panels into usable power supply
By following these simple procedures you will have successfully attached the solar panels to your electrical system while ensuring secure and safe practices were followed. Now you’re ready to start positioning the solar panels for maximum efficiency!
Positioning The Solar Panels For Maximum Efficiency
Accurately positioning solar panels is a critical factor in maximizing their efficiency. Calculating the precise tilt angle and azimuth direction of each panel requires knowing your location’s latitude and longitude, as well as accounting for other environmental factors such as shading throughout the day.
You can set up the correct angles manually or automatically with an automated tracker, depending on the system. A 15-30 degree tilt towards the south (in the northern hemisphere) is usually recommended, but seasonal variations should be considered. The azimuth should be calculated based on local geography to avoid obstructions and maximize sunlight exposure.
Beyond calculating angles and considering environmental factors, troubleshooting problems with installation may require additional knowledge about roof slope, wiring diagrams or even tools like multimeters. With the right guidance and some care taken during setup, you’ll ensure that your solar energy system performs its best! As we move forward into our next step of setting up the solar charge controller, understanding these basics is essential for success.
Setting Up The Solar Charge Controller
The solar charge controller is a critical component to any solar panel system, as it helps regulate and manage the power from your panels. According to statistics, over 70% of all home-based systems rely on some form of charge controller to maintain optimal battery performance. As such, it’s important that you take care when selecting one for your own setup.
When comparing brands, consider cost benefit analysis, features, specifications, warranty periods, and customer service ratings. Prices vary widely between models, so research before purchasing. Some controllers have added features like LCD displays or temperature sensors, which optimize power production but come at an additional cost. Keep this in mind if you want to save money. Find reviews from people who have used the product to get a better idea of its performance in real-world applications.
Finally, after deciding on the best model, read the installation instructions carefully before setting up the unit to ensure smooth operation and peace of mind. With proper preparation, connecting the batteries should be easy.
Connecting The Batteries To The System
Connecting the batteries to the system is one of the most important steps in installing solar panels. It’s essential that you have a keen understanding of battery safety and system design before starting this part of the project. As an expert installer, I recommend taking these precautions:
- Make sure your batteries are securely fastened to prevent them from shifting during operation.
- Use high-quality cables designed for use with deep cycle batteries.
- Install circuit breakers or fuses near the connection point to protect against electric shocks and short circuits.
Once all safety measures have been taken, it’s time to begin connecting the wires between your batteries and other components in your system such as charge controllers or inverters. Use caution when working with electrical systems and make sure everything is properly connected according to manufacturer specifications. After completing this step, you’ll be ready to move on to installing the inverters and monitoring equipment – two more crucial pieces in any successful solar panel installation!
Installing The Inverters And Monitoring Equipment
Once the solar panels have been installed, it’s time to start installing the inverters and monitoring equipment. Choosing inverters for your system depends on a few factors. First, look at the power output of each panel when you purchased them – this will determine what type of inverter is right for you. Second, decide how much energy storage you’ll need in batteries – sizing these correctly is essential as they’re an expensive investment that needs to be carefully considered. Finally, make sure there are no compatibility issues with any other components already present or ones being added later.
The next step is to actually install the chosen inverters and connect them up correctly. This can require some tricky wiring work so it’s best left to a certified electrician unless you know exactly what you’re doing. Once everything has been wired together securely, it’s important to check all connections properly before continuing onto the next stage.
Testing your system after connecting all components is essential to ensure safe operation and reliable performance. This involves running diagnostics to verify current flow and voltage levels in the entire array, including photovoltaic cells and control systems. It’s also a chance to double-check accuracy against manufacturer specs before powering up your new setup. With thorough testing, you can confidently use your solar panel system like a professional green energy advocate.
Testing The System
The moment of truth has arrived! After completing the installation process, it’s time to test your solar panel system and make sure everything is working correctly. This testing phase can be nerve-wracking for even experienced installers, but with due diligence and following safety protocols and regulatory guidelines you can ensure a smooth transition from installation to operation.
Here are some key points to keep in mind when setting up:
- Check all connections for tightness and accuracy – this includes both mechanical fasteners as well as electrical wiring.
- Ensure that wires aren’t loose or pinched, and check the grounding system carefully.
- Make sure to seal all junction boxes against moisture intrusion.
- Test each component of the system independently before connecting them together into an integrated unit – this may mean running individual tests on batteries, charge controllers, inverters, etc., depending on what components were installed.
- If possible, monitor power output during these tests to confirm they’re operating within their specified ranges.
- Also look out for any unexpected behavior such as surges or overloading situations which could indicate potential problems down the road.
Once everything checks out after testing then you’ll know that your hard work paid off and you can start enjoying clean energy production from your new solar system! Now comes the important task of maintenance and troubleshooting-which we will take a closer look at in our next section.
Maintenance And Troubleshooting
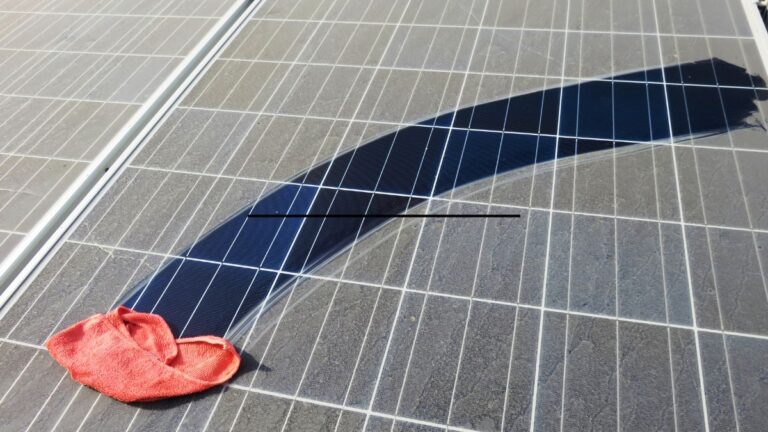
Now that you have finished testing your solar panel system, it is time to move on to the next step: maintenance and troubleshooting. To keep your system running optimally and reduce downtime, regular routine maintenance is essential.
The first thing you should do when maintaining your solar panel system is check for any physical damage or deterioration of components such as wires and connectors. If there are any issues with the wiring, ensure that all connections are secure before proceeding further. Additionally, inspect each component for signs of corrosion or wear-and-tear which could cause malfunctions in the future.
To increase electricity storage from solar energy, adjust and optimize the system regularly. This includes fine-tuning inverter power levels, battery charge cycles, and voltage thresholds based on equipment type. These small changes maximize efficiency and maintain a steady supply of clean energy. Proper care and attention to preventive maintenance and optimization tasks ensure uninterrupted, reliable operation for years to come.
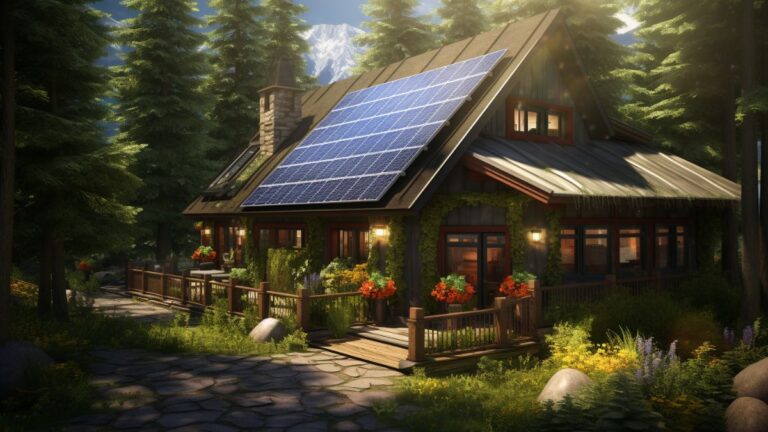
Empower Your Home with Efficient Solar Spheres – Inspired by Nature’s Design
How To Store Solar Energy
After installing solar panels, the next step is to store solar energy. Solar panel efficiency and energy conservation are two essential components of this process. You can do this through a number of different methods such as batteries or electrical grids. Batteries in particular allow for surplus solar energy storage throughout the day without interruption. They also provide an easy way to monitor your system’s performance and calculate how much electricity you’re producing each day.
Another option for storing solar energy is through net-metering systems that connect directly with the utility grid. These systems allow homeowners to send excess power back into the grid during peak hours when demand is higher than production capacity from their own solar array. Homeowners can then credit those peak hours against times when they draw from the grid due to lower levels of sunlight or other climate factors. By doing so, it helps reduce strain on utilities’ resources while giving homeowners greater control over their renewable energy consumption.
With battery storage and net metering options, maximizing value from solar technology is possible. Financial incentives will be crucial in achieving our goals of reducing carbon footprint and providing clean energy to communities. Let’s explore available financial assistance for solar panel installation.
Financial Incentives For Solar Panel Installation
Having explored how to store solar energy, let’s now turn our attention to the financial incentives that make solar panel installation a more attractive proposition. Did you know that in 2020, nearly two-thirds of all new electric capacity came from solar power? That’s an incredible statistic and one worth considering!
If you decide to install your own solar panels on your home or business, there are numerous tax credits, rebate programs and other financial incentives available at both state and federal level. These can help reduce upfront costs significantly – often by thousands of dollars. For example, many states offer generous rebates for installing solar systems on residential homes. This means you could be eligible to receive over 50% back on the cost of the equipment itself.
In addition, the Federal government offers a 30% investment tax credit (ITC) that can be used to offset taxes owed in the year of purchase. This credit applies whether you finance the system or pay cash upfront. It’s worth exploring the potential benefits of investing in a solar panel system considering these savings.
Benefits Of Solar Panels
Solar panels are a great way to reduce your energy costs and environmental impact. Not only do they save you money, but they also provide clean renewable energy for years to come. With the right setup, you can make sure that your solar panel system will generate enough power for all of your needs, now and in the future.
Installing solar panels is relatively simple with today’s technology. Start by assessing your property’s sunlight exposure throughout the year. Determine the necessary equipment and installation space. Government incentives may help cover upfront costs. Remember, the long-term benefits outweigh initial inconveniences. By using solar energy, you save money and help the planet.
Frequently Asked Questions
What Type Of Solar Panel Is Best For My Home?
Solar panel costs have significantly decreased over the past decade, making it an appealing option for homeowners seeking to lower their energy expenses. When choosing the right solar panel for your home, consider local regulations and installation costs.
Monocrystalline silicon solar cells are generally the most efficient in converting sunlight into electricity. However, they also tend to be pricier compared to polycrystalline or thin-film photovoltaic cells. To find the best fit for your needs and maximize savings, consult with a knowledgeable solar panel installer.
How Long Does It Take To Install Solar Panels?
Installing solar panels is a relatively straightforward process that you can complete in as little as one day. However, the total cost for installation will depend on several factors such as roof angle, size of system and complexity of layout. Additionally, the local climate may also affect your costs since some areas require additional equipment to withstand extreme weather conditions. Take all these things into consideration when deciding how long it takes to install solar panels. Ultimately, with proper planning and expertise from professional installers, you can have solar energy up and running within a few days!
Are Solar Panels Easy To Maintain?
Maintaining solar panels is easy, cost effective, and energy efficient. Take the case of Ms. Smith for example; after completing the installation she started to see immediate benefits in terms of lower electricity costs and increasing energy efficiency from day one! She only needed to perform a few inspections each year to make sure everything was running smoothly – that’s it! It doesn’t take long either – usually about thirty minutes per panel – so you can easily get back to enjoying your newfound liberation without having to spend too much time on maintenance.
What Is The Best Way To Store Solar Energy?
To store solar energy effectively and affordably, it is crucial to find a solution that suits your lifestyle. Fortunately, with advancements in technology, numerous options now exist that minimize environmental impact and financial burden. One optimal approach is investing in cutting-edge battery systems, capable of storing surplus electricity generated during peak times for future use. This not only maximizes energy efficiency but also reduces expenses associated with conventional utility power sources.
Are There Any Financial Incentives For Installing Solar Panels?
If you want to save money and receive financial aid when installing solar panels, you’re in luck! Going solar not only reduces your monthly energy bills but also helps promote sustainable living. We can provide you with the best strategies to maximize incentives and make the most of your green investment. So why wait? Start taking steps towards a sensible solar panel system and invest in your future today.
Conclusion
Installing solar panels is a great way to reduce your energy costs and help the environment. With all of the financial incentives available, it makes sense to invest in solar panels now.
I understand that some people may have concerns about installation time or maintenance requirements. However, with proper planning and guidance from an experienced installer, you can easily get up and running within days. Additionally, solar panels are low-maintenance and require minimal upkeep over time.
Investing in solar power is a cost-effective way to save money on energy bills while also benefiting the environment. It’s a smart decision that offers numerous advantages. It’s one of the best decisions you’ll ever make.
2 Comments
Comments are closed.