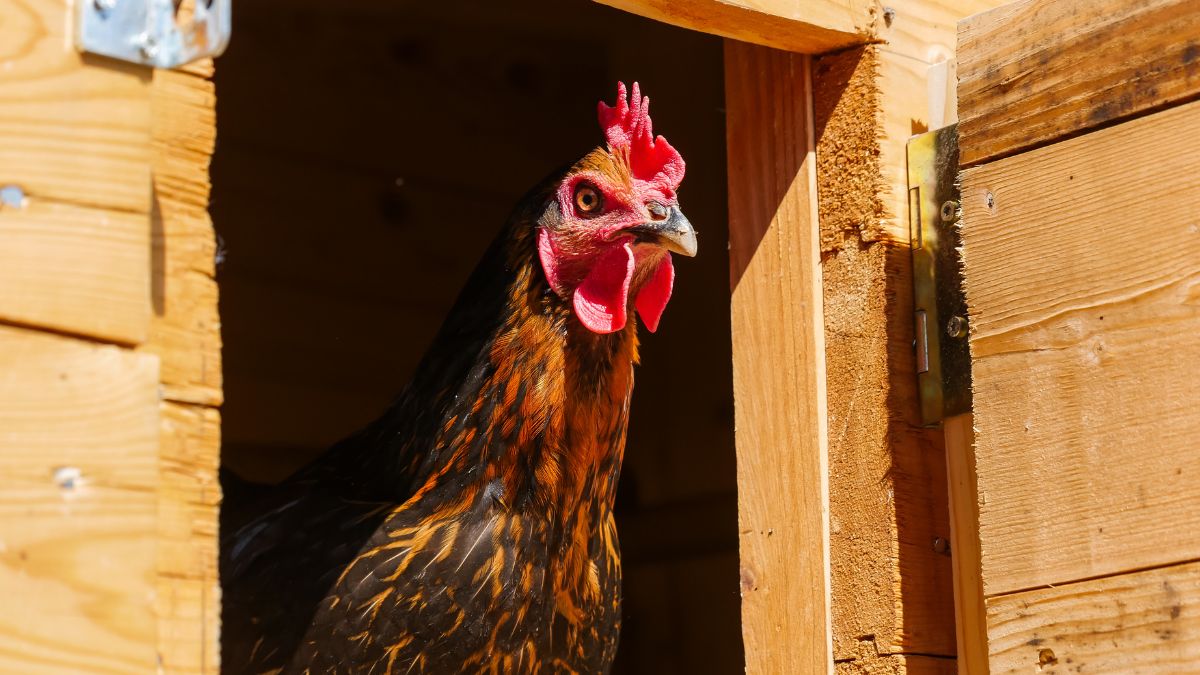
Frugal Fowl Haven: How to Make a Chicken Coop with Pallets
Are you looking for a way to build your own chicken coop on the cheap? Look no further than using pallets! With some basic tools and an eye for creativity, you can turn a few wooden pallets into a cozy home for your feathered friends. It’s like giving them their own little piece of paradise, without having to break the bank. So why not take up this DIY chicken coop from pallets endeavor and let your imagination run wild? From cutting and sawing to insulating and covering, it’s time to get crafting and make that chicken coop of your dreams!
Gather Your Materials for DIY Chicken Coop from Pallets
Ready to get started? Gather your materials and let’s begin building! To make a DIY chicken coop from pallets, you’ll need some basic tools such as a saw, drill, screws and nails. You will also need several pallets, depending on the size of the coop you are aiming to build. It is important to choose pallets made of untreated wood so that it is safe for your chickens. Additionally, you may want to purchase additional lumber or hardware cloth if needed for the structure of the coop. Once these items have been collected, you can start planning out the size and layout of your chicken coop.
Size and Layout of Your DIY Chicken Coop from pallets
Now that you’ve chosen your materials, it’s time to decide on the size and layout of your project – a decision that could make or break its success. When building a chicken coop from pallets, you’ll need to consider how many chickens you plan on keeping, as well as the space needed for them to roam around freely. You’ll also want to be sure that the chicken coop has enough height for easy access when cleaning and feeding your chickens.
Be sure to use plenty of pallets when constructing the walls and roof of your DIY chicken coop from pallets, as these will ensure stability and weatherproofing. Make sure you measure out all pieces before assembling them in order to get an accurate picture of the size and shape of your chicken coop. Once everything is planned out, it’s time to start putting together this unique structure!
Assemble the Pallets
Gather your tools and get ready to start building – this is going to be an exciting project! Start by finding a flat, level surface for your easy DIY chicken coop from pallets. Lay out the pallets you’ll need for the structure in whatever shape you decided on. Make sure that all the corners are flush together and no gaps appear between them. It’s best if you can secure the pallets to each other with screws or nails at this point.
Next, take a look at how well-constructed the pallet pieces are and make sure there aren’t any weak points that could potentially cause problems when it comes time to build your chicken coop with pallets. Take extra care when cutting away any unnecessary wood since it can affect stability later on during assembly.
Assemble all your pieces carefully and keep checking back to ensure they’re securely fastened together as you go along. Once everything is put in place, give yourself a pat on the back –you’ve just completed one of the most important steps of this project! Now it’s time to cut the pallets down to size before continuing onto the next step.
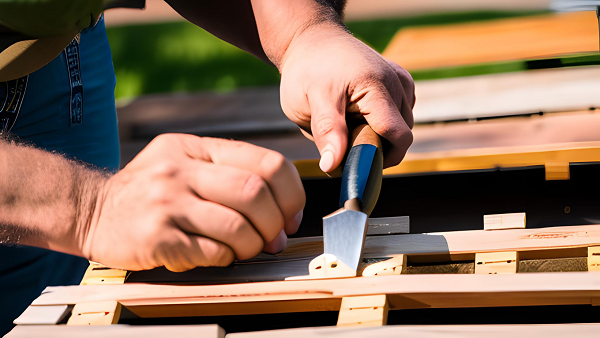
Cut the Pallets to Size
With your tools at the ready, it’s time to begin cutting down the assembled pieces to their desired size. To ensure accuracy, start by measuring twice before making any cuts. It’s important that you are precise in order for the end result to be as sturdy as possible.
Take this time to make sure each piece is cut with straight and smooth edges. Once all of your pieces have been cut down to size, you can move on to the next step: adding crossbeams. If needed, use a sander or sandpaper to clean up any rough edges before moving forward.
Add Crossbeams
You’re almost there! Time to get your pallet project up and running by adding the crossbeams, which will be the backbone of your build. Now, you can use either two-by-fours or four-by-fours for this – whichever is easier for you to work with. Measure each side of the structure and cut pieces that are slightly longer than what’s needed so they extend a few inches beyond the edges.
This should give them enough stability when attached. Use deck screws to connect them securely, making sure not to angle them too much as that could create weak spots in your coop’s frame. Once the crossbeams are set, it’s time to move onto attaching the roof – a critical element in keeping your feathered friends safe from predators and other elements of nature.
Attach the Roof
Now it’s time to top off your project with a secure roof, ensuring your feathered friends feel safe and protected from the elements. Start by measuring and cutting the pallets to size. Make sure they fit perfectly on the coop.
You’ll need two larger pieces for the roof, then attach them together with smaller pieces of pallet along their edges. Hammer in nails into each piece of wood that meets another and use additional wood screws for added security. Once you’ve finished connecting the pieces, cover the entire roof in tar paper or plastic sheeting so that rain won’t seep in from above.
Before you can call it done, make sure all of your hard work is secured together with heavy-duty staples all around the edges. This will help protect from wind damage as well as keep any pests out of your chicken coop. Now that you’ve got an airtight roof on top, let’s move on to making doors for easy access to care for your chickens inside!
Make the Doors
To complete your project, it’s time to make the doors for easy access to your feathered friends. Gather the materials you’ll need: two pallets, hinges, screws and a latch. Cut one of the pallets into two sections – these will form the door frame. Measure twice before cutting so that both door frames are identical in size.
Attach each side of the frame to the coop structure using hinges so that they open outwardly like regular doors. The final step is adding a latch or hook on one side of both doors so they can be secured shut when necessary. With everything securely attached, your chickens now have a convenient way to come and go as they please! Onwards then – it’s time to add a ramp that allows them to get in and out with ease.
Add a Ramp
Building a ramp for your feathered friends is the next step in this project, so let’s get started! Here’s what you’ll need to do:
- Gather materials such as screws and nails, hinges, plywood and pallet boards.
- Measure and cut the necessary wood pieces according to size.
- Attach the wood pieces together with screws or nails.
- Secure hinges on each side of the ramp to attach it to the coop door and outer wall.
You’ve now created an easy access way for chickens to enter or exit their new home – now it’s time to create an outdoor run!
Create an Outdoor Run
Creating your own outdoor run for your feathered friends is an easy and rewarding project – let’s get started! An outdoor run provides a safe, secure space for chickens to roam around in during the day. It also gives them plenty of fresh air and sunshine which helps keep their feathers healthy, boosts their vitamin D levels, and strengthens their immune systems.
To build a chicken run out of pallets, the first step is to measure the area where you’d like it to be located. Once you’ve determined the size and shape of the run, you can begin assembling your pallets. Securely attach each pallet side with galvanized nails or screws so that predators can’t easily pry them apart. Make sure to leave enough room for a door at one end of the structure so that you can access it easily when needed.
When building your chicken run from pallets, safety should always be your top priority. Be sure to make sure all sides are securely attached and there aren’t any gaps large enough for predators like raccoons or foxes to fit through. Next up: installing nesting boxes!
Install the Nesting Boxes
Now that the outdoor run is complete, it’s time to install the nesting boxes in your DIY chicken coop. The nesting boxes are essential for egg production and should be placed away from the roosting poles. It’s best to make them accessible from both outside and inside of the coop. This will allow you to easily collect eggs without having to enter the coop and disturb any chickens that may be laying at that time.
To build a nesting box, start by cutting an opening into one side of your pallet boards that is large enough for a chicken to comfortably fit through. Next, line the bottom of your nest box with hay or straw for insulation and comfortability. You can either leave it open on top or attach a lid for better protection against inclement weather conditions or predators. With everything set up appropriately, you’ll soon have fresh eggs ready to harvest! Now all that’s left is adding perches so chickens have somewhere safe to roost…
Add Perches
Adding perches to your outdoor enclosure will give your feathered friends a cozy place to rest, with chickens sleeping up to 14 hours a day! You can install perches on the walls of the coop; most chicken keepers like to put them about 12 inches above the floor. Make sure that you use sturdy materials for your perch – hardwood such as cedar is best as it’s more resistant to weathering and won’t splinter.
It’s also important that you make sure the perch is wide enough so that no chickens are standing on top of each other when they’re roosting. And remember: The more space between each perch, the better! Providing enough room for all your birds will help prevent overcrowding and minimize any possible fighting among them. With these considerations in mind, installing a window in the coop becomes an essential part of creating a safe and comfortable home for your chickens.
Install a Window
Installing a window can be a beautiful addition to your feathered friends’ home, giving them natural light and fresh air while they rest. To make sure it provides the most benefit, here are four tips to consider when installing:
- Use an acrylic or glass window that won’t shatter if an animal bumps into it.
- Make sure the window is securely attached so animals can’t remove it or push through any gaps.
- Install insulation around the frame and use weather stripping to keep out drafts and overheating during summer months.
- Place the window in a shaded area of your coop so direct sunlight won’t cause too much heat inside during summer days.
With these considerations in mind, you’ll be able to create a safe environment for your chickens with plenty of air circulation and natural lighting for their comfort! Insulating and covering the coop will help ensure your chickens stay warm during winter months, as well as provide protection from predators.
Insulate and Cover the Coop
To protect your feathered friends from the elements, insulating and covering their home is essential. Did you know that chickens can lose up to 10% of their body heat through their feet? To ensure they are comfortable and safe, start by deciding what kind of material to use for insulation. Foam board works well and provides a good barrier against cold or hot temperatures. If using foam board, cut it to fit the walls of the coop then secure it with a heavy-duty adhesive or nails.
Next, cover the walls with plywood on top of the foam insulation. Plywood helps keep out moisture while providing an additional layer of protection against the weather. Finally, apply metal roofing panels to complete the job and make sure your flock has a safe place to sleep at night! With everything in place and secured tightly, you can move onto adding a ventilation system for air circulation within the coop.
Add a Ventilation System
Installing a ventilation system is key for keeping the air inside your feathered friends’ home fresh and healthy. A good ventilation system will also help to keep the temperature at a comfortable level, allowing your chickens to be more productive and laying eggs that are larger and healthier. To achieve this, you’ll need some basic tools and supplies:
- Drill with screwdriver bit for screws
- Galvanized mesh to cover windows or other openings
- Ventilation fan to draw in fresh air from outside the coop
Next up you can add finishing touches by decorating the outside of the coop with brightly colored paint or stencils. This will not only make it look great but also provide an extra layer of protection against rodents or birds of prey. Plus, painting it with non-toxic paint will ensure that your chickens stay safe and healthy too.
Add Finishing Touches
You can enhance the aesthetic of the structure by adding decorative touches, such as a vibrant paint job or stenciled artwork. Consider painting each pallet a different color and layering them to create an interesting pattern on the coop. You may even add some stencils of chickens or chickens with eggs to give your coop some character.
Adding stained wood shutters over the ventilation system is also a great way to dress up the look of your DIY chicken coop while still allowing airflow into and out of it. You can also add hanging baskets filled with colorful flowers and vines around the perimeter of your coop for an eye-catching touch. If you have extra space in your backyard, you could even set up a small garden near the coop for fresh herbs and veggies to feed your chickens!
DIY Chicken Coop from Pallets: FAQs
What are the best materials to use when building a chicken coop?
Building a chicken coop is like constructing a home for your backyard chickens. You want to make sure it’s sturdy, safe, and comfortable so that your feathered friends can flourish. The best materials to use are those that are durable and weatherproof as well as easy to work with.
Consider using pallets for the walls since they come in standard sizes and provide an inexpensive yet strong foundation. They also lend themselves easily to customization should you wish to add a window or door feature. Other important materials include wood screws, plywood for the roof, wire mesh for ventilation, and paint or sealant if desired. With these essential pieces in place, you’ll be able to create a secure haven for your chickens that will last over time!
How do I make sure the chicken coop is secure from predators?
When it comes to making sure your chicken coop is secure from predators, there are some important steps you need to take. One of the best ways to protect your chickens is by ensuring the walls and roof are completely solid. If you’re using pallets for construction, make sure the gaps between them are filled in with screws or nails so no creature can get through them.
You should also consider installing a chicken wire fence around the perimeter of the coop as an extra layer of protection. Finally, be sure to check regularly for any signs that animals may have been trying to break into the coop and take preventive measures as soon as possible.
What types of flooring should I use in the chicken coop?
When considering flooring for your chicken coop, there are a few things to take into account. For example, if you want to provide your chickens with a natural environment, wood shavings or straw make great bedding options that can be easily replaced when needed.
On the other hand, if you’re looking for something more long-term and durable, concrete slabs or rubber mats are a great choice as they can be easily cleaned and won’t absorb moisture like wood shavings or straw. Ultimately, the best option will depend on your individual needs and preferences.
How often should I clean the chicken coop?
When it comes to keeping your chickens healthy and happy, cleaning the chicken coop is an essential part of the job. To give your birds a safe and clean environment, you should aim to clean out the coop at least once a week.
Make sure to remove all bedding, old food, and droppings in order to prevent any health issues for your chickens. Afterward, add fresh bedding material such as straw or wood shavings, and replenish their feeders and water containers with fresh food and water. Doing this regularly will ensure that your flock stays healthy!
How do I provide enough ventilation for the chickens?
To provide enough ventilation for your chickens, you’ll need to make sure their coop has adequate air flow. Install windows or vents at the top of the walls near the roofline, and ensure that they are screened on both sides so no critters can get in. You should also use a fan to keep fresh air circulating inside the coop and an exhaust fan to remove stale air from within. If possible, place these fans away from direct sunlight and out of reach of predators. Finally, open the door and windows each day to let in fresh air.
Conclusion
You’ve just finished building your own DIY chicken coop from pallets! You can be proud of the work you put in to create this amazing structure. It’s like a cozy little home for your chickens, with everything they need to live safely and happily. You can stand back and admire your handiwork, knowing that you made something that will bless your backyard family for years to come. Congratulations on creating a wonderful place for your feathered friends!


2 Comments
Comments are closed.