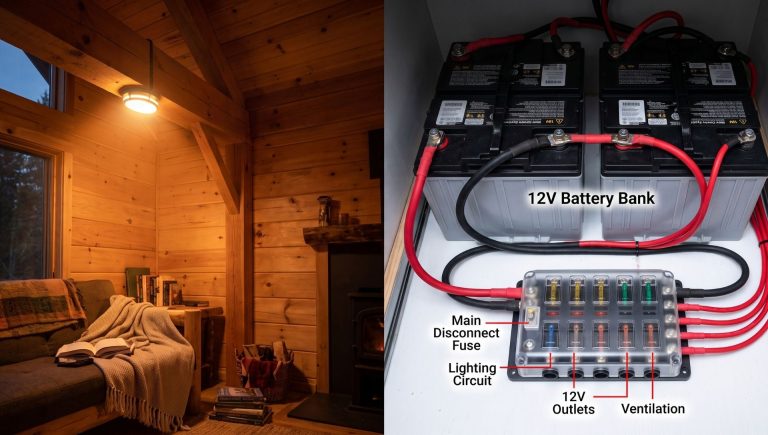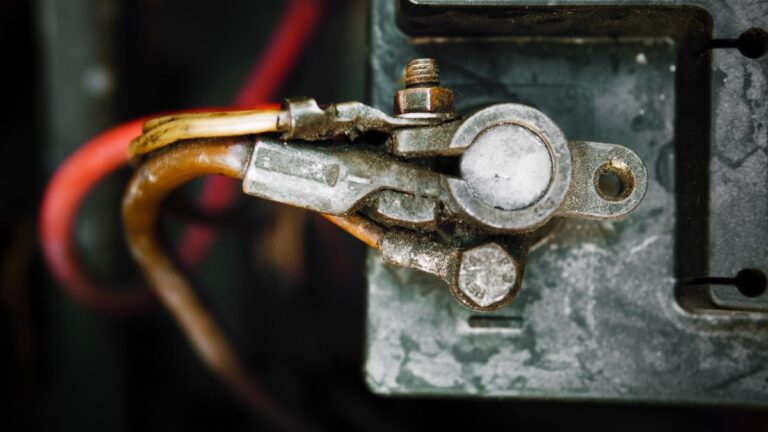
Achieving true energy independence by building an off-grid solar system is one of the most rewarding and empowering projects you can undertake. Whether you are powering a remote cabin, outfitting a sustainable tiny home, or building a resilient backup system for a tropical home in a humid climate, this definitive guide will walk you through everything from calculating your load to the final electrical connections.
⚠️ HIGH-VOLTAGE SAFETY WARNING:
Solar installations involve lethal amounts of DC and AC electricity. Always wear insulated gloves, remove all metallic jewelry, and use a multimeter to confirm zero volts are present before touching any wires. If you are uncomfortable working with high voltage, consult a certified electrician.
Phase 1: The Anatomy of an Off-Grid System
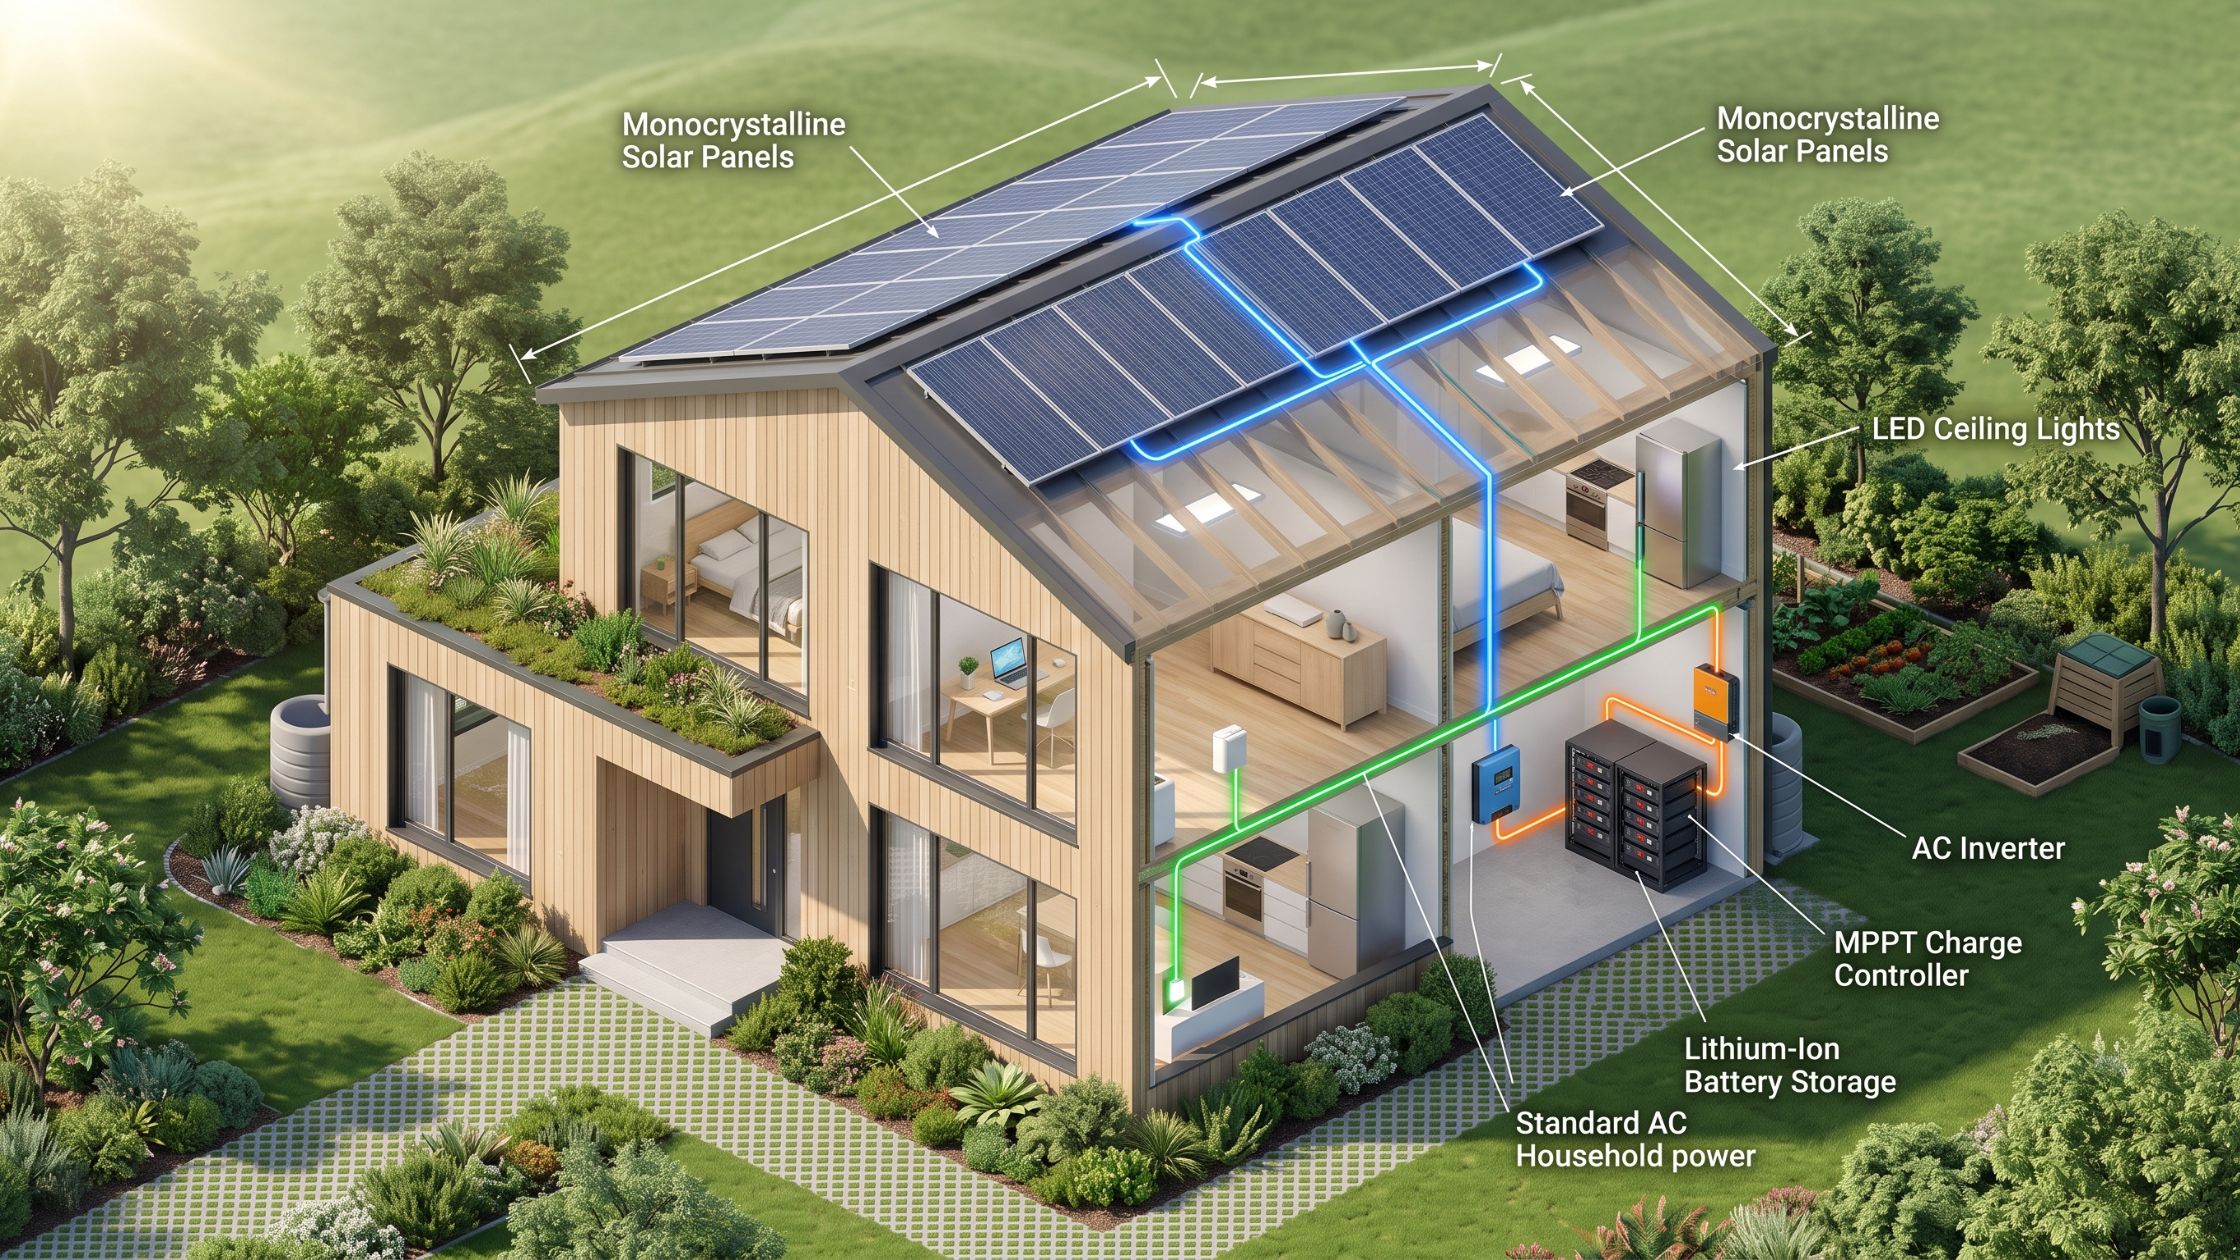
Before climbing onto your roof or stripping any wires, you must understand the core components that make up a functional off-grid system. The system relies on four primary pillars:
1. Solar Panels (The Generators)
The solar array acts as the heart of the system, transforming sunlight into direct current (DC) electricity.
- Monocrystalline Panels: Built from a single continuous crystal structure. They boast the highest efficiency rates (often over 18%) and are excellent for smaller roofs where space is at a premium, though they come at a higher cost.
- Polycrystalline Panels: Created from fragmented silicon crystals melted together. While they are more affordable, they are slightly less efficient, making them ideal for expansive ground mounts where space is not a limiting factor.
2. The Battery Bank (The Storage)
Because solar panels only generate power while the sun is shining, your battery bank stores that energy for nighttime use and cloudy days.
- Lead-Acid (Flooded and AGM): The traditional, budget-friendly choice. However, they only have a lifespan of 300 to 700 cycles and should never be discharged below 50% of their capacity.
- Lithium Iron Phosphate (LiFePO4): The modern gold standard for off-grid living. They provide 3,000 to 7,000 cycles, require zero maintenance, and can be safely discharged down to 80-95% of their capacity.
3. The Charge Controller (The Regulator)
The charge controller sits between the panels and the batteries, preventing overcharging and optimizing the voltage. Pulse Width Modulation (PWM) controllers are basic and cheap, but Maximum Power Point Tracking (MPPT) controllers are vastly superior as they dynamically adjust the input to extract maximum power from your array.
4. The Inverter (The Converter)
Your home appliances run on Alternating Current (AC), while your batteries store Direct Current (DC). The inverter bridges this gap. For off-grid setups with modern electronics, a Pure Sine Wave Inverter is absolutely mandatory. It delivers clean, consistent power, whereas cheaper Modified Sine Wave inverters can damage sensitive electronics.
Phase 2: Auditing Your Energy Needs & Sizing the System
The most devastating mistake you can make is blindly buying a “solar kit” without understanding your actual energy load. Miscalculating your consumption will leave you sitting in the dark.
Step 1: Calculate Your Daily Watt-Hours
You must list every electrical device you plan to run. Multiply the device’s wattage by the number of hours you will run it daily.
- Example: A 60-watt fan run for 8 hours = 480 Watt-hours (Wh).
- Do not ignore “phantom loads”—the power that modern electronics draw even when turned off. Add a 20% buffer to your final total to account for these phantom loads and future expansions.
Step 2: Size the Battery Bank
Your battery bank needs to be large enough to sustain your home through “Days of Autonomy”—the number of consecutive days you can survive without sunlight. Most robust off-grid systems aim for 2 to 5 days of autonomy. Ensure you factor in the Depth of Discharge (DoD) based on your battery chemistry.
Step 3: Size the Solar Array
Once you know how much energy your batteries need to hold, you must size your panels to fill those batteries during your location’s peak sun hours. Divide your daily energy requirement by your location’s average peak sun hours to determine the total wattage your array must generate.
Related Post: How to Wire a 12V DC Off-Grid Cabin Lighting System (Step-by-Step)
Phase 3: Site Assessment and Mounting Strategy
The location and orientation of your solar panels directly dictate their energy production.
Addressing Shading and Orientation
For maximum year-round production in the Northern Hemisphere, panels should face true south, while locations in the Southern Hemisphere should face true north. Even a tiny amount of shade on a single cell can restrict the flow of electricity for the entire string of panels.
Roof Mounts vs. Ground Mounts
- Roof Mounts: Save yard space and utilize existing structures. However, they require careful sealing (especially in heavy rainfall or tropical climates) to prevent leaks.
- Ground Mounts: Allow for precise orientation and easy cleaning, but they require concrete footings and trenching to run the conduit back to your house.
Phase 4: Step-by-Step Installation & Wiring Guide
If you are proceeding with a DIY roof installation, follow this sequence exactly to ensure structural integrity and electrical safety.
1. Locate the Rafters and Install Flashings
For a sturdy foundation that can withstand high winds, roof attachments must be bolted directly into the structural roof rafters.
- Visual Location: Look under the eaves of your roof to spot the rafter tails.
- Echo Location: Tap the roof with a rubber mallet; a solid sound indicates a rafter, while a hollow sound indicates the empty space between.
- Exploratory Drilling: If you are dealing with skip sheathing, drill a small pilot hole, insert a bent wire, and rotate it until you feel the wooden rafter block it. Mark the center of the rafter and drive your lag bolts in securely.
2. Install the Racking Rails
Once the flashings are sealed and secured, bolt your aluminum racking rails to them. Ensure they are perfectly level and properly spaced to support the dimensions of your specific panels.
3. Mount the Solar Panels
Lift the panels onto the roof carefully. Secure them to the rails using mid-clamps and end-clamps. Leave a few inches of space between the roof surface and the panel to allow for natural airflow, which keeps the panels cool and maintains higher efficiency.
4. Wire the Battery Bank
Before touching the solar panels, you must establish the central storage hub. Depending on your voltage requirements, wire your batteries in series (to increase voltage) or parallel (to increase capacity). Ensure all interconnecting battery cables are exactly the same length and gauge to prevent uneven charging and discharging.
5. Connect the Battery to the Charge Controller
CRITICAL RULE: Always connect the battery bank to the charge controller first. Connecting the solar panels to the controller before it has established a connection with the batteries will instantly fry the internal circuitry of the controller. Connect positive to positive, and negative to negative.
6. Connect the Solar Array to the Charge Controller
Once the charge controller is booted up and reading the battery voltage, you can safely connect the PV array. Route your heavily insulated, UV-resistant cables from the roof, through the combiner box, and into the controller inputs.
7. Connect the Inverter
Mount your inverter on a non-combustible surface in a highly ventilated area. Wire the heavy-gauge DC input cables from the battery bank to the inverter. The inverter should be sized 2 to 3 times higher than your expected capacitive loads to handle startup surges from appliances. Connect the AC output of the inverter directly to your home’s main service panel via a dedicated backfeed breaker.
Phase 5: Grounding, Bonding, and NEC Compliance
Adhering to the 2023 National Electrical Code (NEC) is not just about passing inspections; it is about keeping your home safe from fires and lightning strikes.
- Grounding vs. Bonding: The main purpose of grounding is to provide a safe, alternate path into the earth for large electrical surges, like lightning. The purpose of bonding is to connect all metallic components (like the aluminum rails and panel frames) together to eliminate dangerous voltage buildup between them.
- Ground Fault Detection (GFDI): A compliant system must detect ground faults in the DC circuits and interrupt the current immediately to prevent fire hazards. Ensure your inverters or charge controllers are explicitly listed for GFDI protection.
- Calculating Voltage Limits: The PV system’s DC source voltage cannot exceed the ratings of your equipment. You must calculate the open-circuit voltage (Voc) based on the lowest expected ambient temperature in your region, as cold temperatures cause solar voltages to spike.
Phase 6: Final Commissioning
With all components mounted, wired, grounded, and appropriately fused, you are ready for commissioning.
- Use your multimeter to verify the polarity and voltage at every disconnect switch before throwing it.
- Turn on the main battery breaker to power up the inverter.
- Engage the solar disconnect to allow current to flow from the roof to the charge controller.
- Monitor the charge controller screen to ensure it is registering incoming amperage and successfully pushing it into the battery bank.
By meticulously calculating your loads, investing in robust battery chemistry, and following strict electrical installation sequences, your DIY off-grid solar system will provide you with clean, reliable, and sustainable energy for decades.
To help you visualize the most critical wiring sequence discussed in Phase 4, watch this How to wire a solar charge controller and battery bank tutorial. This video provides a clear, visual walkthrough on correctly wiring a charge controller to your battery bank, ensuring you follow the proper safety sequences during setup.
Off-Grid Solar Kits Amazon Comparison
Selecting the right off-grid solar equipment is a balance between energy needs, technical expertise, and budget. Whether you are outfitting a weekend getaway cabin, looking for reliable battery storage, or seeking a complete home backup solution, Amazon offers a variety of specialized kits. This guide compares three distinct tiers of solar technology to help you determine which system fits your specific energy profile.
Renogy Solar Starter Kits: The Entry-Level Standard
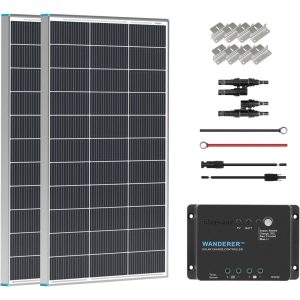
Renogy has established itself as the go-to brand for those entering the world of DIY solar. Their starter kits are designed for simplicity and reliability, making them perfect for micro-tier systems.
200W Starter Kit and 100W Expansion
The 200W Starter Kit is the quintessential beginning for small-scale power. It typically includes high-efficiency monocrystalline panels and a charge controller. For those who realize they need a bit more headroom, the 100W Expansion Kit allows for modular growth without replacing the existing architecture.
Ideal Use Cases
- Weekend Cabins: Perfect for running LED lighting, small fans, and charging mobile devices.
- Micro-Tier Systems: Ideal for sheds, remote gates, or small workshops.
- Energy Production: Under optimal conditions, these systems produce roughly 1000Wh per day, providing enough energy for basic essentials without the complexity of a high-voltage installation.
Eco-Worthy LiFePO4 Batteries: High-Performance Storage
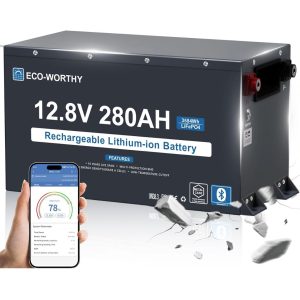
A solar panel is only as good as the battery storing its energy. Eco-Worthy’s Lithium Iron Phosphate (LiFePO4) series represents a significant upgrade over traditional lead-acid batteries, focusing on long-term value and safety.
Technical Superiority: 280Ah and 314Ah Models
The 12V 280Ah and 314Ah models are the workhorses of the Eco-Worthy lineup. These batteries are designed for extreme durability and longevity, often lasting ten times longer than conventional AGM or Lead-Acid counterparts.
- Massive Energy Capacity: The 314Ah model offers up to 4019Wh of energy storage in a single unit.
- Smart Management: Every battery features a built-in smart Battery Management System (BMS) that protects against overcharging, deep discharge, and short circuits.
- Climate Resilience: Equipped with low-temperature protection, these batteries ensure safety during the charging process in colder environments.
- Levelized Cost per Cycle: While the initial investment is higher than lead-acid, the superior cycle life (often 3000-5000+ cycles) means the cost per kilowatt-hour over the battery’s life is significantly lower.
EcoFlow DELTA Pro Ultra: The Ultimate Turnkey Solution

For those who require a professional-grade, all-in-one system for heavy loads or full residential backup, the EcoFlow DELTA Pro Ultra stands in a category of its own.
Residential Power Capability
The DELTA Pro Ultra is designed to bridge the gap between portable power and permanent home standby generators. It offers a massive 6900W AC output, which is sufficient to run heavy appliances like central air conditioners, well pumps, and electric dryers simultaneously.
Scalability and Charging
- Expandable Capacity: The system is modular, starting at 6kWh and expandable up to a staggering 30kWh, allowing users to tailor their storage to their home’s specific demands.
- Multi-Charging: It supports fast charging through multiple sources, including solar panels, AC wall outlets, and even EV charging stations, ensuring you stay powered regardless of the weather.
- User Experience: As a turnkey solution, it eliminates the need for complex wiring, making it accessible for homeowners who want professional performance without a DIY component-based installation.
Comparison Summary
| Feature | Renogy Starter Kits | Eco-Worthy LiFePO4 | EcoFlow DELTA Pro Ultra |
| Primary Goal | Power Generation (Small) | Energy Storage | Whole-Home Solution |
| Target User | Beginners / DIYers | Off-Grid Enthusiasts | Homeowners / Heavy Users |
| Capacity | Homeowners / Heavy Users | Up to 4019Wh per unit | 6kWh to 30kWh |
| Key Advantage | Affordable & Modular | Exceptional Cycle Life | High AC Output (6900W) |
| Complexity | Low to Moderate | Moderate (Requires Inverter) | Plug-and-Play |
Whether you are starting small with a Renogy kit, building a robust storage bank with Eco-Worthy, or investing in the comprehensive EcoFlow ecosystem, each of these solutions offers a reliable path toward energy independence.