Starting on the journey of DIY solar panel installation can be a rewarding experience, both financially and environmentally. The process is more straightforward than many might expect, requiring only three main steps on how to install solar panels at home successfully.
Initially, it is essential to assess your energy requirements and pinpoint the best location for maximum sunlight exposure. Following this, selecting the appropriate DIY solar kit and obtaining necessary permits guarantees your project complies with local regulations. Finally, carrying out the installation with precision is key to ensuring long-term effectiveness and performance.
Curious about the details of these steps? Let’s dive deeper.
Key Takeaways
- Calculate energy needs and select a suitable DIY solar kit.
- Identify the optimal installation location for maximum sunlight exposure.
- Mount and secure solar panels on the chosen structure using racking rails.
- Install and connect microinverters or string inverters for energy conversion.
- Inspect and test the system to ensure proper functionality and safety.
Pre-Installation Preparation
Before starting the installation of your DIY solar panel system, it is vital to conduct a thorough assessment of your energy requirements and property conditions. Begin by calculating your average monthly electricity consumption to determine your energy needs. This important step guarantees that the solar panel kit you choose can adequately meet your power demands.
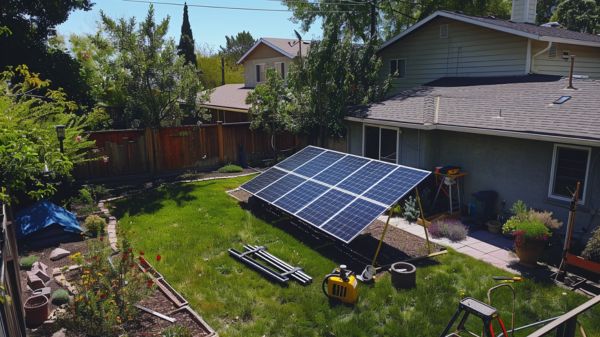
Next, evaluate your property to identify the best location for installing solar panels. Areas with maximum sunlight exposure, typically south-facing roofs or open grounds, are ideal for harnessing solar power efficiently. The angle and shading of the installation site significantly affect the energy output of your panels.
Selecting the appropriate DIY solar kit tailored to your specific energy requirements and property size is crucial. Kits vary in capacity and components, so choose one that aligns with your calculated energy needs.
Furthermore, obtaining the necessary permits from your local building department is a vital step before starting the installation. This ensures compliance with regulations and avoids potential legal issues.
Gather essential tools and materials, including hand tools, measuring tools, safety equipment, and fall protection gear, to facilitate a safe and effective installation process. Proper preparation sets the stage for a successful DIY solar installation, empowering you to achieve energy independence.
Related Post: Affordable Ways to Install Solar Panels Yourself.
Panel Installation Process
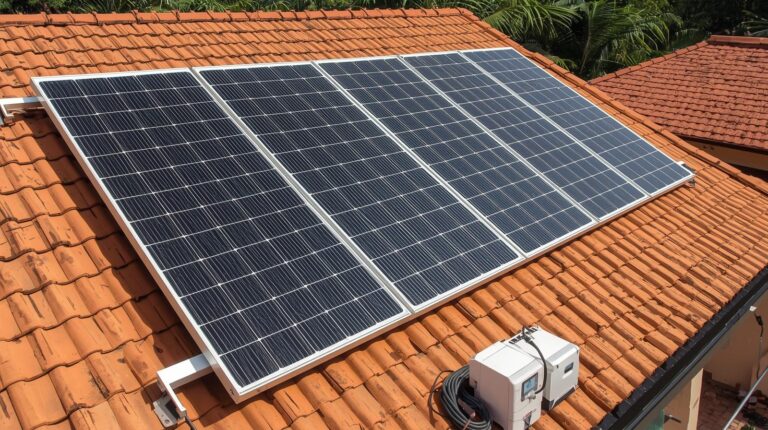
With the preparatory steps completed, the next phase involves systematically installing the solar panels to guarantee maximum energy capture and system efficiency. The installation process begins with Mounting Solar panels on the chosen structure—either roof mounts or ground mounts. For roof-mounted solar panels, mark the roof rafters and secure racking rails meticulously to secure stability.
Conversely, for ground mounts, dig holes and pour concrete footings before installing the racking rails.
Once the racking system is in place, the next step in your DIY solar panel installation is to attach microinverters or string inverters. These components are essential for converting the direct current (DC) generated by the solar panels into alternating current (AC), which is usable within your home.
Proceed to secure the solar panels using appropriate clamps and grounding mid clamps, making sure they are firmly attached to the racking rails. This step is important for the longevity and safety of your solar panel installations.
Post-Installation Tasks
Upon completing the installation, conduct a thorough inspection to make sure all components are securely mounted and correctly wired. This final inspection is vital to guarantee the longevity and efficiency of your solar panel system.
After verifying the physical setup, proceed to test the system to confirm proper functionality and energy production. This involves checking for any irregularities in the energy output and making sure that the system is performing as anticipated.
Next, review the system’s monitoring capabilities to track energy generation and overall performance. Familiarize yourself with the monitoring software and hardware to effectively keep tabs on your system’s efficiency. Routine maintenance tasks, such as cleaning panels and checking connections, should be scheduled to maintain peak performance. Accumulated dirt and debris can notably reduce efficiency, so regular cleaning is essential.
Additionally, keep a record of system performance data. This will help you monitor system efficiency over time and identify any issues that may need troubleshooting. By diligently recording and analyzing this data, you can preemptively address potential problems and maintain the system’s top performance.
These post-installation tasks are essential to ensuring your solar panel system operates efficiently and reliably, empowering you with sustainable energy.
Related Post: Backyard Revolution Review: Your Guide to Energy Freedom.
Conclusion
The successful installation of a DIY solar panel system requires precise pre-installation preparation, including accurate calculation of energy needs and ideal site selection. The panel installation process must follow industry standards, ensuring secure mounting and proper inverter connections.
Post-installation tasks are critical to verify system functionality and performance. Adherence to these structured steps guarantees a reliable and efficient solar energy system, effectively contributing to sustainable energy consumption and cost savings.