Imagine yourself as a green thumb guru, effortlessly growing vibrant and nutrient-packed microgreens right in the comfort of your own home. In this article we’ll give you a comprehensive guide on how to grow microgreens at home.
With our easy-to-follow guide, you’ll discover the secrets to successfully cultivating these miniature wonders. From choosing the healthiest microgreens to harvesting them at the peak of freshness, we’ll equip you with the knowledge and skills needed to create a thriving microgreens garden.
So, get ready to embark on a journey of homegrown goodness that will make you feel like a true plant whisperer.
Getting Started with Microgreens
Before jumping on how to grow microgreens at home, you need to understand what microgreens are and how they differ from sprouts. Once you have a clear understanding, the next step is to choose the right seeds for your microgreens. Look for seeds that are specifically labeled for microgreens, as they’ll have the best flavor and texture.
After you’ve chosen your seeds, soak them in water for a few hours to kickstart the germination process. Then, prepare your container by filling it with a thin layer of moist soil or a growing medium of your choice.
Understanding Microgreens
Are you aware of the benefits that microgreens offer for your health and well-being? Microgreens are young, nutrient-dense plants that are packed with flavor and nutritional value.
They are harvested just after the first leaves have developed, and they are known to contain higher levels of vitamins, minerals, and antioxidants compared to their mature counterparts.
Growing your own microgreens at home can be a fun and rewarding experience. Whether you have a spacious garden or a small apartment, you can easily grow microgreens without soil or in trays indoors.
Here’s a simple guide on how to grow microgreens at home:
| Method | Requirements |
|---|---|
| Growing without soil | Seeds, tray, water, and a growing medium |
| Growing indoors | Seeds, container, light source, and water |
| Growing in trays | Seeds, tray, growing medium, and water |
Choosing the Right Seeds for Microgreens
Have you considered both the price and the variety of seeds available when choosing which seeds to use for your microgreens? Selecting the right seeds is crucial for a successful microgreens harvest. When deciding on the variety, think about the flavors and textures you prefer.
Some popular options include broccoli, radish, and sunflower microgreens. If you’re looking for a cost-effective option, go for seeds that are specifically labeled for microgreen use, as they tend to be more affordable compared to regular seeds. Additionally, consider the growing method you’ll be using. If you want to grow microgreens without soil, look for seeds that are suitable for hydroponic or soilless systems.
Take the time to research and compare prices and varieties to ensure you’re getting the best seeds for your microgreens.
Soaking Seeds and Preparing the Container
Start by carefully pouring water over the seeds in the container, making sure they’re fully submerged. This step is crucial for the germination process of growing broccoli microgreens at home.
Soaking the seeds helps to kickstart the germination process and ensures a higher success rate. Follow the instructions on the seed package for the ideal soaking time, as it may vary depending on the type of seeds you’re using.
Once the seeds have soaked for the required time, drain the water from the container and rinse the seeds thoroughly. You can use a sieve or a fine-mesh strainer to remove any excess water. After rinsing, place the seeds in a suitable container or tray filled with moist soil or a hydroponic medium. Ensure that the container has drainage holes to prevent waterlogging.
Now you’re ready to move on to the next step in growing your own delicious and nutritious broccoli microgreens.
How to Grow Microgreens at Home: Primary Methods
To grow microgreens, you have two main methods to choose from: soil-free growing and soil-based growing.
In soil-free methods, you can use materials like peat moss, coconut coir, or hydroponic systems to grow your microgreens. On the other hand, soil-based growing involves using a tray or container filled with potting soil or a mix of soil and compost.
Both methods have their advantages and it’s important to consider factors like space, resources, and personal preferences when deciding which method to use.
Soil-Free Growing Methods
If you want to grow microgreens without soil, you can try using soil-free growing methods such as using grow mats or pads made of hemp, coconut, jute, or natural fiber. These soil-free growing methods offer several benefits.
Firstly, they eliminate the need for traditional soil, which can be messy and require frequent watering. Secondly, they provide a clean and controlled environment for your microgreens to thrive.
To start, simply place the grow mat or pad in a shallow tray or container. Then, evenly spread the microgreen seeds on top of the mat. Next, mist the seeds with water to ensure proper hydration. Finally, place the tray in a well-lit area and watch your microgreens grow.
Remember to water them regularly and harvest when they reach the desired height. With these soil-free growing methods, you can easily cultivate your own microgreens at home without the hassle of soil.
Soil-Based Growing Methods
You can achieve great results using soil-based growing methods for growing microgreens in your own home. Soil-based growing methods provide a natural and nutrient-rich environment for your microgreens to thrive.
To start, prepare a container with moistened potting soil, ensuring that it’s evenly spread and slightly compacted. Next, follow step-by-step instructions on how to grow microgreens in trays, such as selecting your desired microgreen seeds, sowing them evenly on the soil surface, and covering them with a thin layer of soil.
Remember to water your microgreens regularly, while also maintaining the moisture level of the soil. This can be done by misting the soil or using a watering can with a gentle shower setting.
Growing and Harvesting Microgreens
Growing and harvesting microgreens is an easy and rewarding process. To start, choose a shallow container and fill it with a layer of moistened potting soil. Sprinkle the microgreen seeds evenly over the soil and cover them with a thin layer of soil.
Keep the container in a warm and well-lit area, watering regularly, and in just a few weeks, you’ll have vibrant and healthy microgreens ready to harvest. To harvest, simply snip the greens just above the soil line and enjoy them fresh in salads, sandwiches, or as a garnish.
Planting and Growing Microgreens
When planting and growing microgreens, make sure to monitor the growing conditions regularly. Properly filling the tray with a growing medium is essential for the success of your microgreens. Ensure that the soil is evenly spread across the surface, providing a suitable environment for the seeds to germinate.
Once the seeds are scattered, mist them with water and cover the tray with a lid or plastic wrap to create a humid atmosphere. This encourages faster and healthier growth. Throughout the growth process, it’s crucial to monitor and maintain ideal conditions. This includes providing adequate sunlight, keeping the soil moist but not overly wet, and ensuring proper ventilation.
Regularly check for signs of pests or diseases and take necessary measures to address them promptly. By maintaining optimal growing conditions, you can ensure a bountiful harvest of fresh and nutritious microgreens.
Harvesting and Storing Microgreens
To properly store your harvested microgreens, rinse them thoroughly and immediately use the cut greens or store them in an airtight container in the refrigerator for maximum freshness. Here are some additional tips to help you effectively harvest and store your microgreens:
| Harvesting Tips | Storing Tips |
|---|---|
| Identify the first set of true leaves for harvesting. | Rinse the harvested microgreens thoroughly to remove any dirt or debris. |
| Use scissors to trim the greens at soil level. | Use immediately for the freshest taste and highest nutrient content. |
| Handle the microgreens gently to avoid bruising or damaging the delicate leaves. | If you need to store the cut microgreens, place them in an airtight container. |
| Harvest only what you need to minimize waste and maximize freshness. | Store the container in the refrigerator to keep the microgreens fresh for longer. |
| Consider using different storage containers to prevent cross-contamination of flavors and odors. | Use the stored microgreens within a few days for the best quality and taste. |
Lighting and Watering Requirements for Microgreens
To successfully grow microgreens at home, it’s important to understand their lighting and watering requirements.
Microgreens need at least 12-16 hours of light each day to thrive, so placing them near a sunny window or using grow lights is essential. When it comes to watering, it’s crucial to keep the soil consistently moist, but not waterlogged, by misting or bottom watering them regularly.
Lighting Requirements for Growing Microgreens
You need to understand the lighting requirements for growing microgreens in order to ensure their healthy growth and development. Here are three important things to consider:
- Intensity: Microgreens require bright light to thrive. Place them near a south-facing window where they can receive maximum sunlight. If natural light is limited, you can use grow lights specifically designed for plants. These lights provide the necessary intensity for photosynthesis.
- Duration: Microgreens need 12-16 hours of light per day. This mimics the long daylight hours of summer, encouraging optimal growth. Use a timer to ensure consistent lighting and avoid overexposure.
- Distance: Place the light source approximately 2-4 inches above the microgreens. This allows them to receive the right amount of light without getting scorched or stretched.
Watering the Microgreens Regularly
Make sure you water the microgreens regularly and keep them hydrated for optimal growth. Watering is a crucial aspect of microgreen cultivation, as these delicate plants require consistent moisture to thrive. To ensure proper watering, use a spray bottle or watering can with a fine mist nozzle to avoid damaging the fragile seedlings.
Aim to water the microgreens every day or every other day, depending on the moisture level of the soil. The soil should be kept evenly moist, but not waterlogged, as excessive moisture can lead to root rot and other issues. As a general guideline, water the microgreens when the top inch of soil feels dry to the touch.
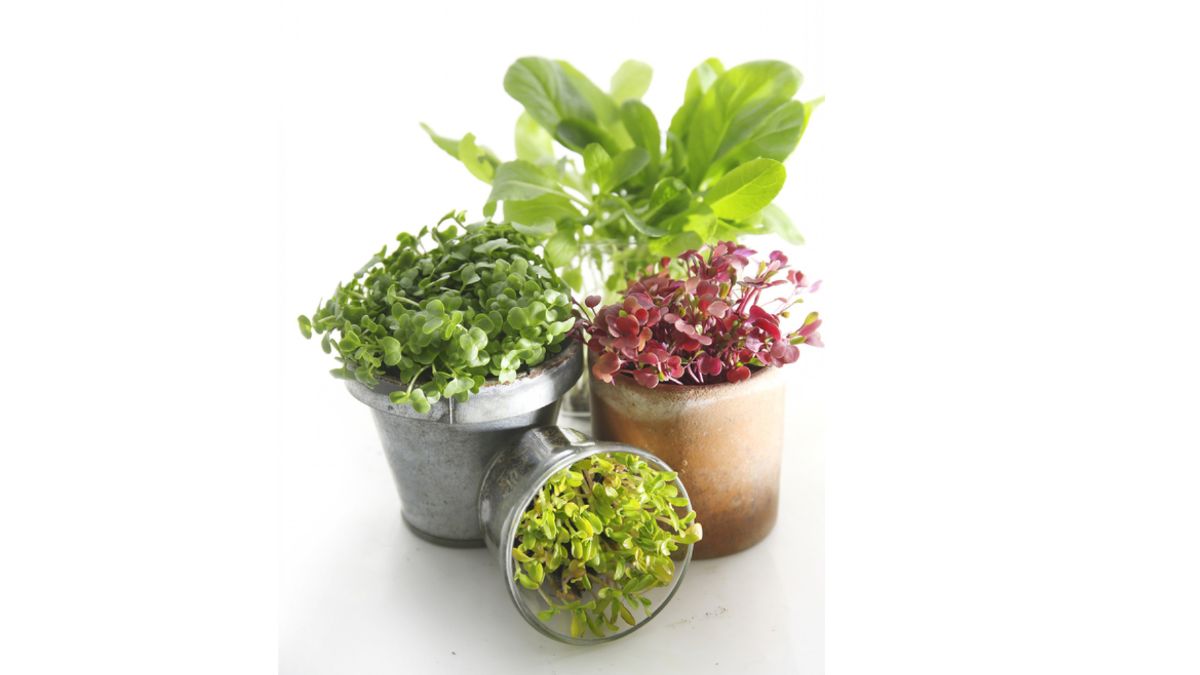
Healthiest Microgreens to Grow and Their Benefits
Growing microgreens like broccoli and kale can provide you with a multitude of health benefits due to their high nutrient content. These tiny green powerhouses are packed with vitamins, minerals, and antioxidants that can boost your immune system, improve digestion, and support overall health.
Here are three of the healthiest microgreens to grow and their benefits:
- Broccoli microgreens: These small greens are rich in sulforaphane, a compound that has been shown to have anti-cancer properties. They also contain high levels of vitamin C, which can strengthen your immune system and promote collagen production for healthy skin.
- Kale microgreens: Kale is known for its high levels of vitamin K, which is essential for blood clotting and bone health. These microgreens also contain fiber and antioxidants that can help reduce inflammation and support heart health.
- Radish microgreens: Radish microgreens have a peppery flavor and are loaded with vitamin C, potassium, and folate. These nutrients can support healthy blood pressure, boost energy levels, and aid in cell regeneration.
Conclusion
Congratulation! You’ve learnt a comprehensive guide on how to grow microgreens at home. As you can see that growing microgreens at home is a simple and rewarding way to add fresh and nutritious greens to your diet. With various methods and a few basic supplies, you can easily cultivate these miniature powerhouses of nutrition.
From vibrant colors to intense flavors, microgreens offer a burst of taste and health benefits in every bite. So why not embark on this green journey and turn your kitchen into a mini garden oasis? It’s a game-changer that will make your taste buds dance with joy!